Home Flight Simulator Plans – How to Install Larger Displays
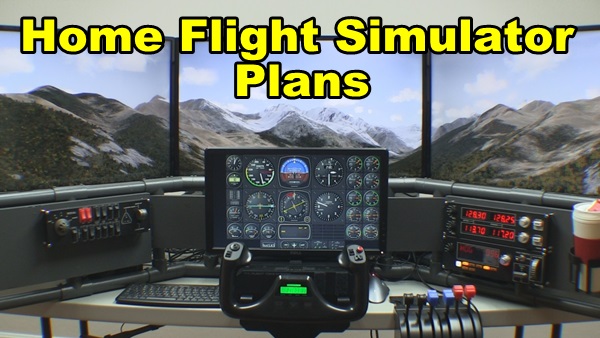
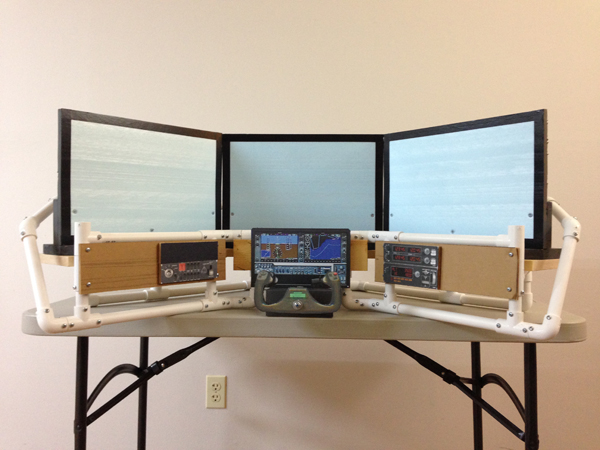
The DIY Deluxe Desktop home flight simulator plans are designed around three 32” HDTVs used as the main displays. But what if you want to use displays that are larger (or smaller)? Many DIY Flight Sim builders modify the plans to match their unique requirements. Furthermore, PVC pipe is a great material for experimental trial-and-error. It’s no wonder so many builders modify their projects.
DIY Deluxe Desktop Flight Sim
Home Flight Simulator Plans
Gary is a DIY Flight Sim builder. He developed a useful spreadsheet to use when using larger (or smaller) displays with the DIY Deluxe Desktop home flight simulator plans. He was kind enough to share it with me, so I’m providing it to you in the course content. First of all, Gary’s spreadsheet is really clever. You simply enter in the dimension of the displays you want to use and then spreadsheet calculates how much to change the affected PVC pipes. Also the relevant pipes are identified in a new Pipe Frame Map.
You still may require a little trial-and-error because different PVC manufacturers make the fittings differently. Fortunately, PVC pipe is inexpensive and easy to work with.
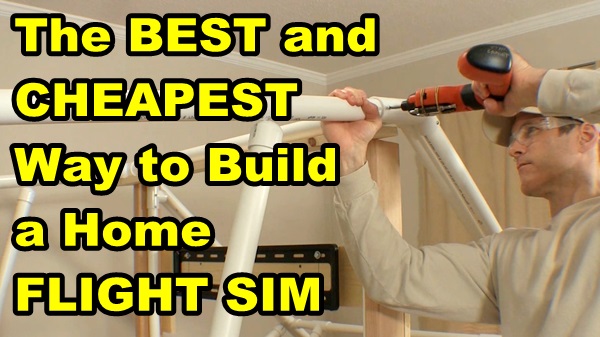
Frequently Asked Question: “What is the best and cheapest way to build a home flight simulator? BTW, don’t have much money.”
Answer: Fortunately, you can build an exceptional DIY Flight Sim with a little work and some planning. It might cost a lot less than you think.
The Best and Cheapest Way to Build a Home Flight Simulator
The home flight simulator of your dreams may seem a daunting and far-away goal. However, following this tried-and-true method, you can divide a huge job into small, workable, steps. Plan the work and work the plan: this is the best and cheapest way to build a home flight simulator.
Step 1: Plan Ahead
How much is this all going to cost? Before you pick up your credit card, pick up a pencil and figure this out. I made this really easy for you with the DIY Flight Sim Budget Tool. It is a flexible method for determining cost and takes into account components you may already have. Once your budget is in place, it’s easy to identify where you can save money.
In addition, an organized plan can help you get support from your spouse.
Step 2: Use What You Got
Want to know the best and cheapest way to build a home flight simulator? You may be able to re-purpose, repair or modify some components you already have. For example, you might re-purpose an old desk for use with your home flight sim by painting it. You will be delighted at what an inexpensive can paint can do.
Pro tip: online flight sim retailers run a sale every month or two. You can get discounts on software and also flight sim controls and peripherals. In addition, check individual manufacturer and developer websites for sales. And don’t forget Steam.com!
Finally, shop Amazon. When you place an item on your Wish List, it will alert you if the price falls.
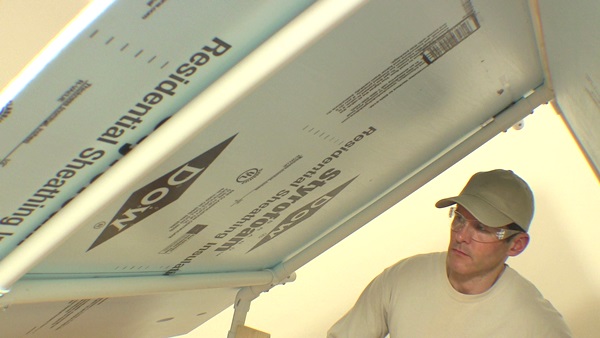
Step 4: Source Local Materials
You can build impressive, functional flight sim frames and enclosures with materials from your local home improvement store. All you need are common hand tools that you probably already have. It’s easy to build with PVC pipes, Styrofoam insulation, and wood boards. This is, by far, the best and cheapest way to build a home flight simulator.
Check out the Builder Academy for a wealth of information on using inexpensive materials for home flight sims. You can enroll for free!
Don’t forget to keep your receipt from the home improvement store. You can easily return any materials you don’t use.
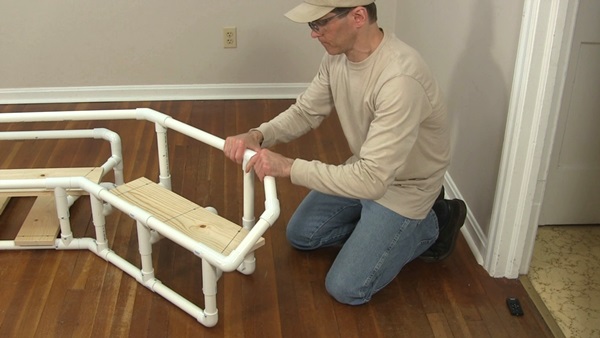
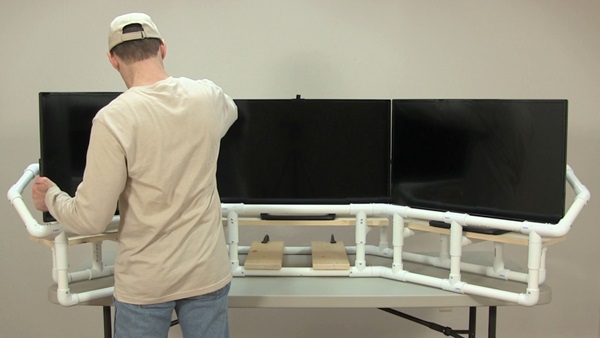
Building with PVC pipe
Building with Styrofoam panels
Step 5: DIY Flight Sim Online Tutorials
Know what to expect before you even start the project. These online courses show you every step of the building process with video clips, diagrams, pictures, printouts, and complete instructions. The tutorials are the least expensive part of your project, but most of all, they save you money and frustration with your project.
My customers finish their projects and get back to flying!
Proper flight sim painting will make your home flight simulator look finished and professional. The paint has an almost magical transformative effect. Most importantly, it turns a framework of pipes, wood, and foam into a complete, comprehensive aviation solution. Check out these # tips for flight sim painting.
Tip 1: Materials
It’s actually inexpensive to paint a DIY Flight Sim project, so it’s well worth doing it. Here’s what you’ll need for flight sim painting:
Latex primer. Ask the paint associate at the store to tint this to your desired color. Latex primer covers well and it dries with a flat sheen (not glossy).
Paper towels and a household cleaner like Formula 409 or something similar. Clean the PVC pipe frame before painting. PVC pipe can be rather dusty, even when it’s brand new.
Disposable 2″ wide paint brushes for the pipe frame. These can be re-used and then later thrown away.
3″ wide paint rollers (and handle) for foam body panels. If you have many wood boards to paint, then also use the rollers for those. If you only have a couple of boards, the brush will do.
Paint tray for the rollers.
Plastic drop cloths to catch drips.
Scrap boards to prop up the frame for painting.
Quart ziplock bags and gallon ziplock bags.
Tip 2: Tint
Yes, you can tint latex primer. The store clerk might tell you that the color may not turn out exactly the same as the paint chip because it’s primer. That’s ok, just tell them you are a pro at flight sim painting and you know what you’re doing.
Here are the colors I use:
Dover Gray D58-4 by Olympic. This is a light gray that I use for nearly all of my DIY Flight Sim projects.
Knight’s Armor D25-5: This is a dark gray that I use for the windows of the DIY Flight Sim Pod and the frame for the DIY Deluxe Desktop Flight Sim.
You don’t have to use these exact colors for your flight sim painting project. One builder reported a problem using Olympic paint + primer combo on PVC pipes. He said it did not to adhere adequately to the PVC. On the other hand, I haven’t heard of any other builders that encountered that problem. It might be best to just stick with regular latex primer.
Tip 3: How Many Coats?
I usually end up putting three coats on a flight sim painting project. Especially when it is a simple PVC frame like Item #F311 DIY Side Joystick Frame. First of all, start painting the frame right side up and allow it to dry. Next, turn the framework upside down and you’ll see all the places you missed. Apply another coat and allow it to dry. Finally, flip the framework right side up again and apply the final coat.
Usually, I remove the wood boards from the frame, label them, and then paint them separately. That’s actually much easier than keeping them in place.
Tip 4: Keep Fresh
You can use your brush and roller multiple times without worrying about them drying out. Simply put the brush in a quart size ziplock bag and keep it in your refrigerator between coats. Push out as much air as you reasonably can from the bag. The same works for the paint roller, but use a gallon sized ziplock bag. Therefore, you can use the brush and roller as many times as you need during your flight sim painting project. Finally, then throw away the brush and roller when you’re finished.
Tip 5: Why not Spray Paint?
Why don’t I recommend spray paint for flight sim painting? Using spray paint on a PVC pipe frame is actually pretty difficult. It’s hard to paint pipes, because you always miss a spot and you end up applying 5 or 6 or more coats. Plus, you need adequate ventilation for spray paint.
Latex primer, on the other hand, is safe to use indoors. This is especially important because many DIY builders work on their projects during the winter months.
Tip 6: Light
Finally, make sure you have good lighting so you can catch the drips or any areas you may have missed. This is common sense, but many people ignore it. I recommend you set up additional lights around your flight sim painting project.
Flight Sim Painting Tips
You can learn more about this topic and many others in the Builder Academy. You’ll also receive updates about new, free DIY Flight Sim content.
Roger Dodger Aviation produced and uploaded over 100 flight simulator videos to YouTube. These 5 videos are the ones that are currently trending.
#1 Flight Sim Pod Final Assembly: 6 minutes
This is an actual excerpt from the DIY Flight Sim Pod instructional video. It’s one of my favorite DIY projects.
#2 A Source for PVC Fittings: DIY Flight Simulator Videos
I found a great place to order PVC Fittings in bulk, so I decided to share the info with everyone. I’m a little surprised because it’s not directly related to flight simulator videos, but it is still watched by many people.
#3 Saitek Yoke Modification: Springs and Zip Ties
This is just one way to modify the Saitek Yoke. It’s one of my favorite flight simulator videos and also one of the most useful…
#4 Saitek X52 Throttle Fix
This is an easy way to fix the annoying detent in the Saitek X52 Throttle. I’m happy to say this video has help a great many people.
#5 Saitek Yoke Disassembly
Before you can modify a Saitek yoke, you must first open the case without damaging the interior mechanisms or losing anything.
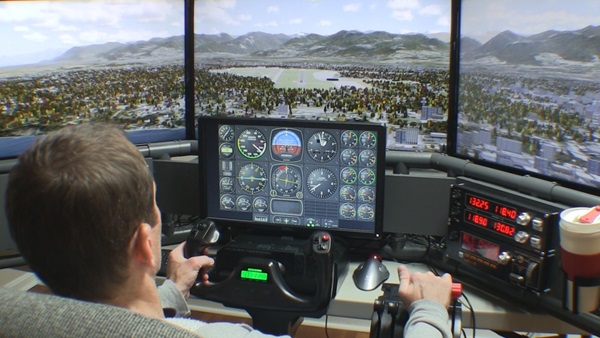
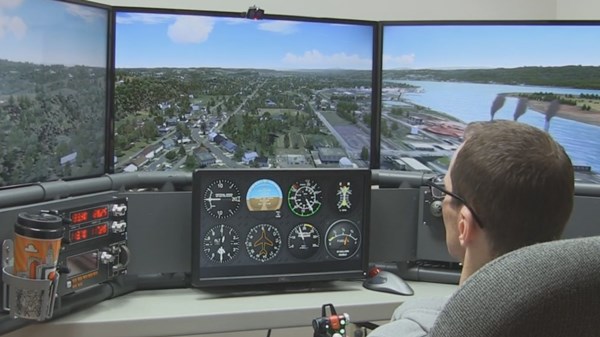
Developers struggle to create software that displays a legible flight simulator instrument panel, and also present a realistic outside world with scenery that stretches to the horizon. Today I’ll focus on viewing the flight instruments. You have a few options to choose from and each has its own benefit trade offs. It’s up to you to decide which flight simulator instrument panel works best with your particular needs.
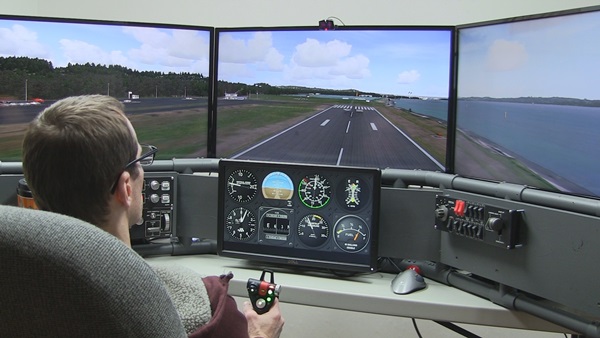
TrackIR with DTG Flight School and the DIY Deluxe Desktop Flight Sim
TrackIR $140.00
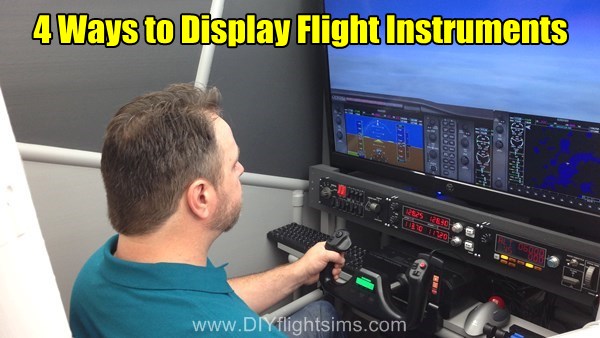
I’ve used TrackIR from Naturalpoint for a long time. It is a view tracking device that allows you to look around the virtual cockpit by moving your head. TrackIR “sees” your head move in 6 axes, also called 6 degrees of freedom. Instead of explaining all 6, I’ll just say your real life head also moves in 6 degrees of freedom, and leave it at that. As a result, you can lean into the flight simulator instrument panel if you want to see something closer. You can also look out the windows, look over your shoulder, look around struts and other parts of the airplane. The picture above shows TrackIR with the DIY Deluxe Desktop Flight Sim.
TrackIR works with a single screen, or multiple screens. It works with a very wide variety of titles: Prepar3D, X-Plane, FSX, Flight Sim World, DTG Flight School, DCS World, even Elite Dangerous, War Thunder, IL2, and many others. In conclusion, TrackIR is very useful but it’s still difficult to use with a GPS or other instruments that require fine tuning.
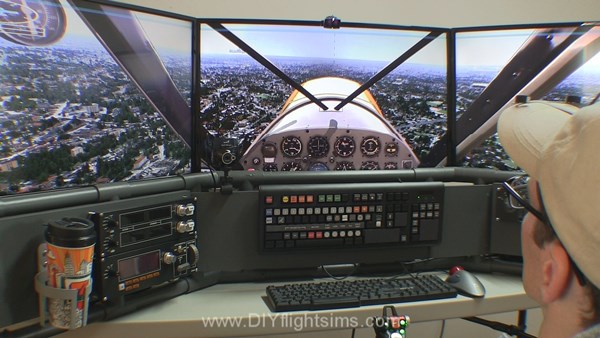
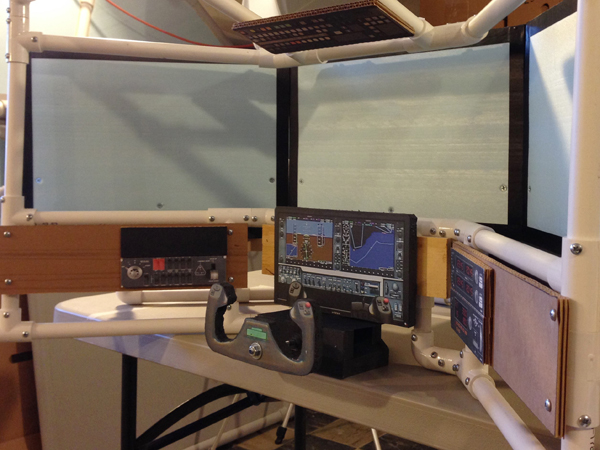
Native FSX instruments in the DIY Flight Sim Pod
Moving/resizing windows (free)
You can move and resize the 2D windows in old FSX and FSX Steam. When you type Shift+1, or Shift +2, Shift+3, etc. then FSX will display different windows that you can move around your screen. You see how this appears in the picture above with the DIY Flight Sim Pod. This trick also works with multiple screens. For example, you could show the outside view on all three monitors, and then in the bottom of your middle screen, show smaller windows with the flight instruments. You can also re-size the windows. That’s all great, except FSX does not save these settings on exit, and you have to set up all your views again the next time you turn on your computer.
Air Manager with the DIY Deluxe Desktop Flight Sim
Air Manager $77.00 + separate monitor or computer
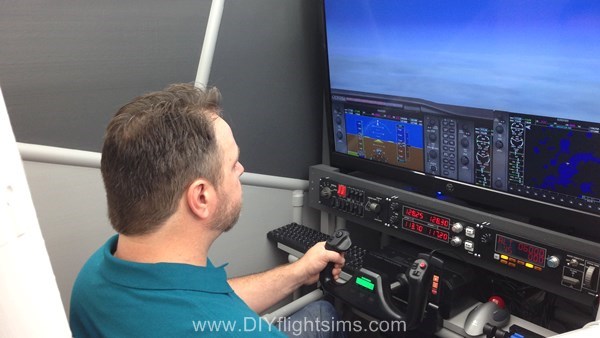
Air Manger works with Prepar3D, X-Plane 9, 10, and 11, FSX and FSX Steam. I’ve personally used Air Manager for displaying the flight simulator instrument panel on a separate screen. What I mean is, a totally separate monitor that is set aside for just the flight instruments. Flat panel computer monitors are so cheap that I literally have 3 in my house just waiting for a project. Air Manager can also work on an iPad or other tablet computer.
Air Manager is very versatile, see it above with the DIY Deluxe Desktop Flight Sim. I run the software on an old, obsolete computer (running Windows Vista) which is connected via network to my flight sim computer. A separate computer means there is zero impact on my frame rates. Download full flight simulator instrument panels, mix and match gauges (free), even create your own (also free).
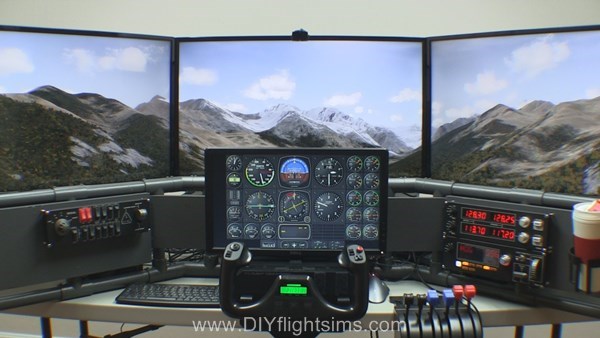
Saitek Pro Flight Instruments $169.99 each
The most expensive option is the Saitek Pro Flight Instrument gauges. I listed the price, but that is only for one single, physical USB gauge. Consequently, if you want a panel consisting of 6 flight instruments and an RPM gauge, that is 6 x $169.99 = $1019.94. I haven’t personally tried these gauges because they are so incredibly expensive. In addition, you are limited primarily to round-gauge type displays.
Flight Simulator Instrument Panel
In conclusion, there are several ways to display a flight simulator instrument panel and the method you choose will depend on your needs and your budget. Have you tried anything I haven’t listed here? If so, let me know in the comments (you don’t have to log in to comment).
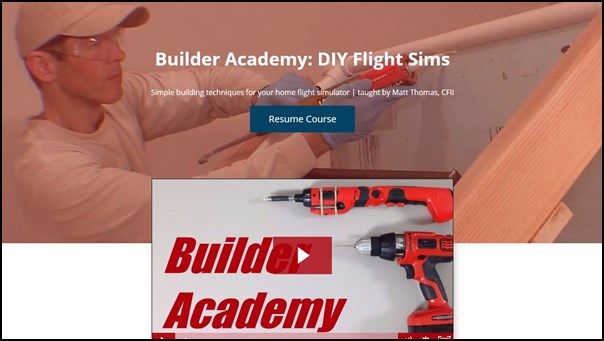
The Builder Academy is a comprehensive resource for learning all the basic flight sim building skills. What is it like to build a DIY Flight Sim project? The Builder Academy will show you. In addition, you can also learn about modifying the existing DIY Flight Sims projects. If you’re wondering how to build a flight simulator, this is your first, best resource. By the way, it’s free!
Building a flight simulator from PVC pipe
View the Builder Academy on your phone or tablet or anything
How to display flight instruments in your simulator
How to modify the Saitek yoke
Introducing the Builder Academy
How to install Saitek Switch Panels
Builder Academy Content
What is in the Builder Academy? Some of the videos in the Builder Academy were formerly a part of the “Free Videos” folder included with some purchases. Other videos were first published on YouTube, but are now only available in the Builder Academy. Some of the content is new and available only at the Builder Academy. Finally, all of the content assists you in different ways when you’re learning how to build a flight simulator. This is an overview of the course curriculum:
Recommended Tools
Building with PVC Pipe (new)
Self-Drilling Screws
Add a Monitor for the Flight Instruments
Display Flight Instruments with Air Manager
Install Saitek Switch Panels
Styrofoam Body Panels
Prototyping – How to Modify DIY Flight Sim Projects
Saitek Trim Wheel Adapter
X52 Saitek Throttle Fix
Saitek Yoke Modifications
CH Yoke Modifications
Paint for Home Flight Simulators
USB Cable Management
Change Log
Training Available Wherever You Are
The Builder Academy is available on nearly any device. As a result, you can view the training on a tablet or phone while you’re in your workshop or view it on a laptop or desktop. Also, there are some printouts and templates for certain projects, so you might need a printer at some point. I periodically add new content, so be sure to check the Change Log if you haven’t been there in a while. The Builder Academy is my platform to show everyone how easy it can be to build a home flight simulator. Even the most complex projects are really just a series of relatively easy steps. Visit the Builder Academy today and let me know what you think of it.
View the Builder Academy on your phone or tablet or anything
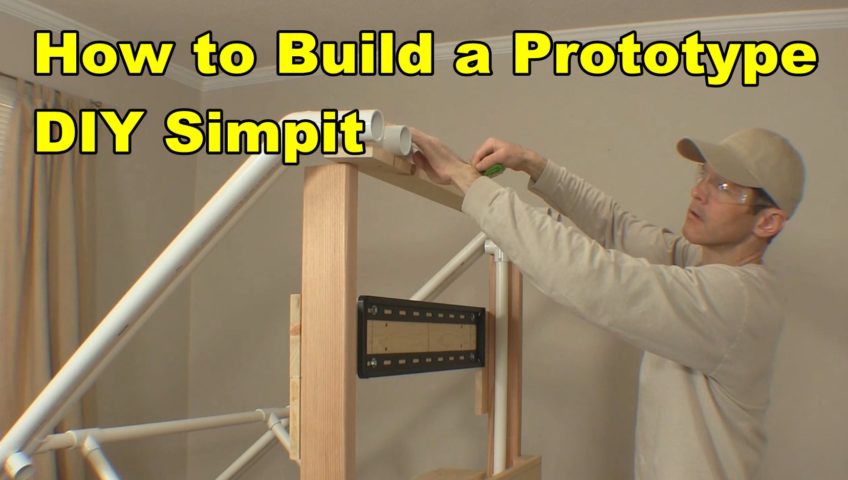
One of the common questions I get is about altering the DIY Flight Sim designs. Most builders modify the designs in some way to match their specific needs or equipment. For examples, take a look at Customer Gallery 1 and Customer Gallery 2 and notice how no two Simpits are alike. Once a builder deviates from the plans, the project becomes a prototype DIY simpit. There is no way I can predict how people will modify my DIY Flight Sim projects, so that is why I use building materials that are inexpensive and easy to use. Don’t be scared! Prototyping is a wonderfully creative process that can give you real satisfaction with your project.
What Does “Prototype” Mean?
You don’t really know if a flight sim design is going to work until you build it in real life. Really! If some anonymous person on a forum says an idea will work or not work, they don’t really know, because anyone can type words on a screen. You only gain true knowledge by building a DIY simpit in real life. That is prototyping.
So when someone asks me if a design modification will work, I’m very cautious about my answer for several reasons…
I don’t know if my understanding of their message matches what they’re imagining.
I don’t know if a proposed modification will require an additional structural reinforcement.
I don’t know someone’s skill level. Have they built things before, or is this the first time?
I don’t know if they have adequate tools. Are they building in a workshop or a dorm room, etc?
Prototyping means you try your idea, then adjust it and try it again, then adjust it and try it again, and keep at it until you are happy with your work. Fortunately, PVC pipe is a wonderful material for prototyping a DIY simpit (more about that below).
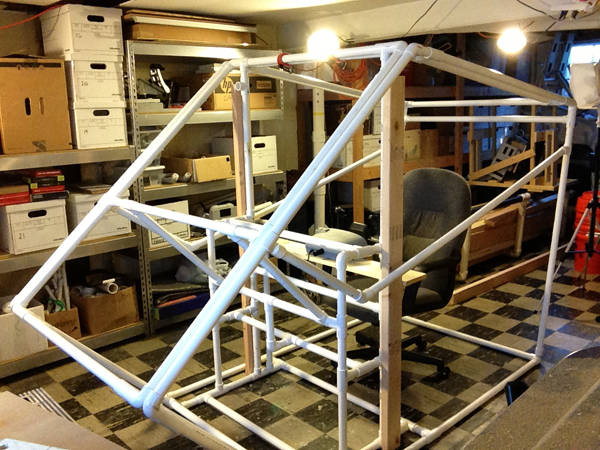
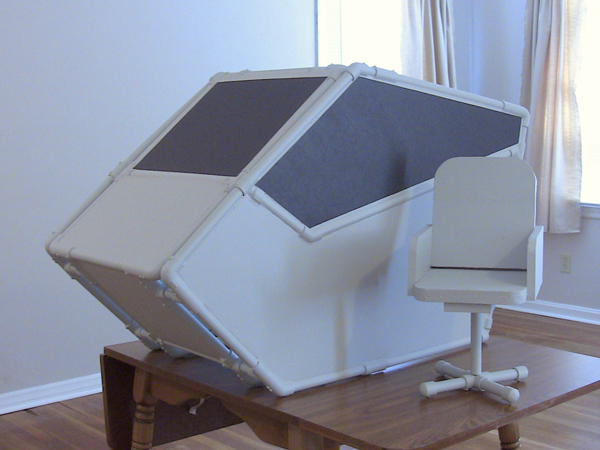
Fully operational prototype of the Deluxe Desktop Flight Sim
Prototype E430 Flight Sim Pod in my workshop
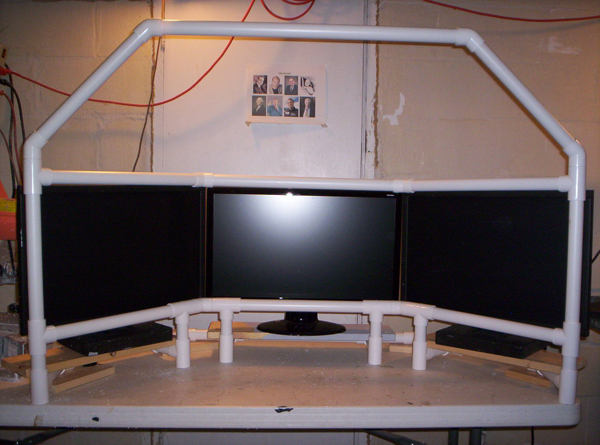
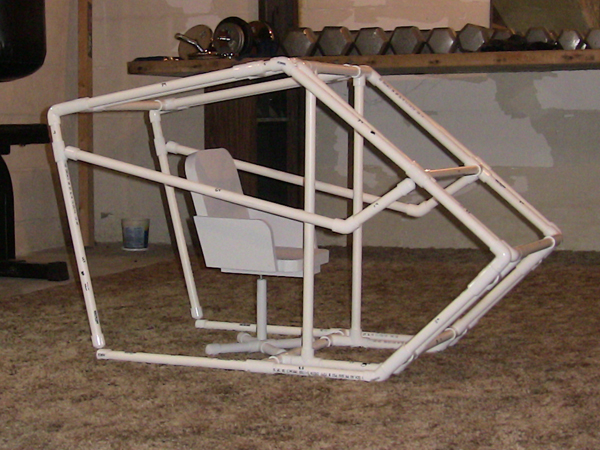
Prototyping starts with the frame around the monitors
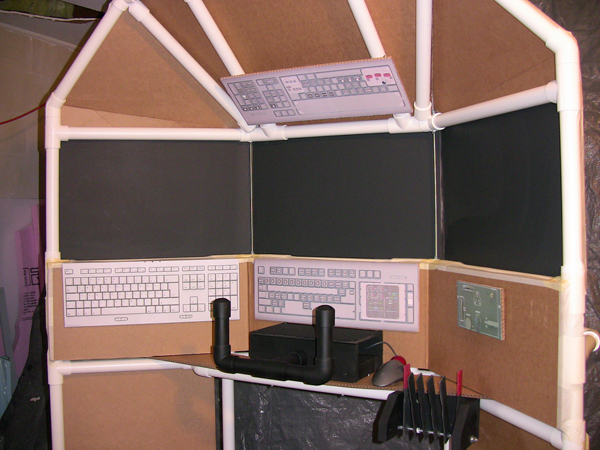
Mocked up flight controls in the prototype Triple Screen Flight Sim
Scale models
When I am designing large DIY simpit projects I make a scale model of my idea. As a result, this helps me find any major flaws and get a feeling for what it will look like before I build it full size. I use 1/2″ PVC pipe when I build a scale model. The smaller pipe saves me money because I use less 1″ pipe when I later build the full size prototype.
I also make scaled down controls, displays, and switch panels. This isn’t Computer Aided Design, but I still call it CAD: Cardboard Aided Design.
Half scale model of the Deluxe Desktop Flight Sim
Half scale flight controls, displays and switch panels
Scale model of the Flight Sim Pod
Scale model of the Flight Sim Pod frame
Scale model of the Triple Screen Flight Sim
Scale models helps me decide how it will all fit together
7 Steps for Prototyping a DIY Simpit
So how do you modify a DIY Flight Sim project if you need to scale it up or scale it down? Here’s an example. Let’s say you want to build the D250 Deluxe Desktop Flight Sim. However, the project is built around 32″ HDTVs but you want to use 27″ monitors. How do you scale this down?
First of all, buy an extra length of pipe in case you need it (PVC pipe is cheap)
Scale with a percentage. 27″ is about 16% smaller than 32″ Here’s the math: 32 – 27 = 5 and then 5 / 32 = .156, which is about 16%
Decrease the measurements of pipes by that same percentage. Only scale the pipes adjacent to the displays, for now.
Cut the pipes and assemble them with the PVC fittings. Start with just the pipes adjacent to the displays. Observe if the frame fits well compared to the displays or if you need to make changes.
If some pipes are a little too long, remove them and cut them shorter. If some pipes are too short, that’s why you bought extra pipe. It’s easy to assemble/disassemble the PVC pipe frame to test different frame dimensions.
Once you have pipe lengths that you are happy with, secure the PVC fittings with self-drilling screws.
Scale the rest of the pipes to fit with the part of the frame you changed. This is much easier now that you have a starting point.
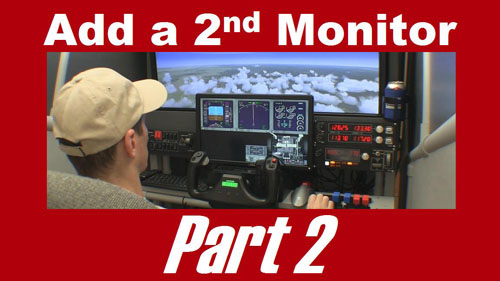
Now we will paint the board, install the monitor, and configure Microsoft Flight Simulator X to run on two monitors
Video Transcript
This is where we left off. Now I know all the components will fit correctly, so next I’ll paint the board.
I removed the mounting bracket and all components, but I left the tee nuts in place. I’m painting with tinted primer like I do with all my projects.
After one side has dried, flip it over and paint the other side.
The paint is dry to the touch, but it can still stick to the support boards when it sits overnight so I’m putting a few screws between the boards to allow the paint to dry completely.
I want a layer of masking tape (or something similar) between the new board and this attachment board. If I don’t separate the two boards like this, the paint will stick the boards together almost like glue.
Attach the board with deck screws,
Test fit the monitor to make sure it fits correctly.
You may or may not need an adapter for the monitor cable. This cheap little monitor only has a VGA plug.
Now that the monitor cable and power are hooked up, we can slide the monitor into place and turn on the computer.
The operating system should be smart enough to recognize the second monitor.
If not, right-click the desktop and choose “Screen Resolution” you may need to prompt the operating system to detect the monitors.
I recommend setting the large screen as Display 1
Also select “Extend these displays” here.
You know it’s working correctly if you can drag a window from one monitor to another.
Start Microsoft FSX. For this example, I’ll use the default G1000 Beechcraft Baron.
Select the 2D cockpit view. Right-click just above the instrument panel and select “Close window”
Next, select Shift + 4 to show the Primary Flight Display in a more manageable shape.
Now I can left click and drag it over to the smaller monitor and drag the edges to re-size the window.
Next, do the same thing with the Multi Function Display
I also like to display the Landing Gear Panel because it shows the elevator trim setting. Check out the Saitek trim wheel (I love this thing). Now I can see the trim setting for takeoff.
A quirky thing about this setup is that even if you save the flight, and exit, FSX will not save the locations of the instruments. The next time you start the flight, the instruments will have to be moved and re-sized again. You can remedy this by using Air Manager from Sim Innovations to display the instruments on your second monitor.
If you use TrackIR, a second monitor can still help you. Here I have the Virtual Cockpit on the main screen and the flight instruments on the small monitor. It works quite well. It was a great experience to add a second monitor to my flight simulator and I hope your project goes well too.
This was a great project and really enhanced the Flight Sim Pod. Dual monitors allow you to display the flight instruments on a smaller screen and show the outside view on a large monitor, or even an HDTV as shown here. Most noteworthy: quality flat panel monitors are wonderfully inexpensive now!
Video Transcript
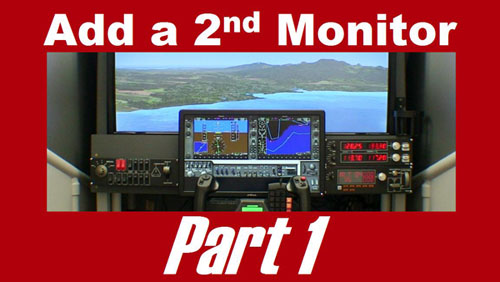
You can display your flight instruments on an auxiliary monitor and use your main monitor for the outside view. This increases your outside visibility and makes it easier to read the instruments.
This is nothing new. People have been running flight simulator on multiple monitors for years, but I wanted to show you some specific issues for mounting a second monitor.
I’ll literally show you the nuts and bolts of this process.
Part 2 of this video will show you what to expect when you run Microsoft Flight Simulator X on two monitors.
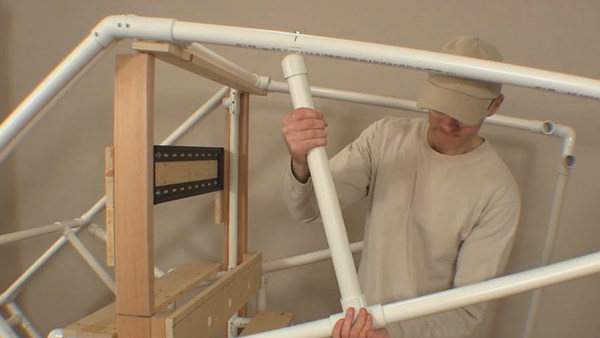
To start off, I removed the 1×6 board from the flight simulator and used a 1×8 board instead. I needed this taller board to mount these two Saitek switch panels vertically.
If you don’t have a miter saw that can cut a 1×8 board you can usually get that done at the store. Many home improvement stores will cut lumber for you.
Now lets look at the monitor mounting bracket. This small bracket is appropriate for this size monitor. One half of the bracket attaches to the monitor, the other half will attach to the board.
This is the Dell 19 inch monitor that I’m using for this project. It was very inexpensive.
This is how the bracket will fit on the monitor…. but look here: the bottom edge of the monitor can not hang below the bottom edge of the board….
Because, I have to allow room for the Saitek yoke below it.
Unfortunately, that puts the top attachment holes on the bracket too close to the top edge of the board, so we can’t use those holes.
No problem. We will simply drill new holes into the steel bracket! It’s not difficult. First, I measure where the new holes will be: three quarters of an inch on center, below the existing holes.
Next I tap the center points with a punch and hammer.
I drilled pilot holes first with a 1/8” drill bit. Use cutting fluid if you have it, or a lubricant like WD-40.
Next, use a ¼” drill bit to make the holes larger. Notice that I clamped the bracket in place.
The drill bit generates a lot of heat, so take your time. Drill a little, then back off for a moment to allow the bit to cool. Then repeat.
The drill press I’m using is not expensive or fancy. You could probably even do this with a hand drill if you clamped the bracket to a work bench. Either way, remember to take your time and be safe.
Use a 5/16” drill bit to make the holes larger one last time. So yes, I used three different drill bits for these holes. Yes, there is an easier way, a step bit will allow you drill holes in steel without changing drill bits.
Wear safety glasses. Wear safety glasses. Look, you can actually see bits of hot metal shooting in different directions.
Are dual monitors worth going through all this trouble? Yes! You will love having your flight instruments on a separate monitor.
Be sure to clean up the bracket after you’re done drilling.
Attach the mounting bracket to the back of the monitor according to the manufacturer’s instructions. This model already has mounting screws for this purpose.
The bracket slides on easily.
Measure the distance from the bottom edge of the monitor to the top edge of the bracket. In this case, it’s 7 ½”
I want the monitor in the center of the board, so I’m measuring the halfway point here.
Again, I want the top of the mounting bracket to be 7 ½” above the bottom of the board.
Hold the bracket in place and trace where your four mounting holes will be.
Drill pilot holes with a 1/8” drill bit, then final holes with a 5/16” drill bit
Now we can use ¼-20 screws to attach the bracket…. However, there’s another issue to address.
The ends of these screws will be too close to my 40” HDTV. I’m not comfortable with that.
So I used these ¼” tee nuts for the top two holes.
Flip the board over, and bang in the tee nuts with a hammer and a block of wood.
You can use shorter screws now. 1 inch long ¼-20 screws with washers.
Make sure the bracket is straight and attach ¼-20 screws to the bottom two holes. These screws are an inch and a half long, attach with nuts, washers and lock washers.
Slide on the monitor and see how it fits.
This is how it will sit in relation to the switch panels.
In part 2 of this video, we will paint the board and attach it to the flight simulator. I’ll also show you how to relocate the aircraft instruments to your new monitor in Microsoft Flight Simulator X.


Recent Comments