5 Modifications for a DIY HOTAS Chair for Virtual Reality and More
The DIY Side Joystick Frame is one of my most popular projects, and it’s very versatile. Even though I published this project 6 years ago, the design has stood the test of time. Yet, as great as it is, I have recently made a few modifications to the design that you might find helpful for your project. Read on for 5 Modifications for a DIY HOTAS Chair for Virtual Reality and More.
A True HOTAS for your Flight Sim
The DIY Side Joystick Frame, Item #F311, makes a true HOTAS (Hands On Throttle And Stick) possible for your flight simulator because the project also includes rudder pedals. True pilots use rudder pedals, not joystick twisty grips so always remember that. I originally envisioned the F311 as useful primarily for jet fighter simulators, but now, many customers are using it for space sims like Elite Dangerous and Star Citizen.
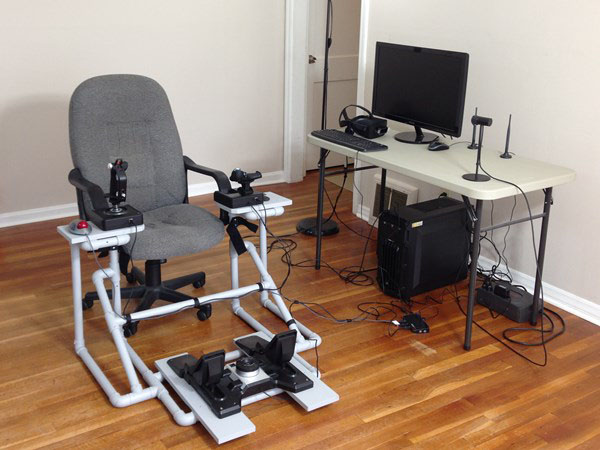
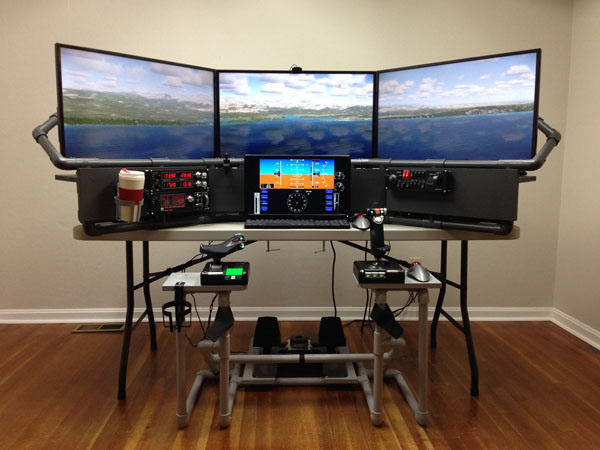
Use the F311 in combination with a Virtual Reality headset. Remember, when you wear a VR headset, you can’t see your keyboard any more and any functions you have assigned to your keyboard keys are literally out of sight. You can also use the F311 with a traditional multi-monitor setup like the DIY Deluxe Desktop Flight Sim (Item D250). The F311 is delightfully versatile and useful. Use these 5 Modifications for a DIY HOTAS Chair to update the F311.
5 Modifications for a DIY HOTAS Chair
I made five main modifications to adapt the F311 Side Joystick Frame for my current requirements. None of these modifications are difficult. If you can build the F311 in the first place, you can certainly make these modifications or include these changes during the initial build.
1. Wider Side Stand Platforms
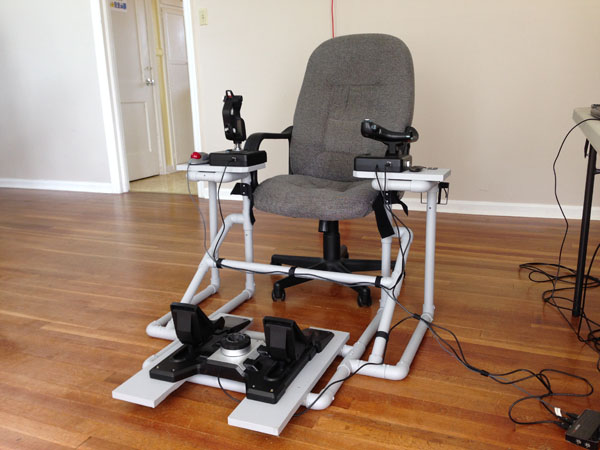
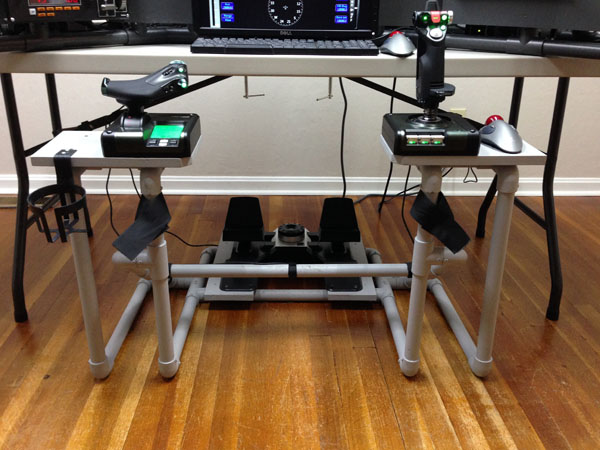
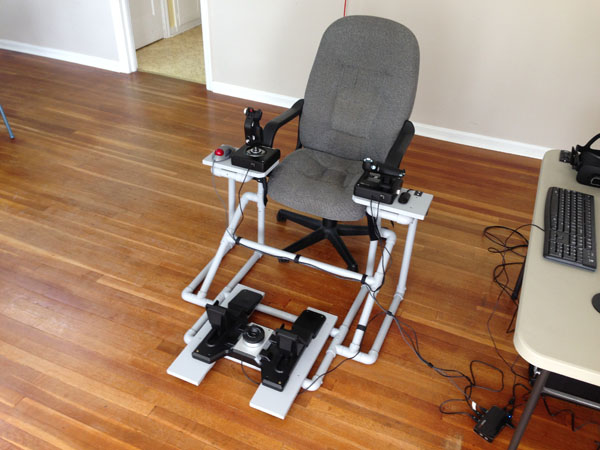
First of all, I installed wider side stand platforms, cut from 1×8 boards. To be clear, the PVC pipe side stands did not change, just the the boards that attach to the top of the stands. I topped the side stands with 1×8 boards, 12″ long. The wider boards give you room for a trackball mouse next to the joystick and give you room next to the throttle to set down your phone or whatever. Most importantly, you can place the controls in a more ergonomic location. This means placing the joystick and throttle in line with the chair’s arm rests. This is so important! Place the joystick and throttle so that your arms sit straight on the chair’s arm rests. This will allow you to fly comfortably for hours.
In addition, I attached the joystick and throttle with wood screws instead of Velcro. I also trimmed the inside corners of the 1×8 boards by 1″ and sanded the edges so my legs wouldn’t get caught on the corners.
2. Longer floor boards
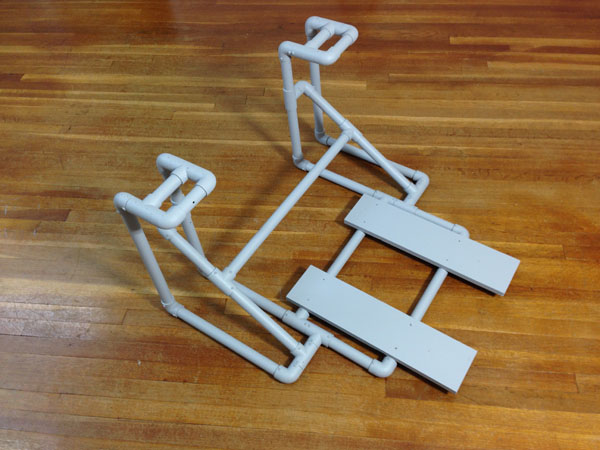
I use the Saitek Pro Flight Cessna Rudder Pedals, and I really like them, but they have to be positioned further away from the pilot. The rudder pedals attach to the Floor Boards with Velcro, but the original boards were too short. Therefore, I replaced them with two 1×6 boards, 22″ long. You might not need to make this change for your rudder pedals.
3. Raised center stabilizer
I also raised the center stabilizer bar to allow room for the Saitek Pro Flight Cessna Rudder Pedals. Specifically, the back of my ankles banged into the stabilizer bar, so I had to move it. It is now 6.5″ higher than it was before.
4. Self-drilling screws
I now use self-drilling screws in everything I build. Back in 2010 when I designed this project, I used Liquid Nails Project Glue to attach all the PVC pipes and fittings. This allowed for some cost-savings, but self-drilling screws are far superior. The screws allow for a simpler assembly with no overnight dry time. In addition, the screws create a much stronger frame. Lastly, you can remove the screws later if you decide to modify the frame. I absolutely recommend using 1/2″ self-drilling screws to build DIY Flight Sims from PVC pipe.
Video: Learn more about self-drilling screws for DIY Flight Sim projects
5. Cup holder
Don’t fly thirsty! I include a cup holder with almost every project I design. The cup holder is located next to the throttle and it’s easy to find it, even when wearing a VR headset. I use these inexpensive cup holders from Amazon.
If you’ve already built the DIY Side Joystick Frame, Item F311, or if you haven’t built one yet, these 5 Modifications for a DIY HOTAS Chair can enhance your home flight simulator experience for years to come.


2 Comments
Thank you for the update to this already awesome frame. When I got my plans, you had already found the benefit of self-drilling screws, so that’s what I used and doing so allowed me to make a couple adjustments to accommodate my height/chair preferences. I also raised that center bar so that it wasn’t so clumsy for me and my leg position as well. The beauty of your plans is that they are straightforward such that with a little thought, the builder is able to customize the frame to fit his/her body type.
Congrats on the continued improvement of your website and products. I always tell people online to come here when they are looking for ways to mount/use their HOTAS sets.
I’m so glad you enjoy the project! It’s great to hear that it is working well for you. Thank you for posting.
Write a Comment
Tag Cloud
Categories
Recent Posts
Recent Comments
Meta
Recent Posts
Recent Comments
Archives
Categories
Meta