CH Products Yoke Modification
CH Products Yoke Modification
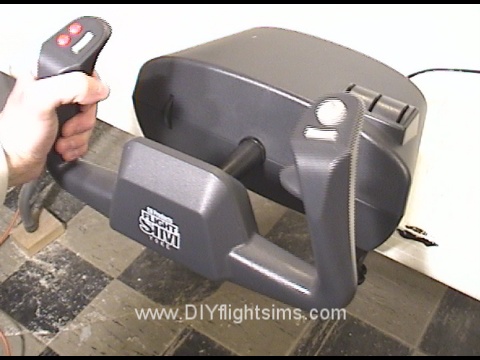
The CH Products Flight Sim Yoke is a solid addition to your home flight simulator. Even so, we can modify it a little to make the yoke work more smoothly because the spring tension and the friction within the mechanism can cause you to over-control the airplane. Sometimes you need to make more subtle control inputs.Ideally, when you have the airplane trimmed properly, you can fly with a light touch on the yoke. For example, if you’re over-controlling the airplane during landing, you’ll porpoise down the runway. Well if you don’t do that in real life, it’s embarrassing when it happens in flight simulator.
Our previous video showed how to disassemble the yoke. This video will show the CH Products yoke modification. I’m basically replacing the tension springs with rubber bands. The mod is reversible, so if you decide you don’t like it, you can change it back to the way it was before.
CH Products Yoke Modification
Note: disassembling consumer products may void the manufacturer’s warranty.
We will start by removing the springs. There is continuous tension on the spring, so push it down onto the pylon. Then remove the screw and washer… and carefully unhook the spring. Reattach the screw. Unhook the other end of the spring from the shaft. Repeat on the other side to remove the second spring. This cable is held in place with a small zip tie. Carefully snip it off. We’re going to use the hole that the zip tie was in…but we’re going to need one on the other side too. Here’s the existing hole, and now we’re drilling one in the same place on the other side. This is a one eighth inch drill bit. Just removing the little plastic shavings here.
Now we have our own little zip ties for the next step, and rubber bands. Insert the zip tie through the hole. Take two rubber bands and loop them over themselves like this. Connect the zip tie to one end of the rubber bands like this. Then stretch the rubber band over the pylon. Repeat on the other side. Notice I’m holding the yoke handle when I loop the rubber bands over the pylon.
Everything is looking good so far so let’s tighten up the zip ties. Loosen the rubber bands, cinch up the zip tie, then loop the rubber bands over the pylon again. Here’s the opposite side. Try not to get the rubber bands twisted too much. Snip off the ends of the zip ties.
Finishing Steps
Now you might ask, isn’t there a simpler way? If you look at how the shaft is constructed, you’ll notice we can simply loop these rubber bands on the opposite horn like this and loop the other rubber bands on the other side. Well that does work, but not very well. The rubber bands tend to rub against each another and make a banjo sound. I’m assuming you don’t want your yoke to sound like a banjo, so that’s out.
Remember this lever needs to be seated correctly on the bottom of the shaft, and the sleeves need to set in the grooves on the back of the unit. Finally, this wiring harness was disconnected from the mini-levers that we removed in the previous video. We don’t want it flopping around, so we attached it to these other wires with a zip tie, and everything is tucked away nicely.
The CH Products yoke modification is complete! Now the yoke has a better response to those subtle little control inputs that we tend to use when the airplane is trimmed for cruise flight, or any time a soft touch is necessary.

Write a Comment