The Builder Academy is a comprehensive resource for learning all the basic flight sim building skills. What is it like to build a DIY Flight Sim project? The Builder Academy will show you. In addition, you can also learn about modifying the existing DIY Flight Sims projects. If you’re wondering how to build a flight simulator, this is your first, best resource. By the way, it’s free!
Building a flight simulator from PVC pipe
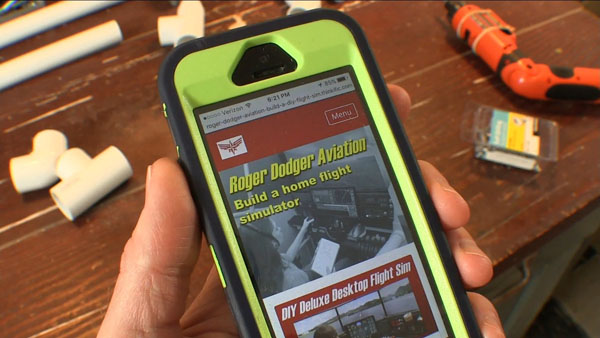
View the Builder Academy on your phone or tablet or anything
How to display flight instruments in your simulator
How to modify the Saitek yoke
Introducing the Builder Academy
How to install Saitek Switch Panels
Builder Academy Content
What is in the Builder Academy? Some of the videos in the Builder Academy were formerly a part of the “Free Videos” folder included with some purchases. Other videos were first published on YouTube, but are now only available in the Builder Academy. Some of the content is new and available only at the Builder Academy. Finally, all of the content assists you in different ways when you’re learning how to build a flight simulator. This is an overview of the course curriculum:
Recommended Tools
Building with PVC Pipe (new)
Self-Drilling Screws
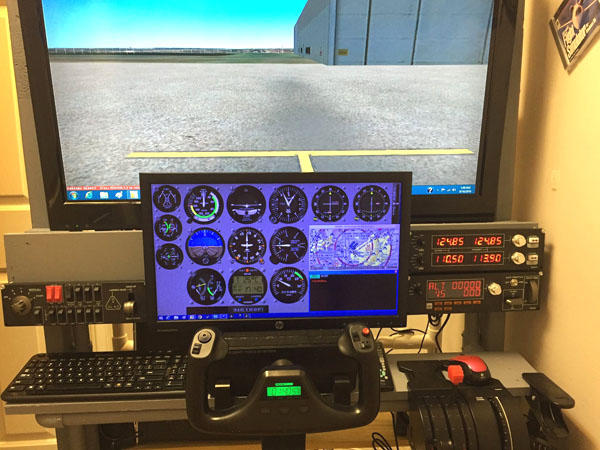
Add a Monitor for the Flight Instruments
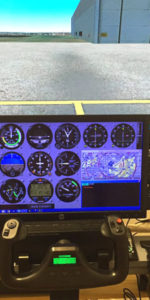
Display Flight Instruments with Air Manager
Install Saitek Switch Panels
Styrofoam Body Panels
Prototyping – How to Modify DIY Flight Sim Projects
Saitek Trim Wheel Adapter
X52 Saitek Throttle Fix
Saitek Yoke Modifications
CH Yoke Modifications
Paint for Home Flight Simulators
USB Cable Management
Change Log
Training Available Wherever You Are
The Builder Academy is available on nearly any device. As a result, you can view the training on a tablet or phone while you’re in your workshop or view it on a laptop or desktop. Also, there are some printouts and templates for certain projects, so you might need a printer at some point. I periodically add new content, so be sure to check the Change Log if you haven’t been there in a while. The Builder Academy is my platform to show everyone how easy it can be to build a home flight simulator. Even the most complex projects are really just a series of relatively easy steps. Visit the Builder Academy today and let me know what you think of it.
View the Builder Academy on your phone or tablet or anything
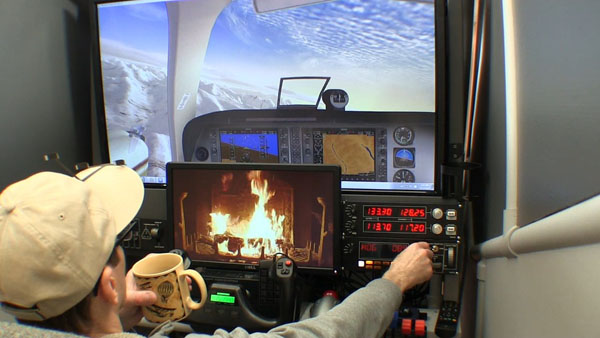
This project combines two of my favorite things: a cozy fireplace and my flight simulator. Why not simulate a nice cozy fireplace inside a flight simulator?!
This DIY flight sim is ready for winter! I combined the warm atmosphere of a crackling fireplace with the fun of flying my simulator. It’s just the thing for those freezing winter months. You can do this too, it’s easy to set up.
Create a Fireplace Inside a Flight Simulator
My flight simulator has two displays connected to the graphics card. The large display is a 40″ HDTV and the smaller display is a 19″ VGA computer monitor. Typically, I display the flight simulator outside view on the large screen and the flight instruments on the smaller screen. For today’s project, I’m only running FSX on the large screen. Start FSX and start a flight. Select Windowed Mode from the View Menu and resize the window so it fits on one screen (the large screen in my example).
Next start a web browser on the second monitor and find a fireplace video on YouTube. Play the video and select full screen. This is how I my smaller display shows a cozy, crackling fireplace.
All we need now is a nice hot apple cider. I recently discovered sugar free apple cider from Alpine. It doesn’t need any sugar because of what we add next: cinnamon flavored bourbon. Apple and cinnamon… oh it’s so, so good! Leave the ice and snow outside, you’re flying in comfort. Happy Landings!
Now we will paint the board, install the monitor, and configure Microsoft Flight Simulator X to run on two monitors
Video Transcript
This is where we left off. Now I know all the components will fit correctly, so next I’ll paint the board.
I removed the mounting bracket and all components, but I left the tee nuts in place. I’m painting with tinted primer like I do with all my projects.
After one side has dried, flip it over and paint the other side.
The paint is dry to the touch, but it can still stick to the support boards when it sits overnight so I’m putting a few screws between the boards to allow the paint to dry completely.
I want a layer of masking tape (or something similar) between the new board and this attachment board. If I don’t separate the two boards like this, the paint will stick the boards together almost like glue.
Attach the board with deck screws,
Test fit the monitor to make sure it fits correctly.
You may or may not need an adapter for the monitor cable. This cheap little monitor only has a VGA plug.
Now that the monitor cable and power are hooked up, we can slide the monitor into place and turn on the computer.
The operating system should be smart enough to recognize the second monitor.
If not, right-click the desktop and choose “Screen Resolution” you may need to prompt the operating system to detect the monitors.
I recommend setting the large screen as Display 1
Also select “Extend these displays” here.
You know it’s working correctly if you can drag a window from one monitor to another.
Start Microsoft FSX. For this example, I’ll use the default G1000 Beechcraft Baron.
Select the 2D cockpit view. Right-click just above the instrument panel and select “Close window”
Next, select Shift + 4 to show the Primary Flight Display in a more manageable shape.
Now I can left click and drag it over to the smaller monitor and drag the edges to re-size the window.
Next, do the same thing with the Multi Function Display
I also like to display the Landing Gear Panel because it shows the elevator trim setting. Check out the Saitek trim wheel (I love this thing). Now I can see the trim setting for takeoff.
A quirky thing about this setup is that even if you save the flight, and exit, FSX will not save the locations of the instruments. The next time you start the flight, the instruments will have to be moved and re-sized again. You can remedy this by using Air Manager from Sim Innovations to display the instruments on your second monitor.
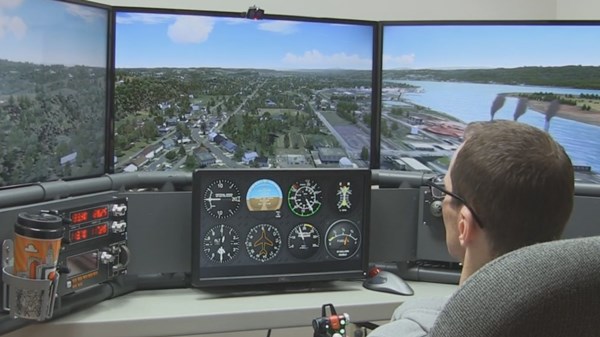
If you use TrackIR, a second monitor can still help you. Here I have the Virtual Cockpit on the main screen and the flight instruments on the small monitor. It works quite well. It was a great experience to add a second monitor to my flight simulator and I hope your project goes well too.
This was a great project and really enhanced the Flight Sim Pod. Dual monitors allow you to display the flight instruments on a smaller screen and show the outside view on a large monitor, or even an HDTV as shown here. Most noteworthy: quality flat panel monitors are wonderfully inexpensive now!
Video Transcript
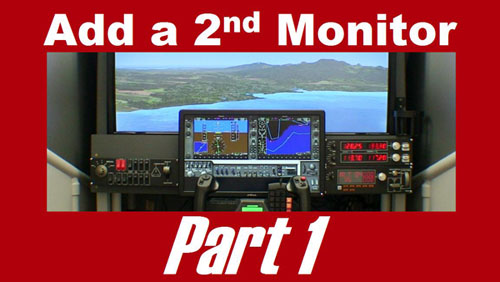
You can display your flight instruments on an auxiliary monitor and use your main monitor for the outside view. This increases your outside visibility and makes it easier to read the instruments.
This is nothing new. People have been running flight simulator on multiple monitors for years, but I wanted to show you some specific issues for mounting a second monitor.
I’ll literally show you the nuts and bolts of this process.
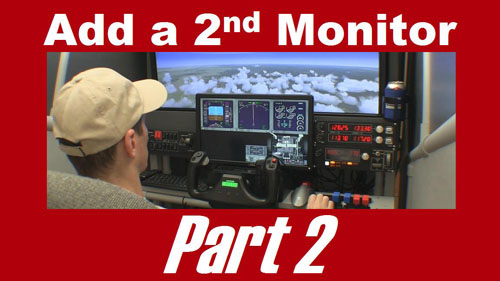
Part 2 of this video will show you what to expect when you run Microsoft Flight Simulator X on two monitors.
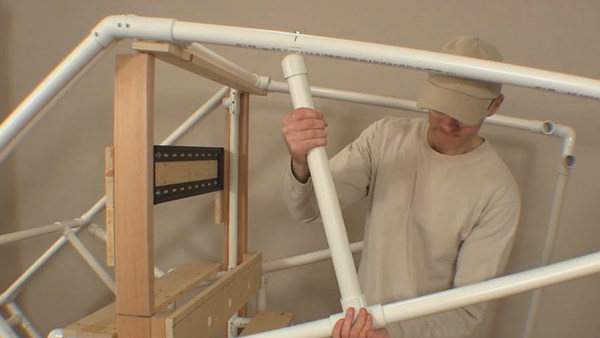
To start off, I removed the 1×6 board from the flight simulator and used a 1×8 board instead. I needed this taller board to mount these two Saitek switch panels vertically.
If you don’t have a miter saw that can cut a 1×8 board you can usually get that done at the store. Many home improvement stores will cut lumber for you.
Now lets look at the monitor mounting bracket. This small bracket is appropriate for this size monitor. One half of the bracket attaches to the monitor, the other half will attach to the board.
This is the Dell 19 inch monitor that I’m using for this project. It was very inexpensive.
This is how the bracket will fit on the monitor…. but look here: the bottom edge of the monitor can not hang below the bottom edge of the board….
Because, I have to allow room for the Saitek yoke below it.
Unfortunately, that puts the top attachment holes on the bracket too close to the top edge of the board, so we can’t use those holes.
No problem. We will simply drill new holes into the steel bracket! It’s not difficult. First, I measure where the new holes will be: three quarters of an inch on center, below the existing holes.
Next I tap the center points with a punch and hammer.
I drilled pilot holes first with a 1/8” drill bit. Use cutting fluid if you have it, or a lubricant like WD-40.
Next, use a ¼” drill bit to make the holes larger. Notice that I clamped the bracket in place.
The drill bit generates a lot of heat, so take your time. Drill a little, then back off for a moment to allow the bit to cool. Then repeat.
The drill press I’m using is not expensive or fancy. You could probably even do this with a hand drill if you clamped the bracket to a work bench. Either way, remember to take your time and be safe.
Use a 5/16” drill bit to make the holes larger one last time. So yes, I used three different drill bits for these holes. Yes, there is an easier way, a step bit will allow you drill holes in steel without changing drill bits.
Wear safety glasses. Wear safety glasses. Look, you can actually see bits of hot metal shooting in different directions.
Are dual monitors worth going through all this trouble? Yes! You will love having your flight instruments on a separate monitor.
Be sure to clean up the bracket after you’re done drilling.
Attach the mounting bracket to the back of the monitor according to the manufacturer’s instructions. This model already has mounting screws for this purpose.
The bracket slides on easily.
Measure the distance from the bottom edge of the monitor to the top edge of the bracket. In this case, it’s 7 ½”
I want the monitor in the center of the board, so I’m measuring the halfway point here.
Again, I want the top of the mounting bracket to be 7 ½” above the bottom of the board.
Hold the bracket in place and trace where your four mounting holes will be.
Drill pilot holes with a 1/8” drill bit, then final holes with a 5/16” drill bit
Now we can use ¼-20 screws to attach the bracket…. However, there’s another issue to address.
The ends of these screws will be too close to my 40” HDTV. I’m not comfortable with that.
So I used these ¼” tee nuts for the top two holes.
Flip the board over, and bang in the tee nuts with a hammer and a block of wood.
You can use shorter screws now. 1 inch long ¼-20 screws with washers.
Make sure the bracket is straight and attach ¼-20 screws to the bottom two holes. These screws are an inch and a half long, attach with nuts, washers and lock washers.
Slide on the monitor and see how it fits.
This is how it will sit in relation to the switch panels.
In part 2 of this video, we will paint the board and attach it to the flight simulator. I’ll also show you how to relocate the aircraft instruments to your new monitor in Microsoft Flight Simulator X.
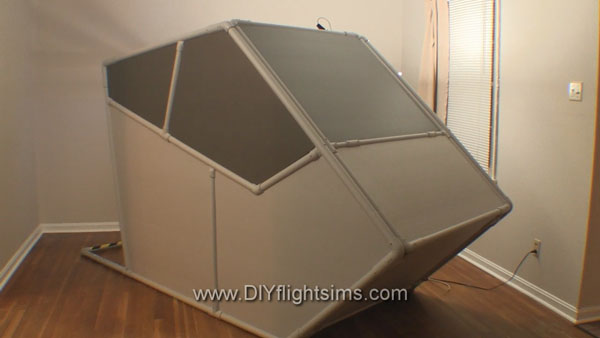
I love adding pictures to the Customer Gallery! Check out this customer-built DIY Flight Sim Pod that was completed by Russ in North Carolina. He has it set up to simulate general aviation airplanes and regularly uses it for cross-country flights that he posts about on his Facebook fan page. You can see it features a large HDTV as the primary display, an auxiliary monitor for the flight instruments, Saitek switch panels, and the Saitek Pro-Flight yoke/throttle quadrant.
It’s a great build and I would like to point out some details that Russ included that contribute greatly to a quality home flight sim project:
He painted it. A lot of people want to skip painting, but it’s such an important part of a truly finished project
Note the trackball mouse. I recommend this handy feature for any flight sim.
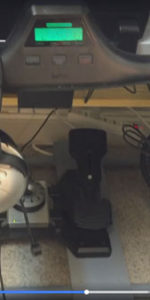
Rudder pedals! No twisty joysticks for us, we’re pilots.
Trim wheel: this is a great product from Saitek that I think is overlooked by way too many people in the flight sim community.
Trackball mouse and Saitek trim wheel
Rudder pedals and a quality headset
DIY Flight Sim Pod build by Russ
DIY Flight Sim Pod Size Comparison to Smart Car
Customer-Built DIY Flight Sim Pod
I’m happy to see pictures of a completed DIY Flight Sim Pod. This is one of my favorite projects but after I published it, I started to realize many people probably didn’t have room for a home flight simulator this large. The Pod is about the size of a Smart Car. Russ found a way to work with limited space by leaving off the Pod’s side walls. You can see in his video here that the walls of this room actually serve as the side walls for the flight sim …. smart!


Recent Comments