3 Suggestions for your mobile flight simulator

Three Suggestions for Your Mobile Flight Simulator

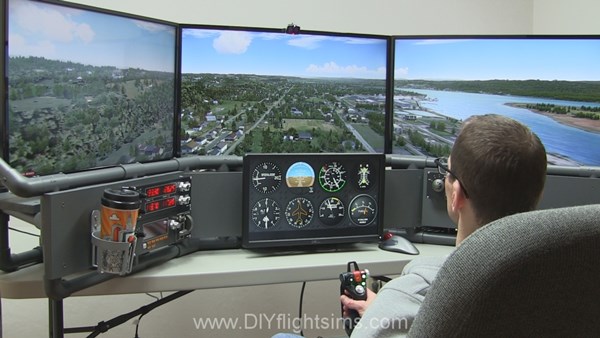
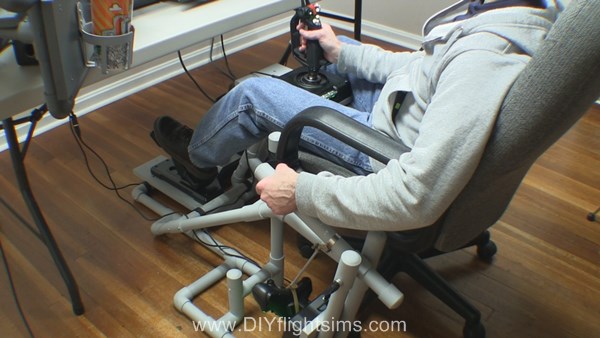
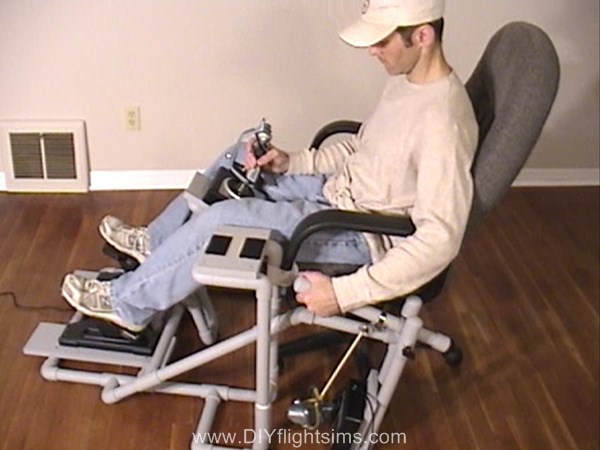
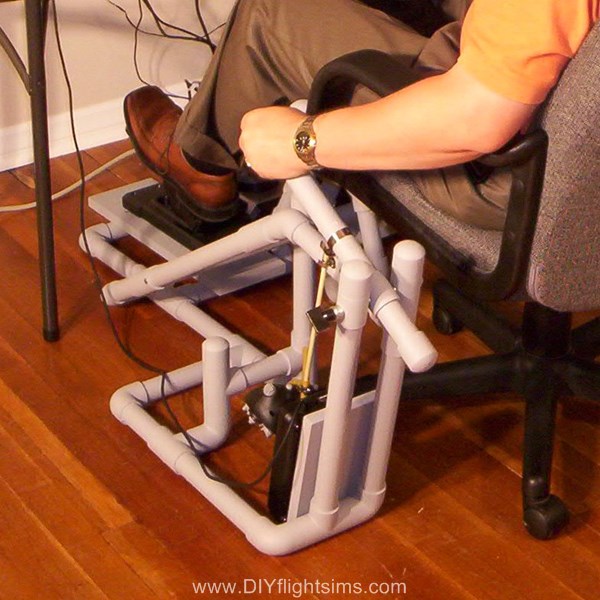
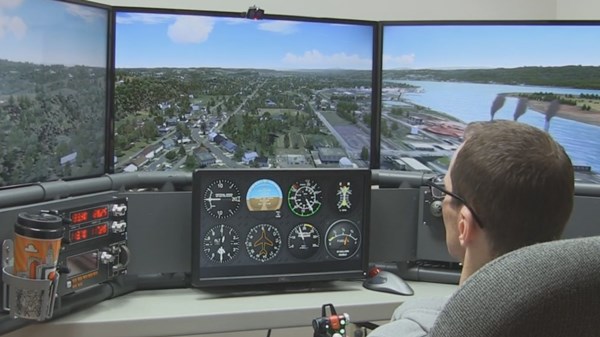
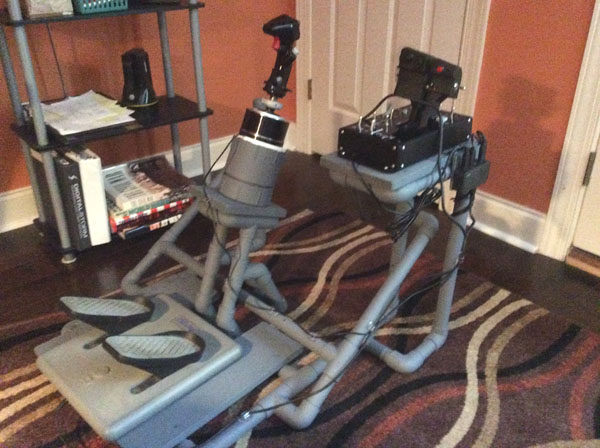
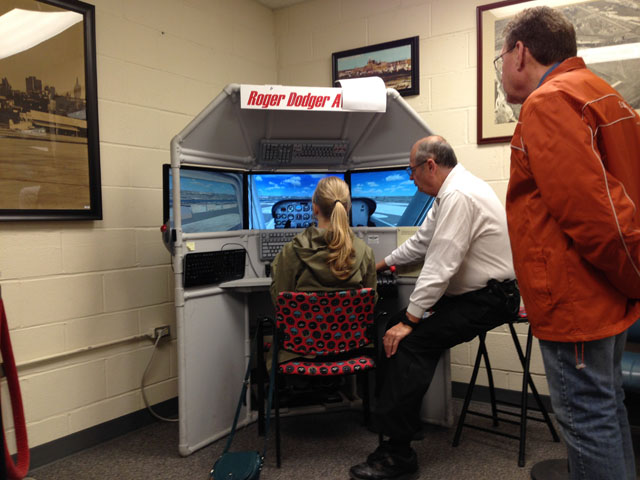
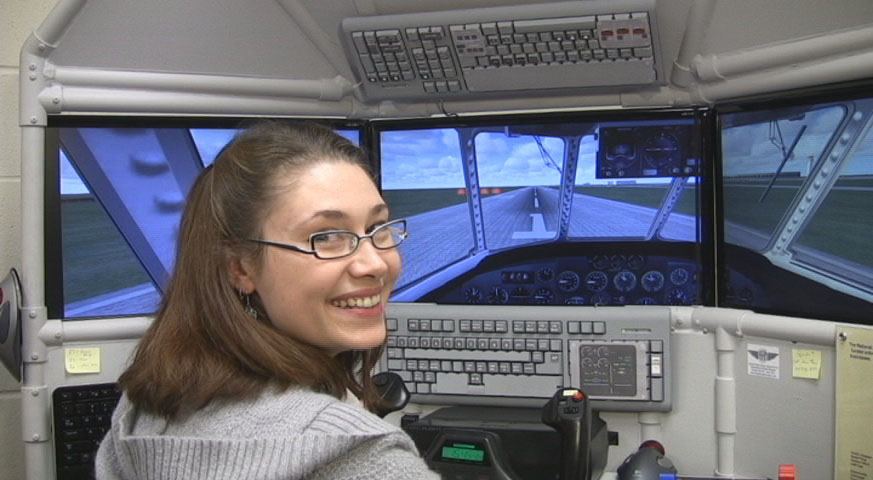
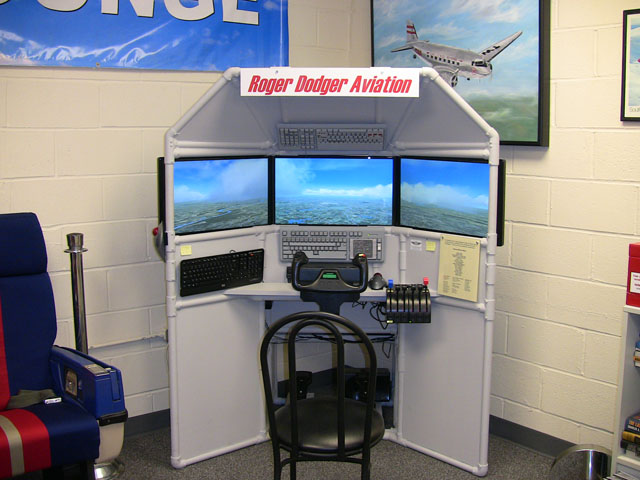
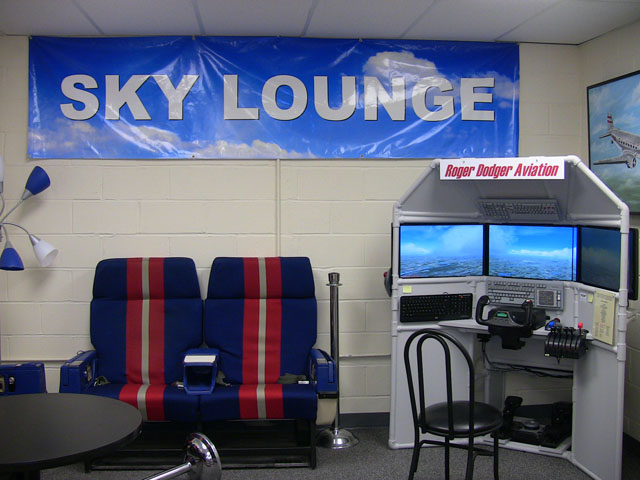
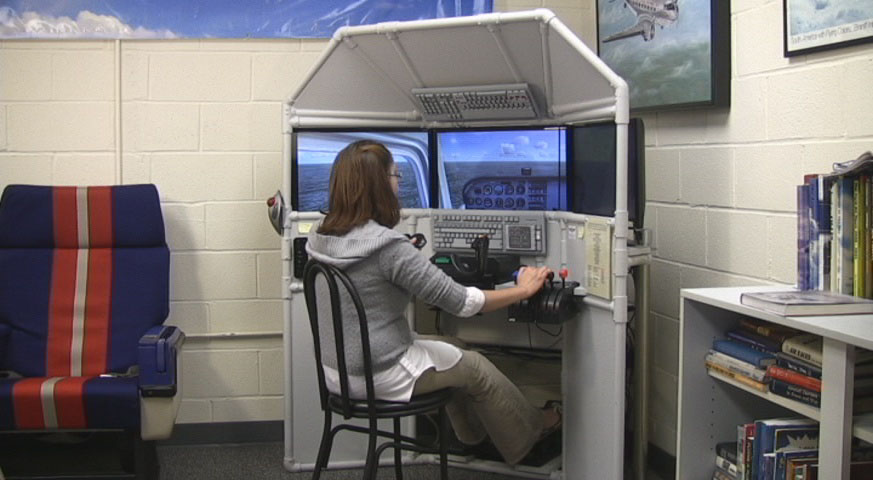
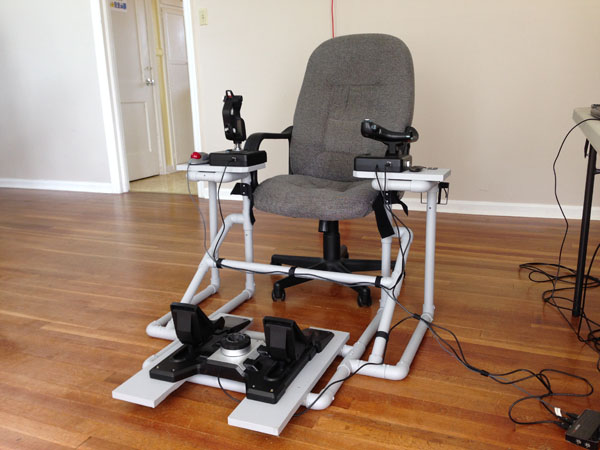
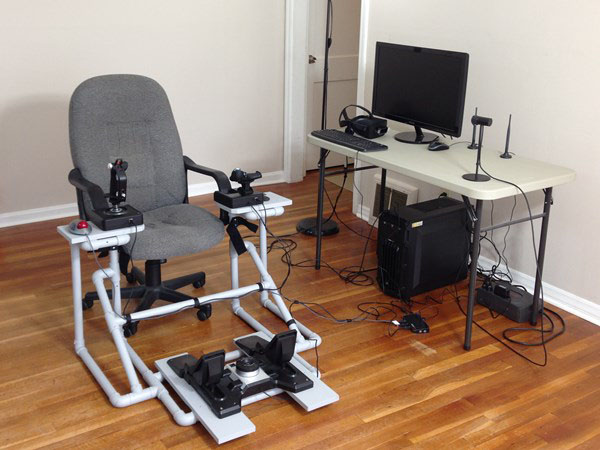
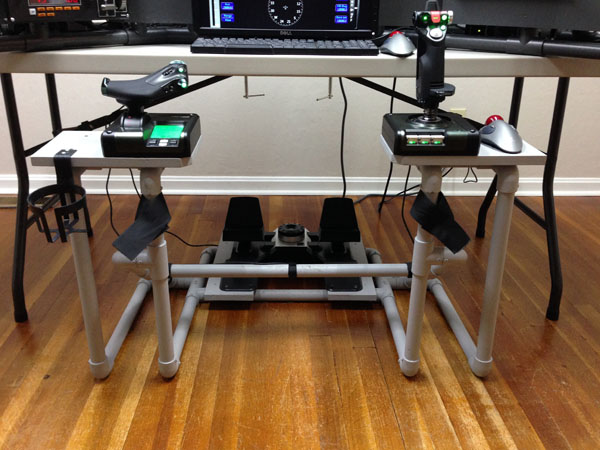
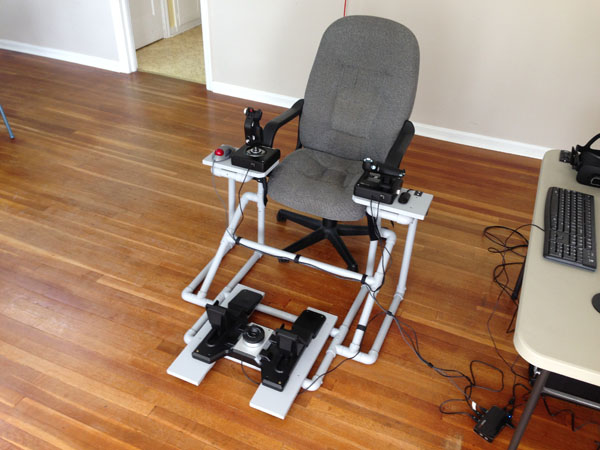
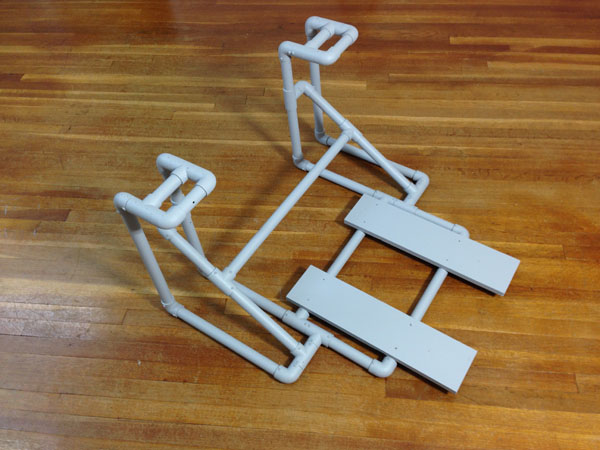
I was contacted by a representative from a giant, international, airline manufacturer who wanted to build a mobile flight simulator to take to events and schools. You may recall I transported the DIY Triple Screen Flight Sim and the DIY Roll-Away Flight Sim to several events. His team had an empty shell from an actual airplane cockpit, with the real controls, but no instruments or much of anything else. Their task was to make the cockpit shell into a mobile flight simulator. Maybe you have had this idea too.

The first major hurdle was to make the real controls work with the flight simulator software on a PC. And that’s when they contacted me for advice. This is what I told them…

Three Suggestions for Your Mobile Flight Simulator

I have a few suggestions for your team regarding this mobile flight simulator. To start off, I believe many of us in the industry tend to regard a mobile flight simulator on an informal spectrum with “more realistic” on one end and “less realistic” on the other. As I understand your need, you will be transporting this simulator to events, setting it up for use by attendees, and then moving the simulator again. For a mobile flight simulator such as this, I have discovered realism is less important than reliability. It either works on the day of the event or it doesn’t. Therefore, expo simulators fall into a binary, more than a spectrum from an operational standpoint.

So with that in mind, I have three suggestions.

Suggestion #1: Hack Retail Products

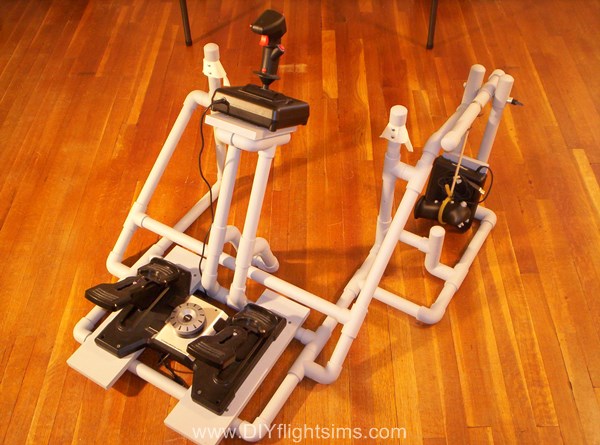
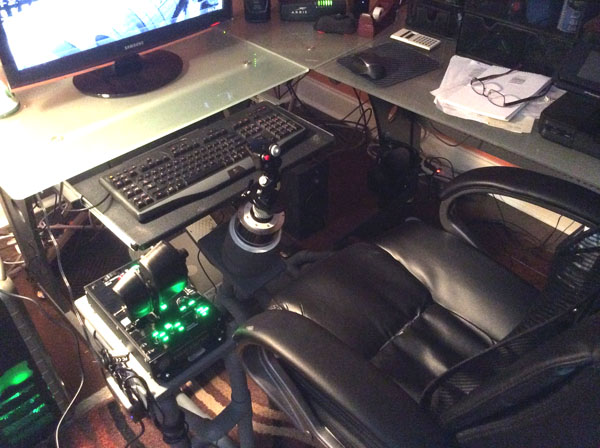
The first suggestion is to purchase a retail flight sim control yoke, and hack it. By “hack” I mean you remove the interior components and incorporate them into the airplane cockpit that you showed me in the picture. Everything you need for your mobile flight simulator is inside a retail flight sim yoke. The yoke contains potentiometers that measure pitch and roll deflection, so you can integrate those components into the actual controls on your airplane. The potentiometers are already wired into a circuit board and so is a USB cable. When you plug in the USB cable to a PC, it will simply recognize the controller and install the drivers. You can then use any flight simulator software you want.

You could do the same thing with retail rudder pedals and a throttle quadrant.

Suggestion #2: Use Retail Products

In my experience, it’s a logistical challenge to safely transport and set up a mobile flight simulator. It is possible some part of your simulator may not work correctly even though you were very careful and were prepared for the event. If you can’t get it to work, the whole day is wasted.

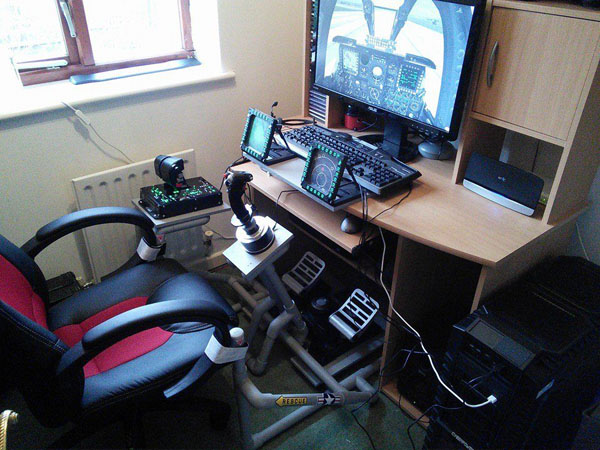
My other suggestion is to simply install retail off-the-shelf flight sim controls in your airplane cockpit. This looks decidedly less realistic, but you gain an extra layer of reliability because you can have spare parts in reserve. For example, if the yoke isn’t working on a particular day, you can simply switch it out with a new yoke. The same is true with the rudder pedals and throttle quadrant.

Suggestion #3: Get Running Now, Progress Later

Finally, third option would be to use both strategies. Perhaps you start with Suggestion #2, which is quick and simple, and then maybe a year later move up to Suggestion #1, which is more complex but looks more professional. This approach gets you up and running for early success and also provides a path to improvements. Later, you and your team will have more experience with the flight simulator hardware and software. Therefore, it will be easier for you to re-install the real controls and get them running with the PC. Your team and stakeholders will feel good about the progression of the project.

I hope these suggestions are helpful. I’m interested in knowing how your flight simulator turns out so please let me know what you ultimately decide to do.

DIY Helicopter Simulator Controls, free upgrade to online tutorials

DIY Helicopter Simulator Controls | Free Upgrade to Online Tutorials

What is the Upgrade?

The F331 DIY Easy Helicopter Collective is one of my favorite projects because it fills an urgent need in the flight sim community. Try to find a helicopter collective control for a reasonable price. You will not find one, they are all hundreds of dollars. My DIY Helicopter Simulator Controls are still, after several years, the most cost-effective solution for home flight sim pilots. My tutorials show you how to build a framework from PVC pipe. You then attach standard HOTAS joystick/throttle and rudder pedals. The new, upgraded version of these tutorials are completely online and can be accessed with any device. No more cumbersome downloads!


How do you get the Upgrade?

This new online version is FREE if you’ve already bought the F331 DIY Easy Helicopter Collective. Email me at DIYflightsims@rogerdodger.net to get your upgraded version. Be sure to tell me what email address you used when you ordered so I can look you up. Then, I’ll send you a coupon code that will allow you access to the online lessons for free. You can then build your own DIY Helicopter Simulator Controls and get flying… and hovering.


More about the DIY Helicopter Simulator Controls

Have you ever tried to fly a helicopter with a regular flight sim throttle? It’s not enjoyable. There is a reason why helicopter controls look different than airplane controls – they ARE different. Once you try a helicopter collective, you will never want to go back to a regular throttle. When you use a collective, the movement is completely natural, you don’t have to even think about the controls any more, just make the helicopter do what you need it to do. I could never hover, or even land a helicopter before I built my collective. Now everything is easier.

Below is a demonstration of the DIY Easy Helicopter Collective, among other things…


How to Build a Flight Simulator

Introducing the Builder Academy

The Builder Academy is a comprehensive resource for learning all the basic flight sim building skills. What is it like to build a DIY Flight Sim project? The Builder Academy will show you. In addition, you can also learn about modifying the existing DIY Flight Sims projects. If you’re wondering how to build a flight simulator, this is your first, best resource. By the way, it’s free!

Builder Academy Content

What is in the Builder Academy? Some of the videos in the Builder Academy were formerly a part of the “Free Videos” folder included with some purchases. Other videos were first published on YouTube, but are now only available in the Builder Academy. Some of the content is new and available only at the Builder Academy. Finally, all of the content assists you in different ways when you’re learning how to build a flight simulator.
This is an overview of the course curriculum:

  • Recommended Tools
  • Building with PVC Pipe (new)
  • Self-Drilling Screws
  • Add a Monitor for the Flight Instruments
  • Display Flight Instruments with Air Manager
  • Install Saitek Switch Panels
  • Styrofoam Body Panels
  • Prototyping – How to Modify DIY Flight Sim Projects
  • Saitek Trim Wheel Adapter
  • X52 Saitek Throttle Fix
  • Saitek Yoke Modifications
  • CH Yoke Modifications
  • Paint for Home Flight Simulators
  • USB Cable Management
  • Change Log

Training Available Wherever You Are

The Builder Academy is available on nearly any device. As a result, you can view the training on a tablet or phone while you’re in your workshop or view it on a laptop or desktop. Also, there are some printouts and templates for certain projects, so you might need a printer at some point. I periodically add new content, so be sure to check the Change Log if you haven’t been there in a while. The Builder Academy is my platform to show everyone how easy it can be to build a home flight simulator. Even the most complex projects are really just a series of relatively easy steps. Visit the Builder Academy today and let me know what you think of it.

View the Builder Academy on your phone or tablet or anything

More DIY Flight Sim Completions in the Expanded Customer Gallery

I added more pictures of DIY Flight Sim completions to the new expanded Customer Gallery. Note there are now three distinct examples of customers adding the popular Thrustmaster Warthog HOTAS joystick to the #F321 DIY Center Joystick Frame.


Thrustmaster Warthog and other Additions

Several customers modified the #F321 Center Joystick project slightly to accommodate the Thrustmaster Warthog joystick. They did this by shortening the center joystick stand by several inches and then bolting on the joystick. The Thrustmaster Warthog originally comes with a flat, square base which can be easily removed. Notice that the DIY Center Joystick Frame works well with Saitek rudder pedals because of their wide stance. You can comfortably straddle the center joystick to reach the pedals. Note the Saitek Combat Rudder Pedals installed on the #F321, but you can also use the Saitek Cessna Rudder Pedals. I originally designed the #F321 project around the early model Saitek Pro Flight Rudder Pedals, witch still work well. You can use the CH Rudder Pedals but they are difficult to use because they are narrow and makes it harder to straddle the center joystick stand.

Center Joystick or Side Joystick?

Check out Craig’s pictures in the new Customer Gallery 2. Craig created one of the most attractive DIY Flight Sim completions. He built the #F321 with a removable center stand and with side stands on both sides. He can now switch between a traditional center joystick and a HOTAS side joystick. Notice the D-ring fasteners he uses to attach the center stand.

DIY Flight Sim Completions: Modified DIY Roll-Away Flight Sim

Rob modified the #E420 DIY Roll-Away Flight Sim to match his needs and style of flying. He added an expanded mid-shelf for the Saitek yoke and throttle quadrant and a swing-out platform for the compact mini-keyboard. Also note the additional platform for the mouse and mouse pad. The Roll-Away Flight Sim frame is wonderfully mobile because Rob installed four castering wheels to it. Two of the castering wheels can be locked in place so he can comfortably use the rudder pedals without worrying about the frame rolling away. You should always use rudder pedals, they are an important part of DIY Flight Sim completions.


Beautiful painted PVC frame for HOTAS flight controls by Craig

Triple Screen Flight Sim at the National Airline History Museum

I built a flight simulator and donated it to a local aviation museum. The museum guests enjoy a hands-on experience because they get to fly the simulator. Some people say the Triple Screen Flight Sim at the National Airline History Museum is their favorite part of the museum.

National Airline History Museum

The NAHM is the only airline-specific museum in the United States. The museum has several airliners but the Lockheed Constellation is the crown jewel of the collection. The Triple Screen Flight Sim allows visitors to fly a simulated Constellation just like the one in the museum.

The Triple Screen Flight Sim at the National Airline History Museum is also used as a introduction to general aviation. Visitors receive a flight “lesson” as they fly a simulated Cessna 172. A museum volunteer personally teaches some basic flight maneuvers while the guest tries them in the sim. The simulator is such an excellent teaching tool because you can pause the flight to answer questions or explain something in more detail.


Triple Screen Flight Sim

The pictures here show a stock version of the DIY Triple Screen Flight Sim at the National Airline History Museum. My DIY video and instruction manual show you how to build this same project from PVC pipes, lumber, and foam insulation. I installed a Saitek Pro Flight yoke, throttle and rudder pedals in this particular project. The painted keyboards are stock versions of the DIY Keyboard Mod: Airliner project.

The DIY Triple Screen Flight Sim is the perfect addition to the Sky Lounge at the NAHM, and it would be a perfect addition to your home.

Kickstarter Fund-Raiser

This project was the first successful flight simulator project ever funded through Kickstarter. It is truly historical. The fund raising campaign paid for the supplies and materials I needed to build the project from scratch. After I built it, I brought it to the Kansas City Maker Faire and then to the NAHM.


The Triple Screen Flight Sim at the National Airline History Museum

5 Modifications for a DIY HOTAS Chair for Virtual Reality and More

The DIY Side Joystick Frame is one of my most popular projects, and it’s very versatile. Even though I published this project 6 years ago, the design has stood the test of time. Yet, as great as it is, I have recently made a few modifications to the design that you might find helpful for your project. Read on for 5 Modifications for a DIY HOTAS Chair for Virtual Reality and More.

A True HOTAS for your Flight Sim

The DIY Side Joystick Frame, Item #F311, makes a true HOTAS (Hands On Throttle And Stick) possible for your flight simulator because the project also includes rudder pedals. True pilots use rudder pedals, not joystick twisty grips so always remember that. I originally envisioned the F311 as useful primarily for jet fighter simulators, but now, many customers are using it for space sims like Elite Dangerous and Star Citizen.

Use the F311 in combination with a Virtual Reality headset. Remember, when you wear a VR headset, you can’t see your keyboard any more and any functions you have assigned to your keyboard keys are literally out of sight. You can also use the F311 with a traditional multi-monitor setup like the DIY Deluxe Desktop Flight Sim (Item D250). The F311 is delightfully versatile and useful. Use these 5 Modifications for a DIY HOTAS Chair to update the F311.


5 Modifications for a DIY HOTAS Chair

I made five main modifications to adapt the F311 Side Joystick Frame for my current requirements. None of these modifications are difficult. If you can build the F311 in the first place, you can certainly make these modifications or include these changes during the initial build.

1. Wider Side Stand Platforms

First of all, I installed wider side stand platforms, cut from 1×8 boards. To be clear, the PVC pipe side stands did not change, just the the boards that attach to the top of the stands. I topped the side stands with 1×8 boards, 12″ long. The wider boards give you room for a trackball mouse next to the joystick and give you room next to the throttle to set down your phone or whatever. Most importantly, you can place the controls in a more ergonomic location. This means placing the joystick and throttle in line with the chair’s arm rests. This is so important! Place the joystick and throttle so that your arms sit straight on the chair’s arm rests. This will allow you to fly comfortably for hours.

In addition, I attached the joystick and throttle with wood screws instead of Velcro. I also trimmed the inside corners of the 1×8 boards by 1″ and sanded the edges so my legs wouldn’t get caught on the corners.

2. Longer floor boards

I use the Saitek Pro Flight Cessna Rudder Pedals, and I really like them, but they have to be positioned further away from the pilot. The rudder pedals attach to the Floor Boards with Velcro, but the original boards were too short. Therefore, I replaced them with two 1×6 boards, 22″ long. You might not need to make this change for your rudder pedals.

3. Raised center stabilizer

I also raised the center stabilizer bar to allow room for the Saitek Pro Flight Cessna Rudder Pedals. Specifically, the back of my ankles banged into the stabilizer bar, so I had to move it. It is now 6.5″ higher than it was before.

4. Self-drilling screws

I now use self-drilling screws in everything I build. Back in 2010 when I designed this project, I used Liquid Nails Project Glue to attach all the PVC pipes and fittings. This allowed for some cost-savings, but self-drilling screws are far superior. The screws allow for a simpler assembly with no overnight dry time. In addition, the screws create a much stronger frame. Lastly, you can remove the screws later if you decide to modify the frame. I absolutely recommend using 1/2″ self-drilling screws to build DIY Flight Sims from PVC pipe.

Video: Learn more about self-drilling screws for DIY Flight Sim projects

5. Cup holder

Don’t fly thirsty! I include a cup holder with almost every project I design. The cup holder is located next to the throttle and it’s easy to find it, even when wearing a VR headset. I use these inexpensive cup holders from Amazon.

If you’ve already built the DIY Side Joystick Frame, Item F311, or if you haven’t built one yet, these 5 Modifications for a DIY HOTAS Chair can enhance your home flight simulator experience for years to come.


5 Modifications for a DIY HOTAS Chair

Prepar3D with Triple Screens and More

What you’re seeing here is Lockheed Martin Prepar3D with triple screens and more. The software is Prepar3D version 3.4, the DIY Deluxe Desktop Flight Sim, the DIY Side Joystick Frame, Air Manager is running the instruments on the 4th display. The installation of P3D was straightforward and you’re looking at a stock installation with no add-ons (yet).


The three main displays are inexpensive 32″ HDTVs connected to a single Nvidia GeForce mid-level graphics card. The system specs are at the end of this blog post.

Prepar3D Installation

P3D recognized the Saitek X52 Pro and properly assigned its functions, which was very nice. For other flight simulator programs, assigning the controls correctly is an awful awful chore, but not for P3D. This is the first flight simulator software I’ve ever seen that correctly identified rudder pedals and successfully assigned them to the correct function. Including the toe brakes. So, kudos to Lockheed Martin. They also build spaceships, by the way. Just so you know.

It’s easy to combine the DIY Side Joystick Frame, (item 311), with the Deluxe Desktop Flight Sim project. I’m using the Saitek Pro Flight Cessna rudder pedals. Great rudder pedals. I updated the drivers for my Saitek switch panels that enabled them to work with P3D. That was easy.

You’ll notice that nothing here is expensive or exotic… or even new. For example, I’m using a second-hand computer to display the flight instruments. The second computer is so old it’s running Windows Vista.

Air Manager is the software that generates the flight instruments and it communicates through the local network connection with P3D on my primary computer. Air Manager also works with X-plane and Flight Simulator X.

System Specifications

DIY Deluxe Desktop Flight Sim, item #D250
DIY Side Joystick Frame, item #F311
Primary computer: Powerspec B634 with Intel i5-3450
Nvidia GeForce GTX 950 SSC
Windows 7, 64 bit
Saitek X52 Pro Flight HOTAS controls
Saitek Pro Flight Cessna rudder pedals

Secondary computer: Dell Inspiron 530s with Pentum E2200
Windows Vista

.

Prepar3D with triple screens and more