Home Flight Simulator for Sale, 7 Ways to Choose

7 Ways to Choose the Best DIY Flight Sim | Home Flight Simulator For Sale

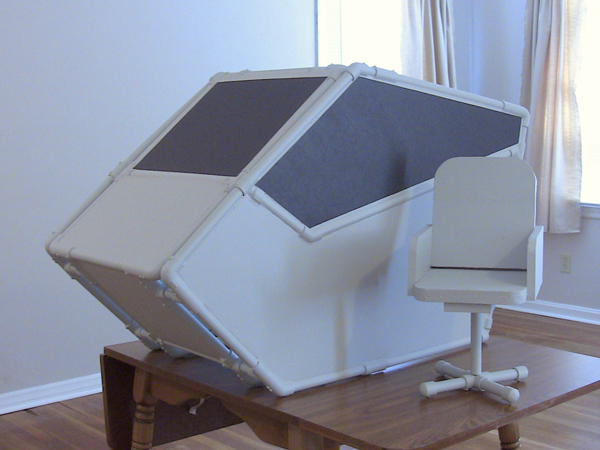
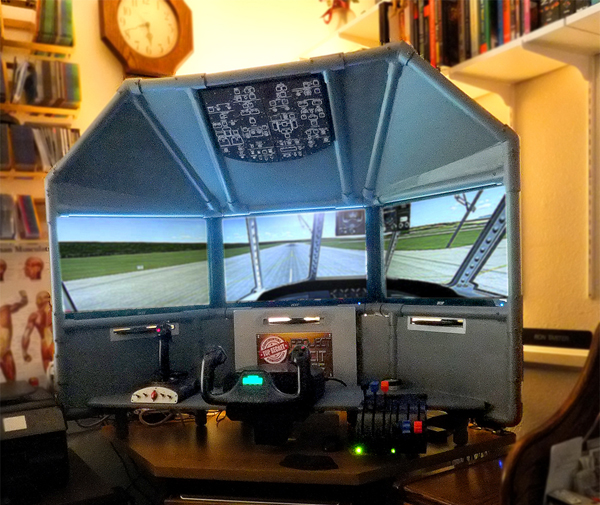
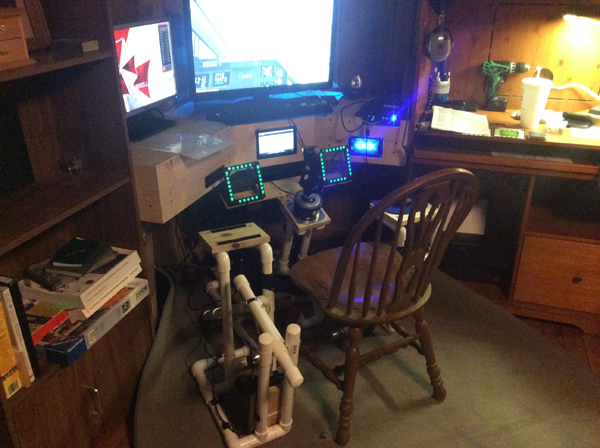
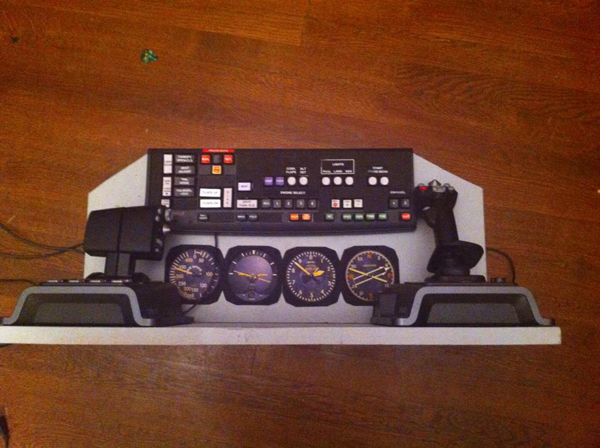
You’re looking for a home flight simulator for sale and you come across two similar DIY projects. How do you tell the two apart? The DIY Deluxe Desktop Flight Sim and the DIY Triple Screen Flight Sim are similar, but there are some significant differences too. Here are 7 ways to choose the best multi-screen DIY Flight Sim for you.

Note: for brevity, you’ll see me refer to the projects by their item numbers.
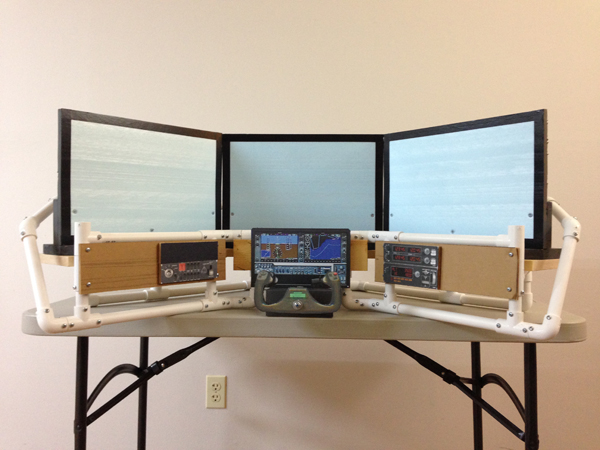
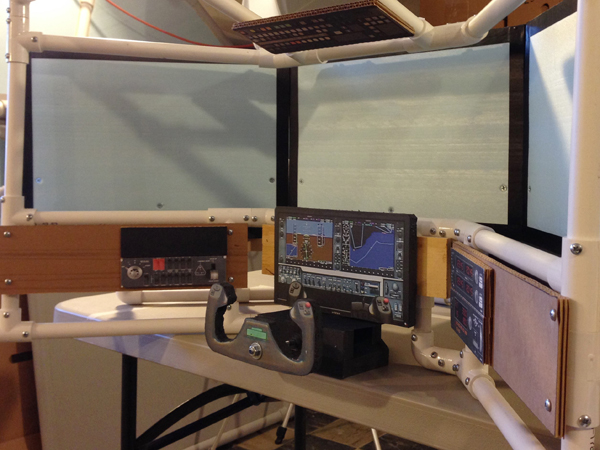
Item #D250: DIY Deluxe Desktop Flight Sim
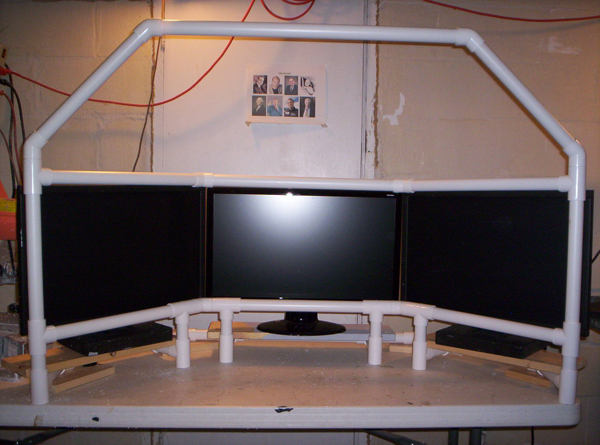
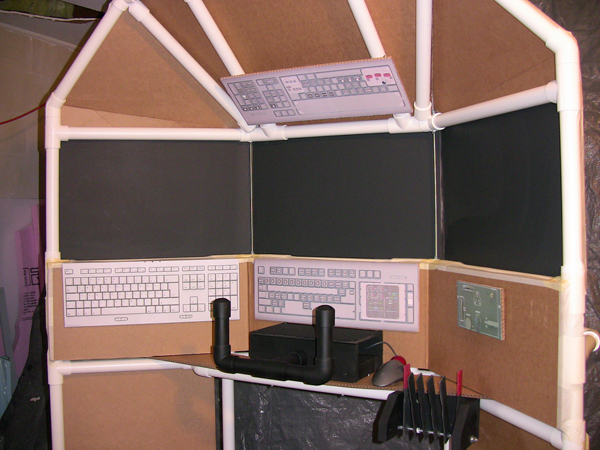
Item #T440: DIY Triple Screen Flight Sim

1. Adaptability

The D250 Deluxe is much more adaptable than the T440 Triple Screen.
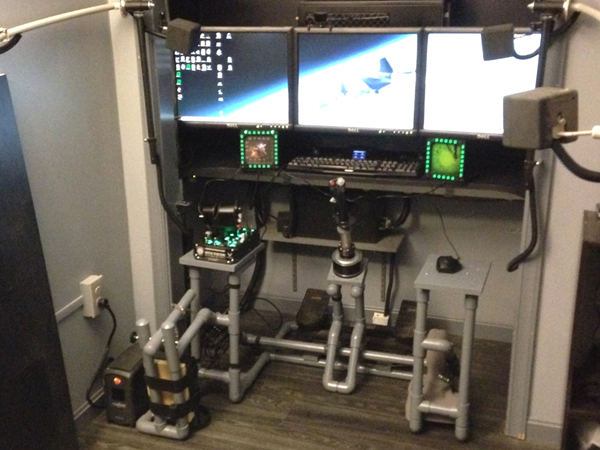
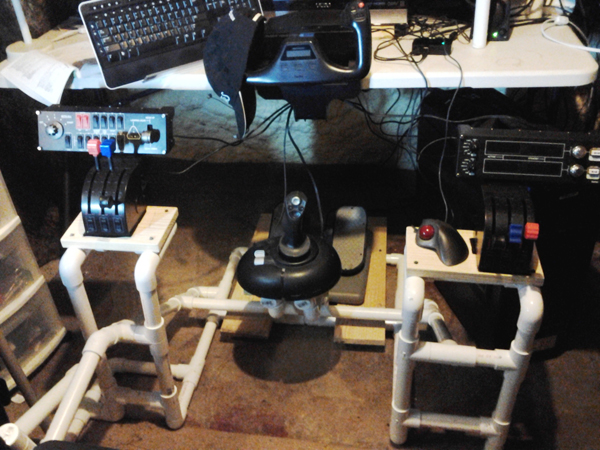
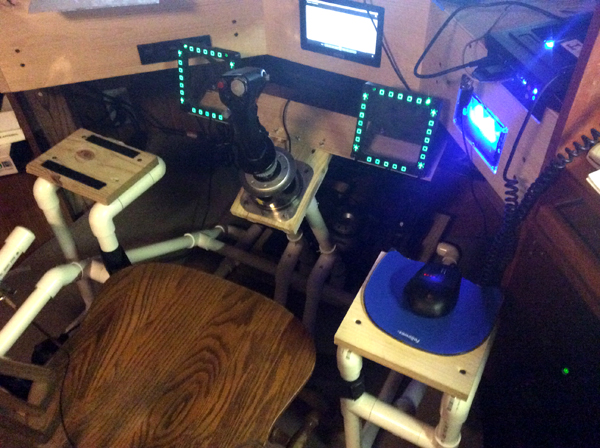
D250: You can build the D250 with a yoke and throttle quadrant, or pair it with one of the DIY floor frames so you can use HOTAS style controls or even a helicopter collective. Match the D250 with the #F311 Side Joystick Frame, the #F321 Center Joystick Frame, or the #F331 Easy Helicopter Collective.
T440: On the other hand, the T440 is great with a yoke and throttle quadrant as originally designed. But if you want a joystick and side throttle, you would need to invent some modifications.


2. Recent Work

The D250 instructional video is much newer than the T440.
T440: I produced the T440 video in 2011 as a part of a successful Kickstarter campaign. I had a very short amount of time to design and build the project and a short time to film, edit, and publish the video. It’s still a great project though.
D250: I produced the D250 video in 2016 so it has better lighting, better sound, I used a better camera, and I had more experience editing than I did in 2011.
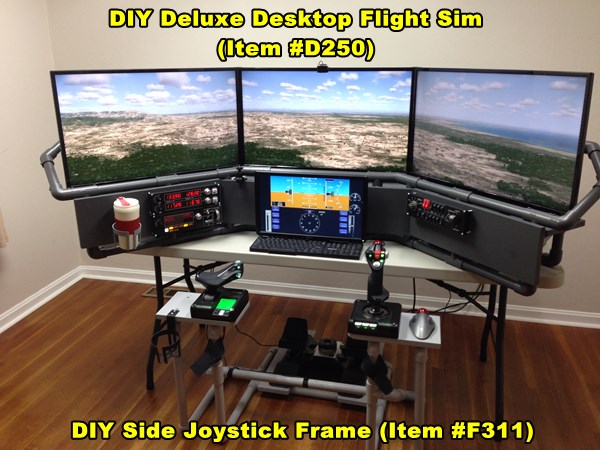
 

Deluxe Desktop Flight Sim with Side Joystick Frame

3. Displays

The D250 has larger screens.
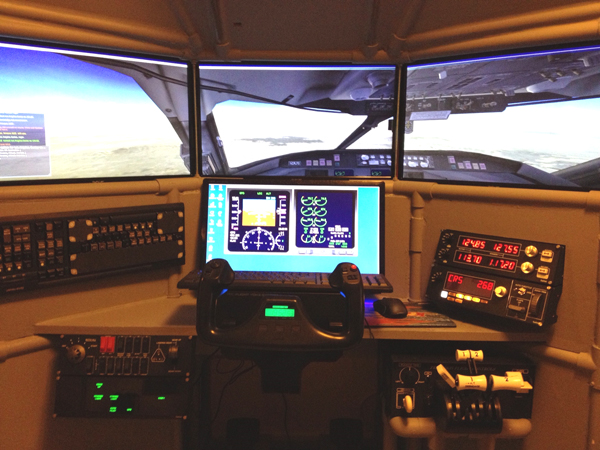
D250: I used 32” HDTVs for the three main displays. The combined screen width is over 6 feet wide.
T440: I used 24” monitors for the three main displays. The combined screen width is less than the D250, but still impressive.


4. Keyboard Modification

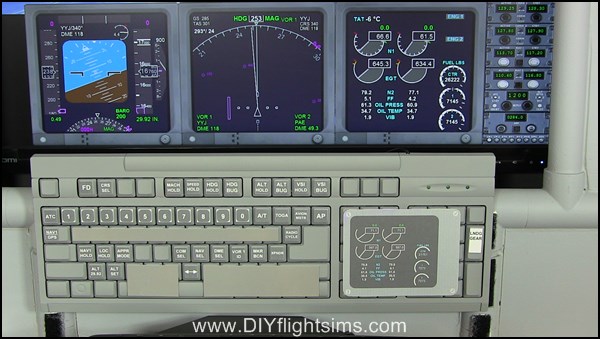
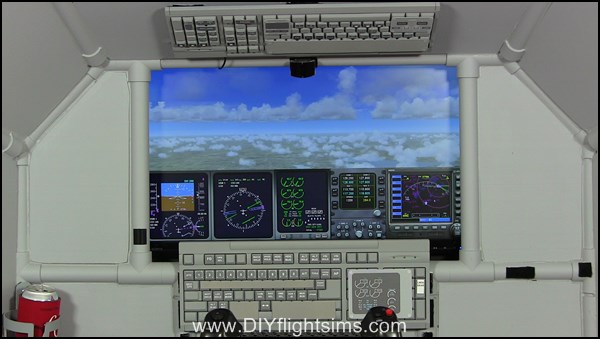
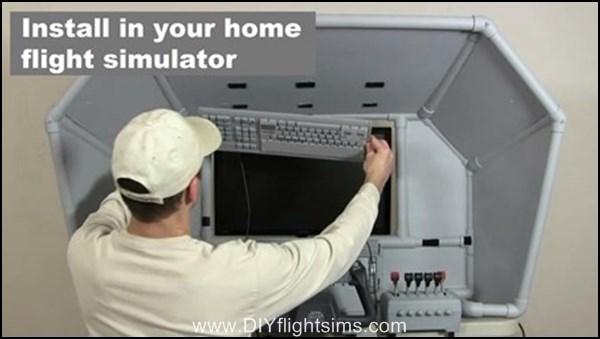
The T440 was designed to have an overhead panel like an airliner. For this reason, the T440 Triple Screen bundle includes the DIY Airliner Keyboard Modification. The D250 doesn’t have a place for an overhead panel.
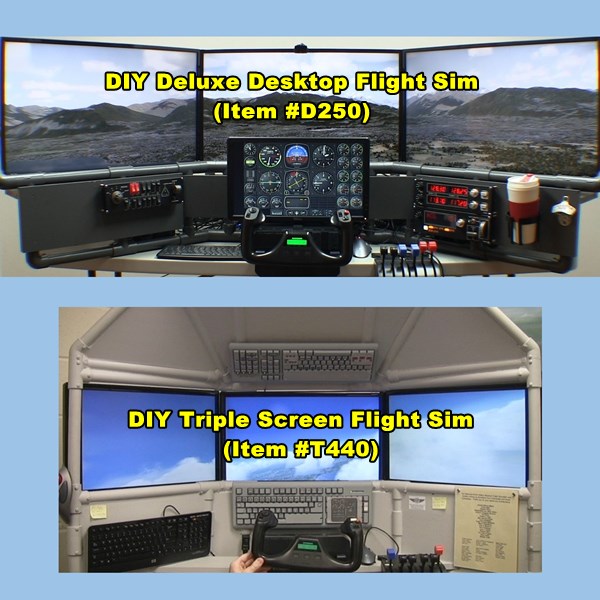
 

Home flight simulator for sale, how to choose the best
Home flight simulator for sale


5. Styrofoam

The T440 has Styrofoam, the D250 does not.
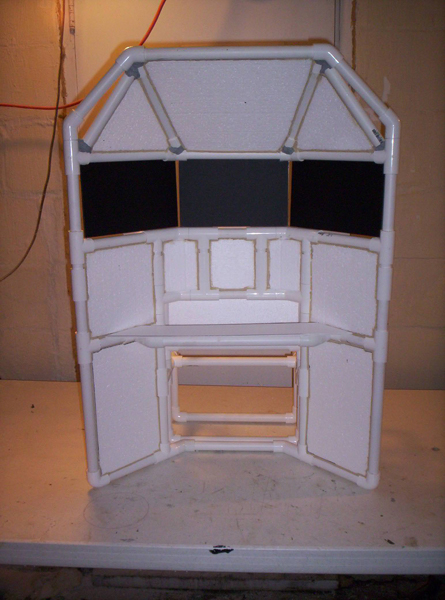
Builders use ½” styrofoam sheets when constructing the T440 Triple Screen project. Styrofoam may be cheap or expensive depending on where you live in the world.


6. Instrument Panel on a 4th Monitor

T440: You will see several builders in the Customer Gallery added a 4th monitor to display the flight instruments. I didn’t include anything about that in the instructions, those clever builders modified their projects on their own.
D250: I included instructions to add an optional 4th monitor for the flight instruments.
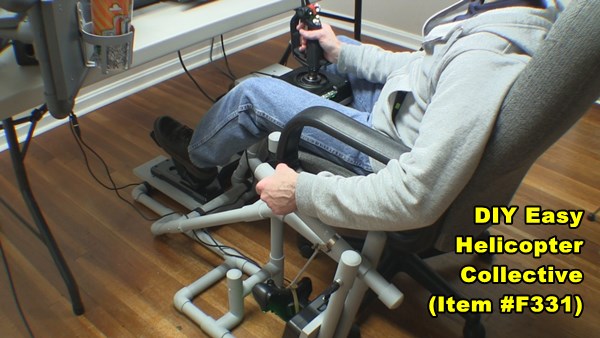
 

DIY Easy Helicopter Collective
DIY Easy Helicopter Collective paired with the Deluxe Desktop Flight sim


7. Ease of construction

I think the D250 is easier to build than the T440.
D250: The project doesn’t require gluing any Styrofoam panels in place. But the D250 does include 1×8 boards. If your saw won’t cut 1×8 boards, you’ll need to get that done at the store when you buy them.
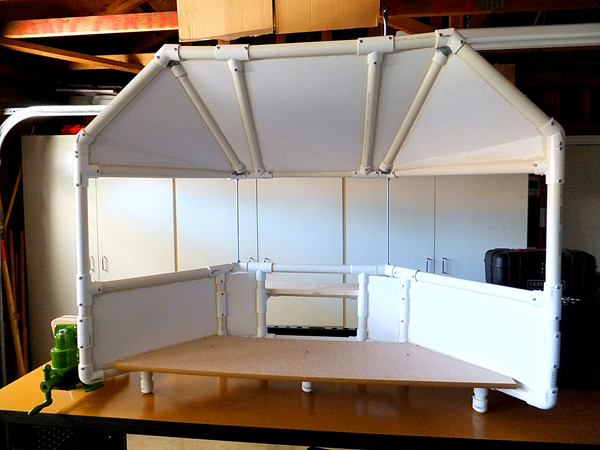
T440: The project doesn’t require you to cut any lumber wider than a 1×6. You do cut Styrofoam with a utility knife, but it is not difficult just a little time-consuming.


Home Flight Simulator for Sale

You have a lot of choices when it comes to your home flight sim project. I hope this comparison helps you.


3 Suggestions for your mobile flight simulator

Three Suggestions for Your Mobile Flight Simulator

I was contacted by a representative from a giant, international, airline manufacturer who wanted to build a mobile flight simulator to take to events and schools. You may recall I transported the DIY Triple Screen Flight Sim and the DIY Roll-Away Flight Sim to several events. His team had an empty shell from an actual airplane cockpit, with the real controls, but no instruments or much of anything else. Their task was to make the cockpit shell into a mobile flight simulator. Maybe you have had this idea too.

The first major hurdle was to make the real controls work with the flight simulator software on a PC. And that’s when they contacted me for advice. This is what I told them…

Three Suggestions for Your Mobile Flight Simulator

I have a few suggestions for your team regarding this mobile flight simulator. To start off, I believe many of us in the industry tend to regard a mobile flight simulator on an informal spectrum with “more realistic” on one end and “less realistic” on the other. As I understand your need, you will be transporting this simulator to events, setting it up for use by attendees, and then moving the simulator again. For a mobile flight simulator such as this, I have discovered realism is less important than reliability. It either works on the day of the event or it doesn’t. Therefore, expo simulators fall into a binary, more than a spectrum from an operational standpoint.

So with that in mind, I have three suggestions.

Suggestion #1: Hack Retail Products

The first suggestion is to purchase a retail flight sim control yoke, and hack it. By “hack” I mean you remove the interior components and incorporate them into the airplane cockpit that you showed me in the picture. Everything you need for your mobile flight simulator is inside a retail flight sim yoke. The yoke contains potentiometers that measure pitch and roll deflection, so you can integrate those components into the actual controls on your airplane. The potentiometers are already wired into a circuit board and so is a USB cable. When you plug in the USB cable to a PC, it will simply recognize the controller and install the drivers. You can then use any flight simulator software you want.

You could do the same thing with retail rudder pedals and a throttle quadrant.

Suggestion #2: Use Retail Products

In my experience, it’s a logistical challenge to safely transport and set up a mobile flight simulator. It is possible some part of your simulator may not work correctly even though you were very careful and were prepared for the event. If you can’t get it to work, the whole day is wasted.

My other suggestion is to simply install retail off-the-shelf flight sim controls in your airplane cockpit. This looks decidedly less realistic, but you gain an extra layer of reliability because you can have spare parts in reserve. For example, if the yoke isn’t working on a particular day, you can simply switch it out with a new yoke. The same is true with the rudder pedals and throttle quadrant.

Suggestion #3: Get Running Now, Progress Later

Finally, third option would be to use both strategies. Perhaps you start with Suggestion #2, which is quick and simple, and then maybe a year later move up to Suggestion #1, which is more complex but looks more professional. This approach gets you up and running for early success and also provides a path to improvements. Later, you and your team will have more experience with the flight simulator hardware and software. Therefore, it will be easier for you to re-install the real controls and get them running with the PC. Your team and stakeholders will feel good about the progression of the project.

I hope these suggestions are helpful. I’m interested in knowing how your flight simulator turns out so please let me know what you ultimately decide to do.

DIY Triple Screen Flight Simulator update

Free Update: DIY Triple Screen Flight Simulator

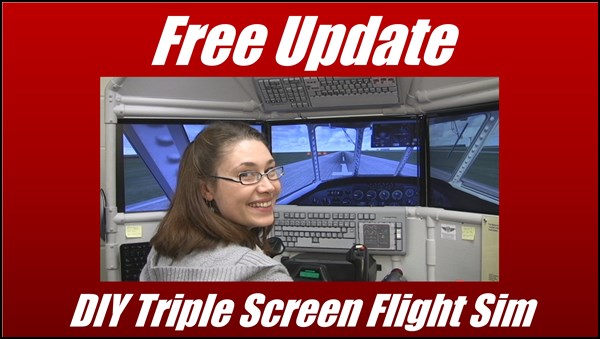
Roger Dodger Aviation’s defining project is probably the Triple Screen Flight Simulator, item #T440. This project has sold well since it was published in 2011. In addition, hundreds of people have flown the sim at the KC Maker Faire and at the National Airline History Museum. I’m proud to announce this DIY project is now available as a online e-learning course. If you already purchased the DIY Triple Screen Flight Simulator project as a download, you will be upgraded to the online course for free.


What is the DIY Triple Screen Flight Simulator Update?

The new version is the same content, but in an online e-learning format. This means the student sees the video clip, instructions, pictures, and diagrams for each particular step. You no longer have to look through an hour long video or 100 page manual to find something. Furthermore, you can access the course on mobile devices like smart phones and tablets as well as standard desktop and laptop computers.


Build with materials from a hardware store
DIY Triple Screen Flight Simulator online course


How do You Get the Update?

If you’ve already purchased item T440 DIY Triple Screen Flight Simulator, the new update is FREE. Just email me at DIYflightsims@rogerdodger.net to get the new updated version. In addition, tell me what email address you used so I can look up your order. Then, I’ll send you a coupon code that allows you access to the update for free. Also, you get free access to the Builder Academy where you can learn all the basic skills for building DIY Flight Sim projects.


DIY Triple Screen Flight Simulator free update


What About the Keyboard Mod?

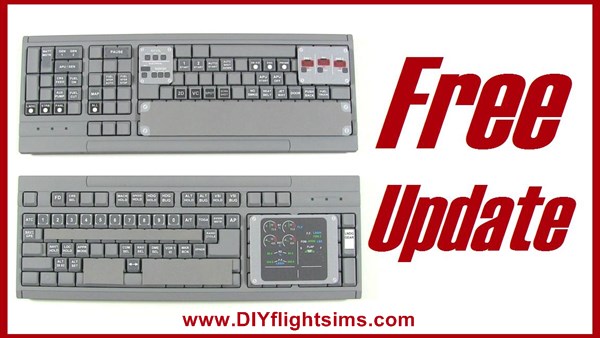
You get it too! The original DIY Triple Screen Flight Simulator project always came with the DIY Airliner Keyboard Mod project, item #K140B. The reason was that it was so easy to install an overhead panel in to this type of cockpit. The keyboard mod is also in an online e-learning format.


Free Update

DIY Flight Sim Keyboard Mod Update

DIY Flight Sim Keyboard Stickers and More

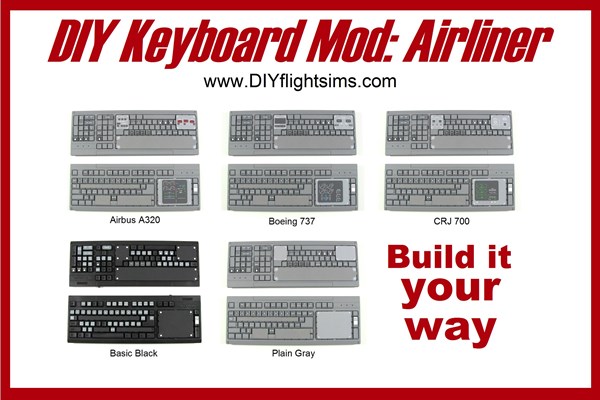
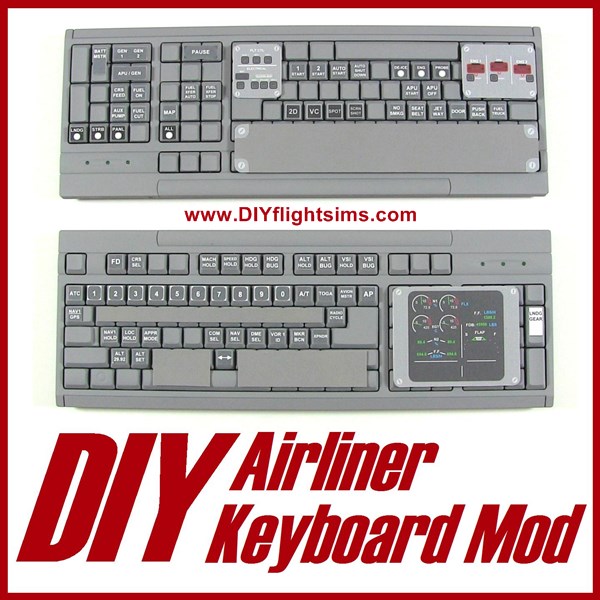
My finest keyboard modification project by far is the DIY Airliner keyboard Mod, item #K140B. This project replicates
an overhead panel and Mode Control Panel from popular modern airliners. This product is more than simple flight sim
keyboard stickers, this is a comprehensive DIY project complete with an online tutorial. If you have this product, you
get the update for free.


DIY Airliner Keyboard Mod, build it your way


What is the Update?

The new version is in a totally online format. This means that you see a video clip, instructions, pictures, and
diagrams for each step. As a result, the new course is a much improved, learner-centered presentation. The printout
flight sim keyboard stickers are also included. In addition, you can access the course on mobile devices like tablets
and smart phones as well as the standard desktop and laptop computers. See the free trial version here.


How do you get the Update?

It’s easy! If you’ve already purchased item K140B DIY Airliner Keyboard Mod, the new version is FREE. Simply email
me at DIYflightsims@rogerdodger.net to get the new updated version. In addition, tell me what email address you
used so I can look up your order. Then, I’ll send you a coupon code that allows you access to the new version for
free. Don’t forget, you also get free access to the Builder Academy. Learn all the basic skills for building a DIY Flight
Sims project.


More about the DIY Airliner Keyboard Mod

I first created this product in 2008, and it has been a great help to many home cockpit builders. Consequently, I’ve updated the project several times. I also included it with the purchase of the DIY Triple Screen Flight Sim, item #T440. You can see a preview of the newest version here and also check out the demo video below…


Maker Faire Kansas City

Flight Simulator at Maker Faire: Video

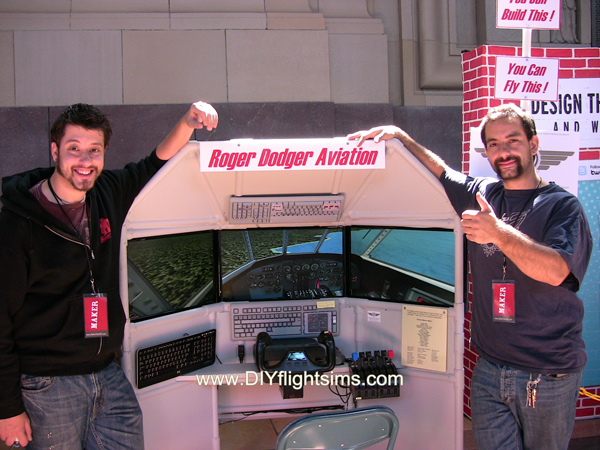
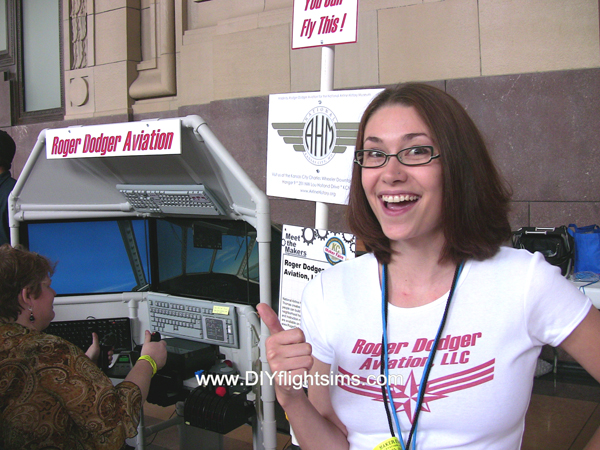
A Maker Faire is a festival of invention and creativity. In the words of Make Magazine it is, “an all-ages gathering of tech enthusiasts, crafters, educators, tinkerers, engineers, science clubs…” You would totally expect to find a DIY Flight Simulator at Maker Faire. We didn’t just bring one, we’ve brought four flight sims to Maker Faire so far. I say “we” because several friends helped me. There’s no way I could have done this alone.


DIY Triple Screen Flight Sim at Maker Faire

I funded the development of the T440 Triple Screen Flight Sim with a successful Kickstarter Campaign and I barely finished it in time for Maker Faire. Transporting a flight sim of this size was a terrible logistical challenge, but we did it. The T440 worked perfectly and it was a huge thrill for me to see a crowd of people around the simulator all weekend. So many people, young and old got to try it out.

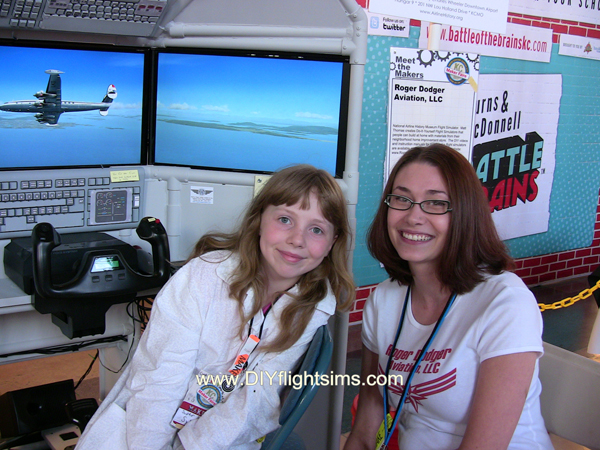
Immediately after Maker Faire, we loaded the T440 into a Uhaul truck and took it to the National Airline History Museum, where it still operates today as a hands-on attraction for the museum guests. I created a complete instruction manual and video for this project so you can build one for yourself. This is one of my most popular products.

My goal was to deploy a flight simulator at Maker Faire and I did it, but it was way too difficult to transport for just a weekend event. This experience at  inspired me to develop a much more mobile flight simulator.

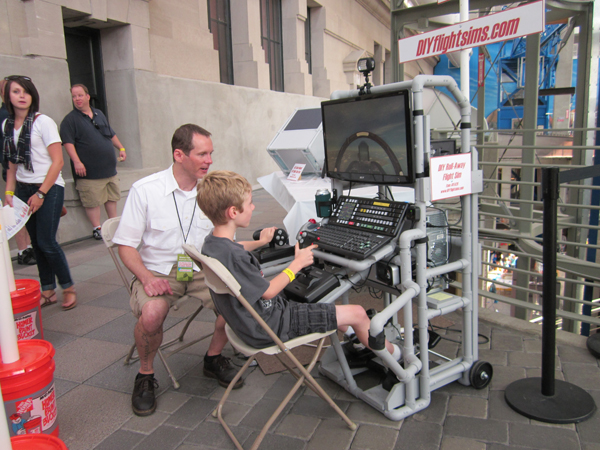
DIY Roll-Away Flight Sim: Three Versions!

Problem: it was too difficult to transport a flight simulator at Maker Faire. Solution: I developed a much more mobile flight simulator that could be moved as a single unit… on wheels! A Roll-Away Flight Simulator! The first version of the E420 Roll-Away was basically a HOTAS set up to fly a jet fighter. The kids at Maker Faire loved it and is was super easy to transport. I was so pleased with this that I brought two Roll-Away Flight Sims to the next Maker Faire. The second version had a yoke and throttle quadrant and later became the E430C. You can build either of these two types of Roll-Away Flight Sims with the instruction manuals and videos I created for you.
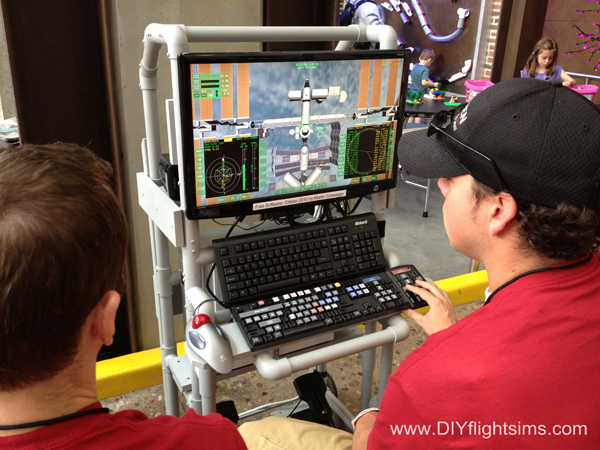
The third version of the Roll-Away Flight Sim was a specialized type I created for kids at a science camp. I later brought it to Maker Faire. This version had no flight controls, only buttons to control a simulated spaceship. We used Martin Schweiger’s Orbiter as the demonstration software. The simulator is very realistic and teaches you a lot about Newtonian physics when controlling a spaceship in zero gravity.


Big Help from Friends

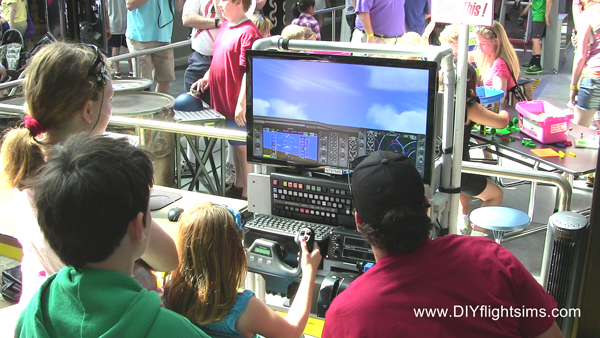
Notice there are several people in these pictures that are not me. I could not have done this alone. We helped hundreds of people try out these flight simulators, and had a lot of fun while we were at it. Many thanks to Aaron, Nick, Jim, Lindsy, Julie, Joe, Jason, Shannon, Michael, and Jennifer!

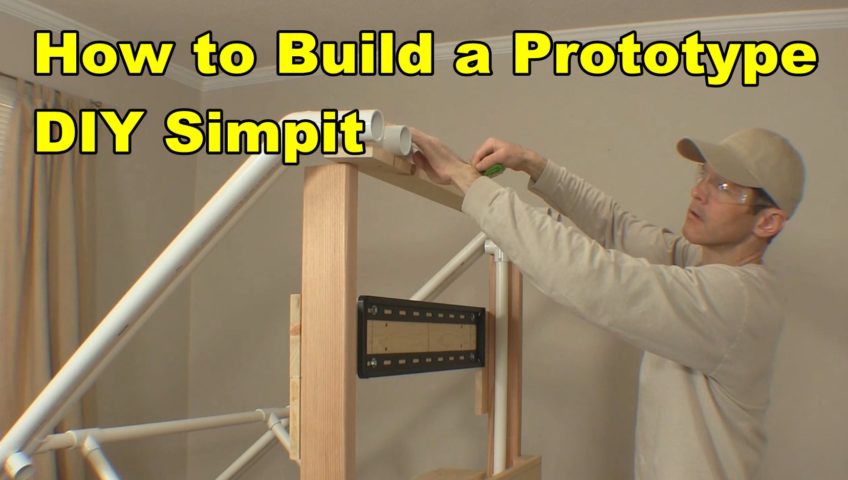
How to Build a Prototype DIY Simpit

How to Build a Prototype DIY Simpit

One of the common questions I get is about altering the DIY Flight Sim designs. Most builders modify the designs in some way to match their specific needs or equipment. For examples, take a look at Customer Gallery 1 and Customer Gallery 2 and notice how no two Simpits are alike. Once a builder deviates from the plans, the project becomes a prototype DIY simpit. There is no way I can predict how people will modify my DIY Flight Sim projects, so that is why I use building materials that are inexpensive and easy to use. Don’t be scared! Prototyping is a wonderfully creative process that can give you real satisfaction with your project.

What Does “Prototype” Mean?

You don’t really know if a flight sim design is going to work until you build it in real life. Really! If some anonymous person on a forum says an idea will work or not work, they don’t really know, because anyone can type words on a screen. You only gain true knowledge by building a DIY simpit in real life. That is prototyping.

So when someone asks me if a design modification will work, I’m very cautious about my answer for several reasons…

  • I don’t know if my understanding of their message matches what they’re imagining.
  • I don’t know if a proposed modification will require an additional structural reinforcement.
  • I don’t know someone’s skill level. Have they built things before, or is this the first time?
  • I don’t know if they have adequate tools. Are they building in a workshop or a dorm room, etc?

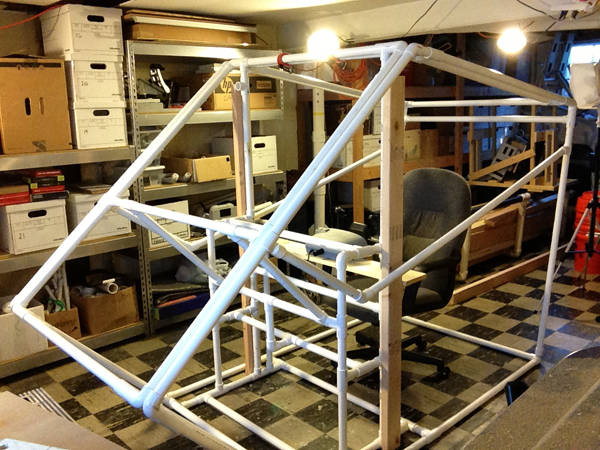
Prototyping means you try your idea, then adjust it and try it again, then adjust it and try it again, and keep at it until you are happy with your work. Fortunately, PVC pipe is a wonderful material for prototyping a DIY simpit (more about that below).


Scale models

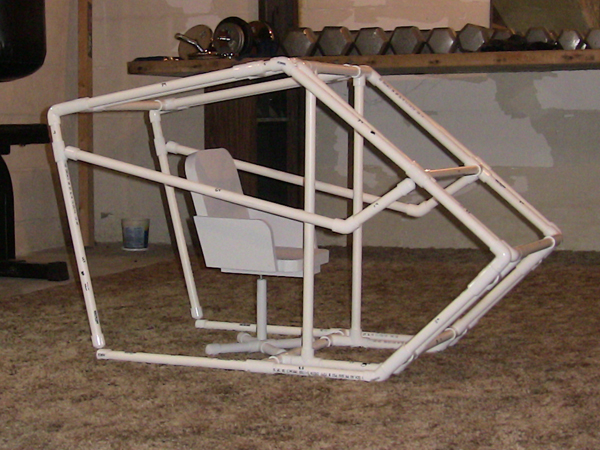
When I am designing large DIY simpit projects I make a scale model of my idea. As a result, this helps me find any major flaws and get a feeling for what it will look like before I build it full size. I use 1/2″ PVC pipe when I build a scale model. The smaller pipe saves me money because I use less 1″ pipe when I later build the full size prototype.

I also make scaled down controls, displays, and switch panels. This isn’t Computer Aided Design, but I still call it CAD: Cardboard Aided Design.


7 Steps for Prototyping a DIY Simpit

So how do you modify a DIY Flight Sim project if you need to scale it up or scale it down? Here’s an example. Let’s say you want to build the D250 Deluxe Desktop Flight Sim. However, the project is built around 32″ HDTVs but you want to use 27″ monitors. How do you scale this down?

  1. First of all, buy an extra length of pipe in case you need it (PVC pipe is cheap)
  2. Scale with a percentage.  27″ is about 16% smaller than 32″ Here’s the math: 32 – 27 = 5 and then 5 / 32 = .156, which is about 16%
  3. Decrease the measurements of pipes by that same percentage. Only scale the pipes adjacent to the displays, for now.
  4. Cut the pipes and assemble them with the PVC fittings. Start with just the pipes adjacent to the displays. Observe if the frame fits well compared to the displays or if you need to make changes.
  5. If some pipes are a little too long, remove them and cut them shorter. If some pipes are too short, that’s why you bought extra pipe. It’s easy to assemble/disassemble the PVC pipe frame to test different frame dimensions.
  6. Once you have pipe lengths that you are happy with, secure the PVC fittings with self-drilling screws.
  7. Scale the rest of the pipes to fit with the part of the frame you changed. This is much easier now that you have a starting point.

Innovative DIY Cockpit and Flight Simulators in the Customer Gallery

I’m always impressed by the many ways my customers modify the DIY Flight Sim projects to meet their needs. It’s one of the best things about this gig. Customers change the home cockpit plans a little or a lot depending on their needs and resources. Check out these innovative DIY cockpit solutions from the Customer Gallery.

Rich’s Quad Screen Flight Sim

My customer Rich built a T440 DIY Triple Screen Flight Sim and installed an additional screen for the flight instruments. This creates a stunning degree of realism because your instruments are positioned close and you focus your vision outside to see the surrounding environment. Similarly, I demonstrated a quad display setup with the DIY Deluxe Desktop Flight Sim and Air Manager powering the instruments.

You can see Rich added four Saitek switch panels and the K140 DIY Airliner Keyboard Mod. Do you think that is a Go Flight TQ6-ADV throttle quadrant? It’s not. It might be two Saitek throttle quadrants with after-market replacement handles attached. You can find such handles from FlightSimPM and others for your own innovative DIY cockpit.

Quad screen flight sim with switch panels, throttle quad by Rich

Thrustmaster Warthog HOTAS for Flight Sims

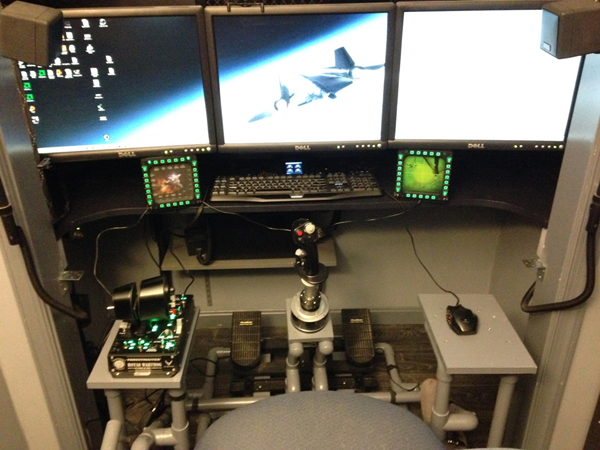
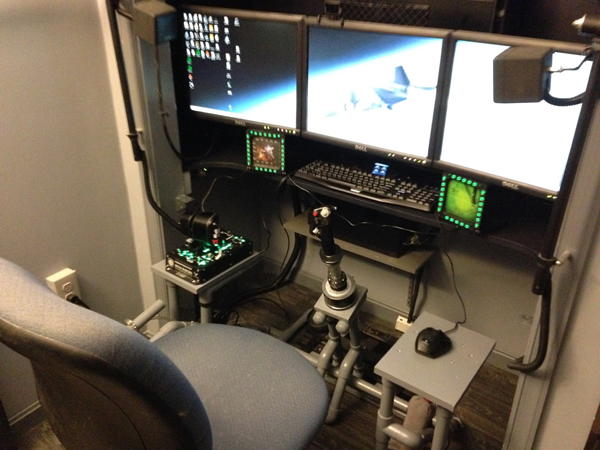
You can also see more usage of the Thrustmaster Warthog joystick and throttle with these projects. Here George modified the F331 DIY Easy Helicopter Collective to also include the Thrustmaster throttle. He can use it to simulate airplanes or spaceships in its shown configuration. He can also relocate the throttle to a platform below the collective handle and effectively simulate helicopters. Here is another example of flight sim builders buying quality hardware to equip their creations. Most of all, he built the whole simulator in a closet and included triple screens and Thrustmaster Cougar Multi-Function Panels (MFPs) for this innovative DIY cockpit.

Home flight sim helicopter collective, triple screens by George

A Very Special Triple Screen Flight Sim

Customer Ron built his T440 Triple Screen Flight Sim so it would fit on his desk. Keep in mind, the original plans are for a self-standing frame. Ron was able to modify the frame extensively so it fit neatly on his corner desk. He also added the Saitek yoke and throttle quadrant that we see so often in home flight simulators. Finally, the virtual cockpit you see there is from a Lockheed Constellation which is exactly what we use in the flight sim I built for the National Airline History Museum.

Desktop triple screen flight sim by Ron

More Innovative DIY Cockpit Solutions

Enjoy these other customer projects that I recently added to the Customer Galleries. More multi-screen projects and more modified frames for HOTAS and helicopter collectives. In addition, I have many more pictures to add to the gallery and I hope to do that in the coming weeks. Happy Landings! 

If you like this post, please leave a comment. That will enable the mystical internet algorithms to spread it to more people.


Triple Screen Flight Sim at the National Airline History Museum

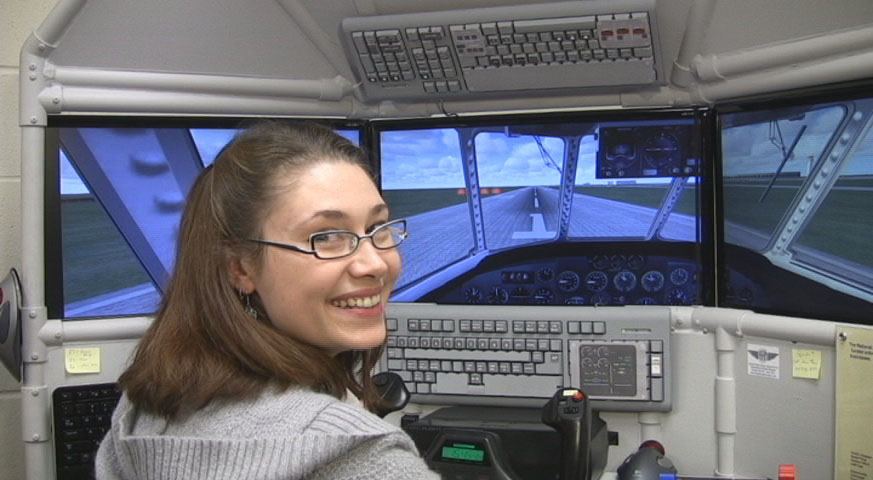
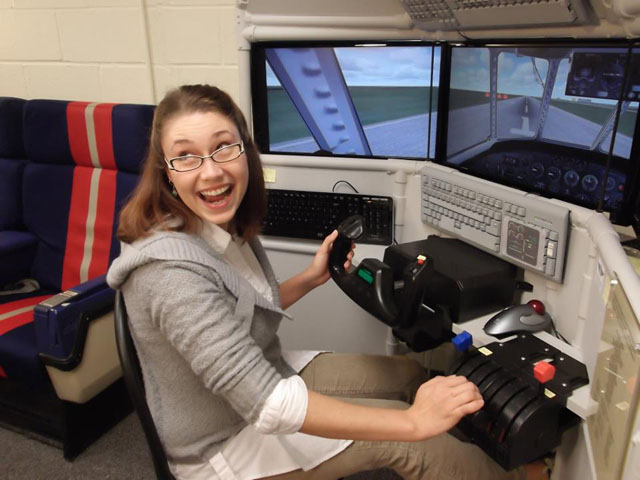
I built a flight simulator and donated it to a local aviation museum. The museum guests enjoy a hands-on experience because they get to fly the simulator. Some people say the Triple Screen Flight Sim at the National Airline History Museum is their favorite part of the museum.

National Airline History Museum

The NAHM is the only airline-specific museum in the United States. The museum has several airliners but the Lockheed Constellation is the crown jewel of the collection. The Triple Screen Flight Sim allows visitors to fly a simulated Constellation just like the one in the museum.

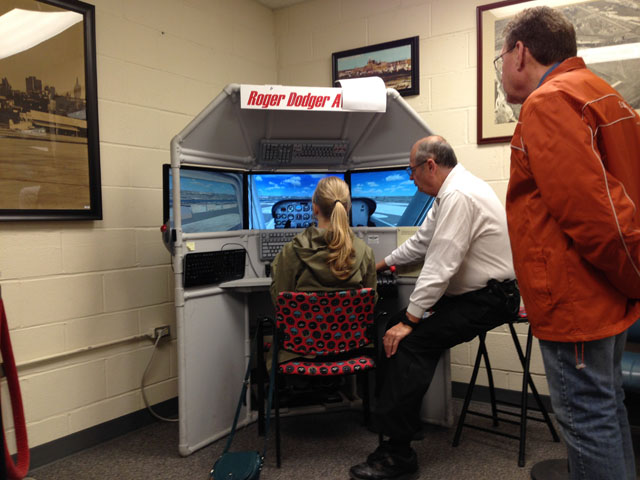
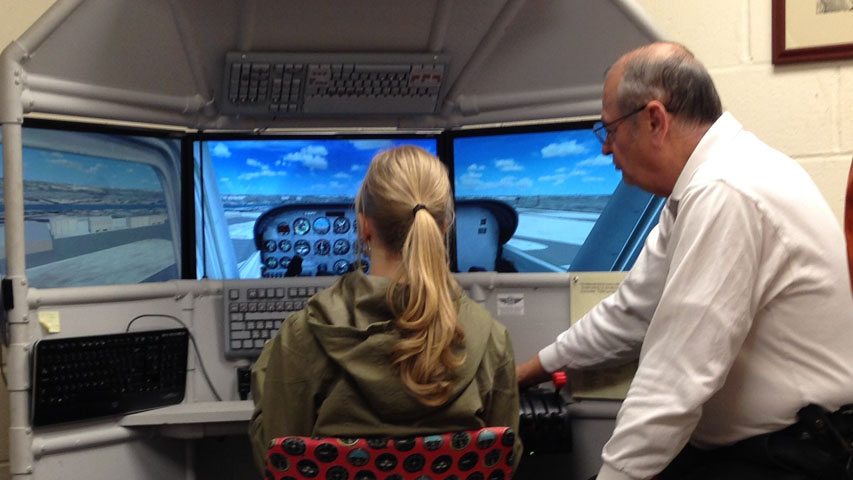
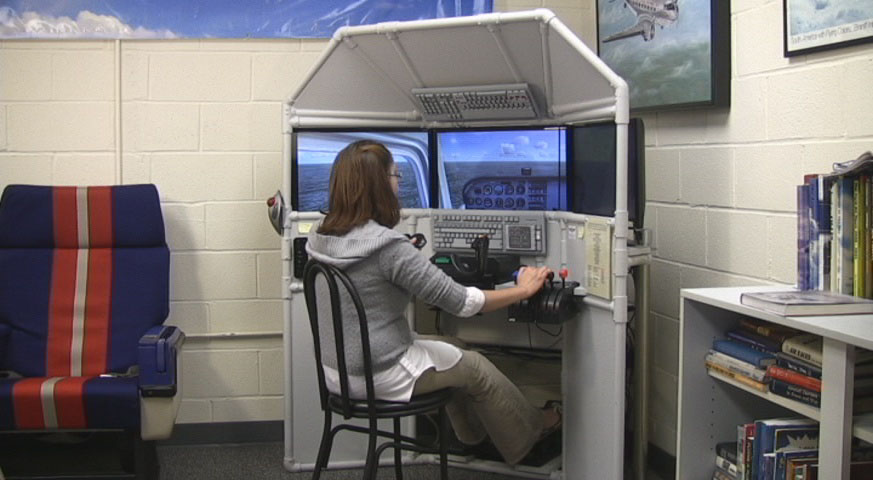
The Triple Screen Flight Sim at the National Airline History Museum is also used as a introduction to general aviation. Visitors receive a flight “lesson” as they fly a simulated Cessna 172. A museum volunteer personally teaches some basic flight maneuvers while the guest tries them in the sim. The simulator is such an excellent teaching tool because you can pause the flight to answer questions or explain something in more detail.


Triple Screen Flight Sim

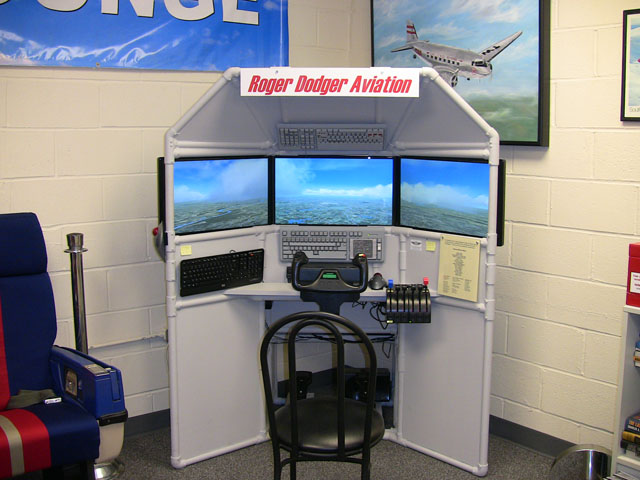
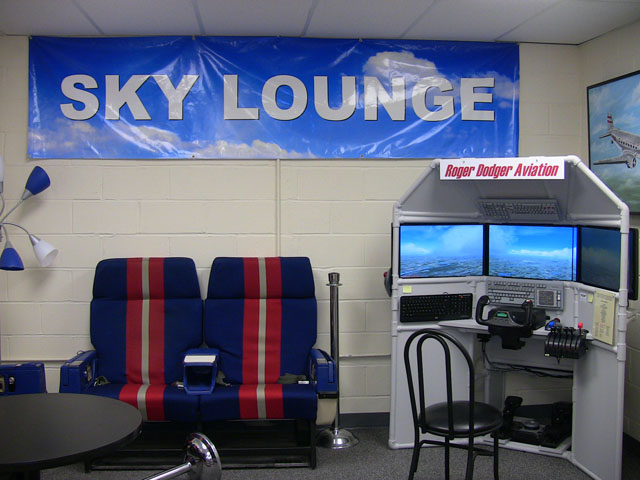
The pictures here show a stock version of the DIY Triple Screen Flight Sim at the National Airline History Museum. My DIY video and instruction manual show you how to build this same project from PVC pipes, lumber, and foam insulation. I installed a Saitek Pro Flight yoke, throttle and rudder pedals in this particular project. The painted keyboards are stock versions of the DIY Keyboard Mod: Airliner project.

The DIY Triple Screen Flight Sim is the perfect addition to the Sky Lounge at the NAHM, and it would be a perfect addition to your home.

Kickstarter Fund-Raiser

This project was the first successful flight simulator project ever funded through Kickstarter. It is truly historical. The fund raising campaign paid for the supplies and materials I needed to build the project from scratch. After I built it, I brought it to the Kansas City Maker Faire and then to the NAHM.


The Triple Screen Flight Sim at the National Airline History Museum

Saitek Pro Flight Instrument Panel in a DIY Triple Screen Flight Sim

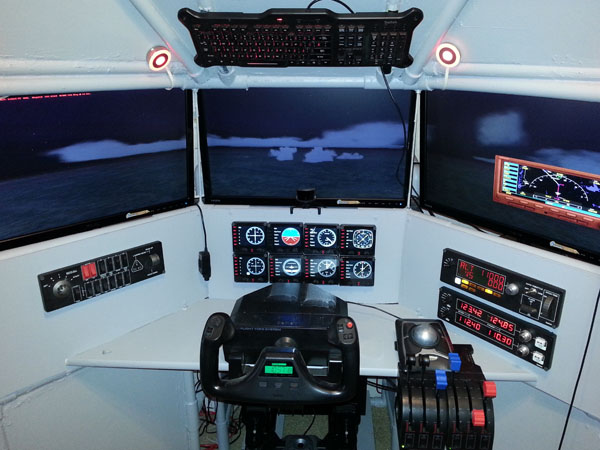
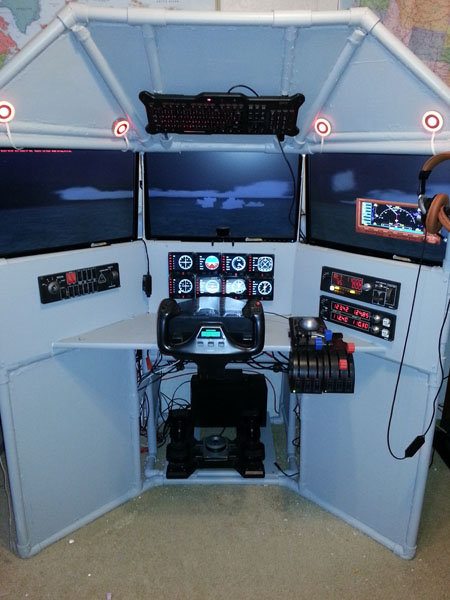
Our customer, Tom, sent in these pictures of his completed project. He installed a Saitek Pro Flight Instrument Panel in a DIY Triple Screen Flight Sim. Actually these are eight separate units that combine to work as a complete instrument panel, therefore he has the standard six flight gauges, plus two VOR displays. 

T440 Triple Screen Flight Sim customer completion

Saitek Pro Flight Instrument Panel

The Saitek Pro Flight Instrument Panel you see in the picture is eight separate flight instruments. Each unit can be set individually to display whatever instrument you choose, in addition, you have 15 different displays to choose from. The units cost $170 to $190 USD depending on where you purchase from. 

The instrument panel is the perfect addition to Tom’s DIY Flight Sim. He says: “Had great fun building this triple screen, with your instructions and videos even I couldn’t mess it up!”

T440 Triple Screen Flight Sim customer completion

Merchandise Shortage

But wait, can you even purchase the Saitek flight instruments right now? On mypilotstore.com they note a merchandise shortage with the following message: 

Out of Stock. There is a massive, world-wide, back-order situation on all Saitek Pro Flight merchandise.  All orders will be filled on a first-come, first-served basis.  Order now to reserve your spot in line. You will not be charged until the order ships and you can cancel at any time prior to shipment.  Orders placed now are expected to be shipped in 6 to 12 weeks.

MadCatz recently sold Saitek to Logitech. Gameindustry.biz reports that MadCatz purchased Saitek in 2007 for $30 million, but is now selling it to Logitech for only $13 million. We can only hope that Logitech can keep the Saitek product line in production and going strong for years to come. I’ve owned several Logitech products (keyboards, mice, etc.) and I’ve always been happy with their reliability and functionality. I know that there have been concerns lately about the workmanship in Saitek products and consequently I hope the sale to Logitech improves the reliability of the entire Saitek product line. 

Flight Simulator Eagle Scout Project

Flight Simulator Eagle Scout Project

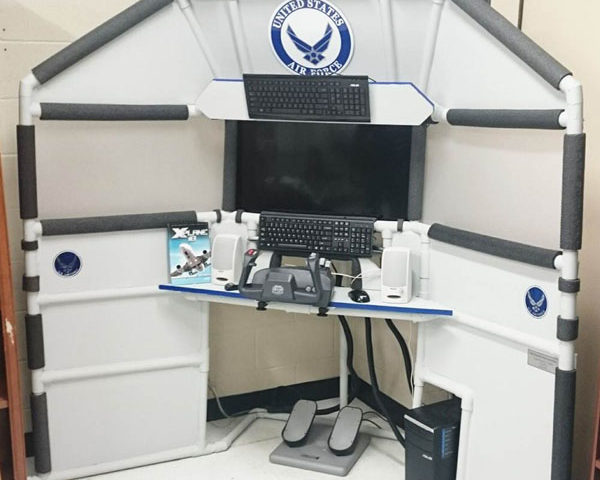
A young man named Ryan built this flight simulator for an Eagle Scout Service project. You might be wondering how a Flight Simulator Eagle Scout Project comes into being. If you are unfamiliar with service projects, the Scout must demonstrate that he has a plan for funding and building the project and he must also show that it’s a benefit to the community.
(Let’s be real: ALL flight simulators benefit the community, but I digress). 

Ryan reached out to me and requested a donation of the T440 Triple Screen Flight Sim project video/manual and I granted his request. He raised enough money or donations to build the DIY flight sim as you see in the picture. He also modified the design to match his resources and needs. After completing the project, Ryan donated it to his Junior Reserve Officer Training Corps (JROTC) classroom. This is the official JROTC for the United States Air Force and the cadets use this flight simulator to learn about flying and careers in the USAF.

Quote from Ryan:

“Thank you so much for your flight sim plan donation for my Eagle Scout Project. As you can see I had to make some changes due to the equipment and available space in the JROTC class room… Thank you for making this project possible through your donation and helping me make the Air Force JROTC program at my high school more fun for the cadets learning about flight.”

Charitable Donations

I get requests regularly from people asking for free stuff, but I rarely fulfill those requests, even from people claiming to represent charitable groups.

There are several reasons I rarely give away free stuff

  • My videos and instruction manuals are the least expensive part of your project. If you really want to save money, try getting discounts on your displays, computer, or controls.
  • I do not receive follow-up from the people I donate to 99% of the time. All I ask for is a picture of the completed project and a description of how it’s being used. I have received a follow-up message only two times in nine years and both times they were Eagle Scouts that completed their service projects.
  • It’s more work for me. I have to manually generate download emails when I fulfill a donation. On the other hand, regular purchases are automatic and instant.
  • I regularly offer huge sales on all my products. If you sign up for my monthly newsletter, you will be the first to know about upcoming sales.
  • Roger Dodger Aviation does not make enough money. As long as I have to work at a day job, I probably won’t have the time to seriously consider the donations requests I receive.

Am I wrong?