4 Ways to Display Flight Simulator Instrument Panel

4 Ways to Display Flight Instruments | Flight Simulator Instrument Panel

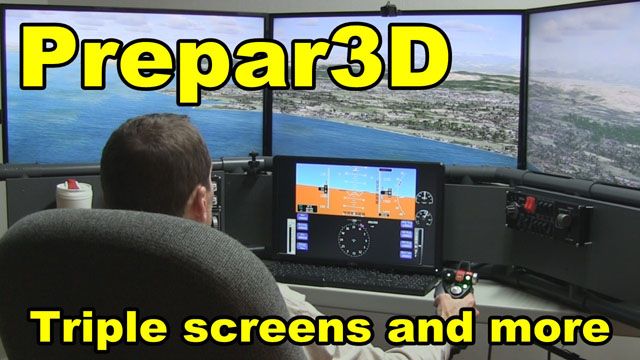
Developers struggle to create software that displays a legible flight simulator instrument panel, and also present a realistic outside world with scenery that stretches to the horizon. Today I’ll focus on viewing the flight instruments. You have a few options to choose from and each has its own benefit trade offs. It’s up to you to decide which flight simulator instrument panel works best with your particular needs.


TrackIR with DTG Flight School
TrackIR with DTG Flight School and the DIY Deluxe Desktop Flight Sim


TrackIR $140.00

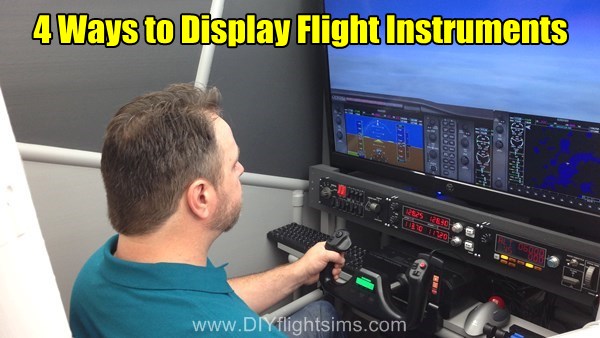
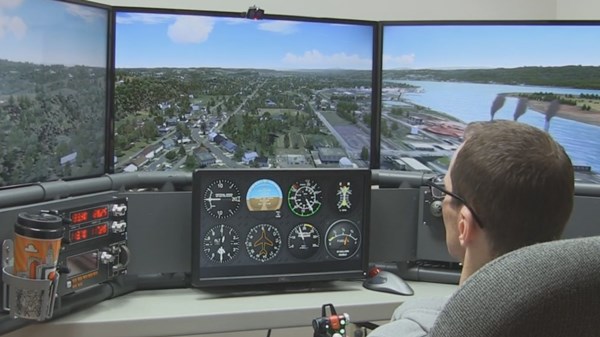
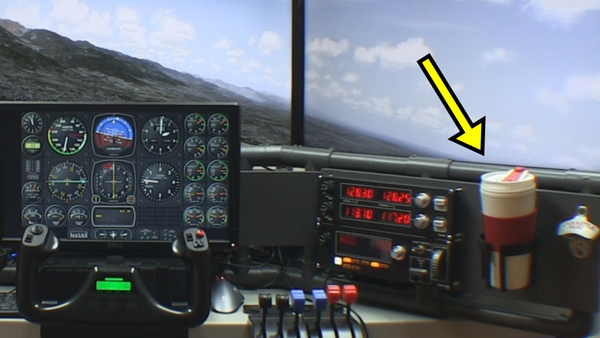
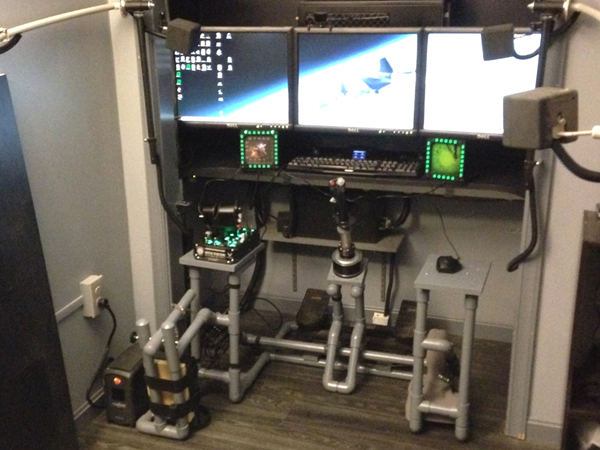
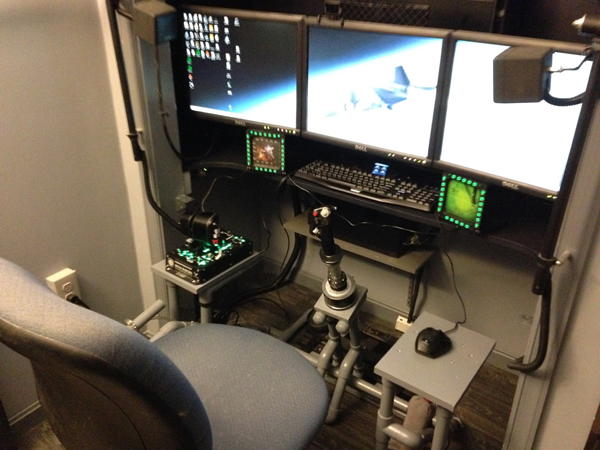
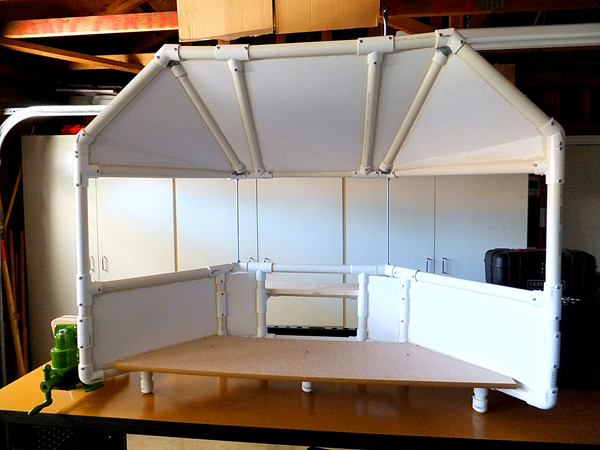
I’ve used TrackIR from Naturalpoint for a long time. It is a view tracking device that allows you to look around the virtual cockpit by moving your head. TrackIR “sees” your head move in 6 axes, also called 6 degrees of freedom. Instead of explaining all 6, I’ll just say your real life head also moves in 6 degrees of freedom, and leave it at that. As a result, you can lean into the flight simulator instrument panel if you want to see something closer. You can also look out the windows, look over your shoulder, look around struts and other parts of the airplane. The picture above shows TrackIR with the DIY Deluxe Desktop Flight Sim.

TrackIR works with a single screen, or multiple screens. It works with a very wide variety of titles: Prepar3D, X-Plane, FSX, Flight Sim World, DTG Flight School, DCS World, even Elite Dangerous, War Thunder, IL2, and many others. In conclusion, TrackIR is very useful but it’s still difficult to use with a GPS or other instruments that require fine tuning.


Native FSX instruments in the DIY Flight Sim Pod


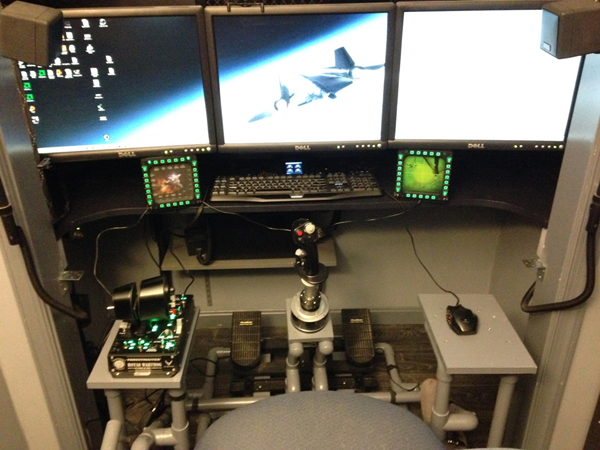
Moving/resizing windows (free)

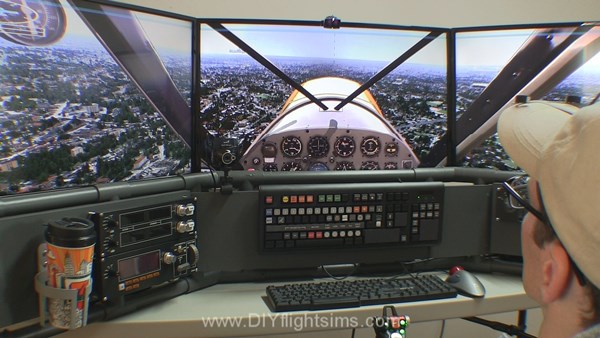
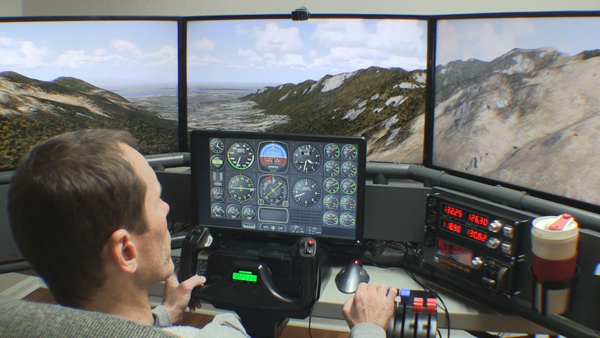
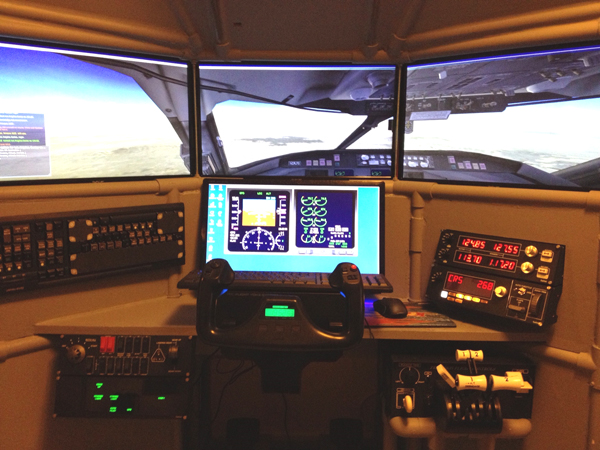
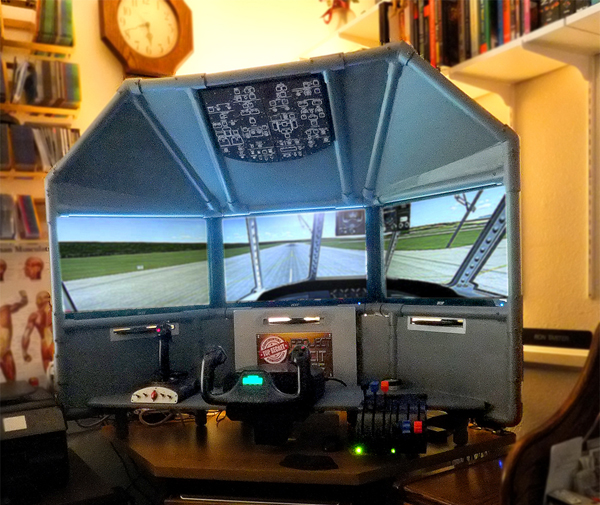
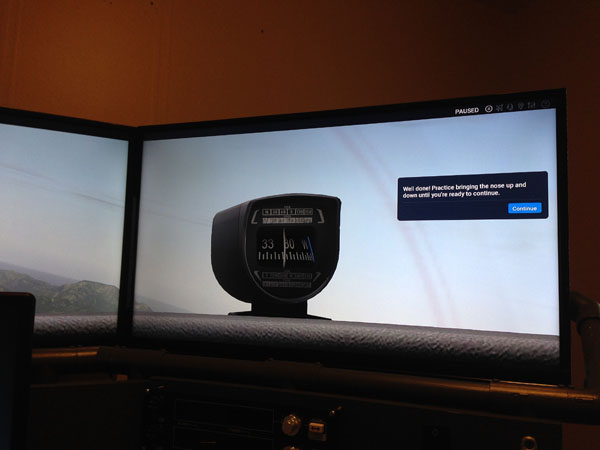
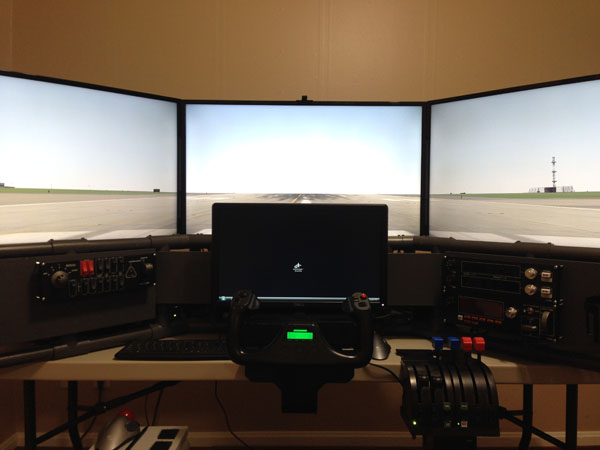
You can move and resize the 2D windows in old FSX and FSX Steam. When you type Shift+1, or Shift +2, Shift+3, etc. then FSX will display different windows that you can move around your screen. You see how this appears in the picture above with the DIY Flight Sim Pod. This trick also works with multiple screens. For example, you could show the outside view on all three monitors, and then in the bottom of your middle screen, show smaller windows with the flight instruments. You can also re-size the windows. That’s all great, except FSX does not save these settings on exit, and you have to set up all your views again the next time you turn on your computer.

However, there is a way to make FSX save the flight simulator instrument panel settings by using a handy freeware utility. More about that here.


Air Manager with the DIY Deluxe Desktop Flight Sim


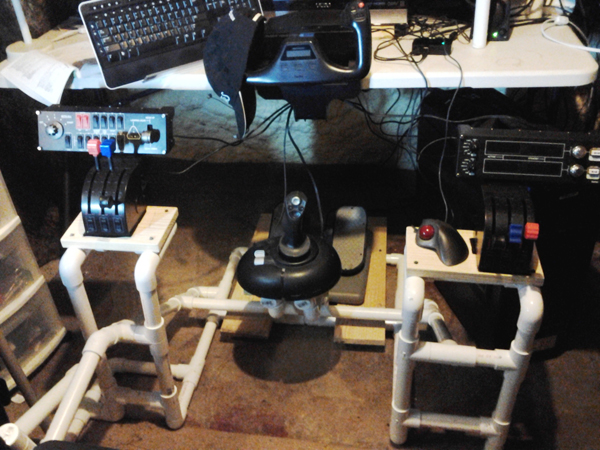
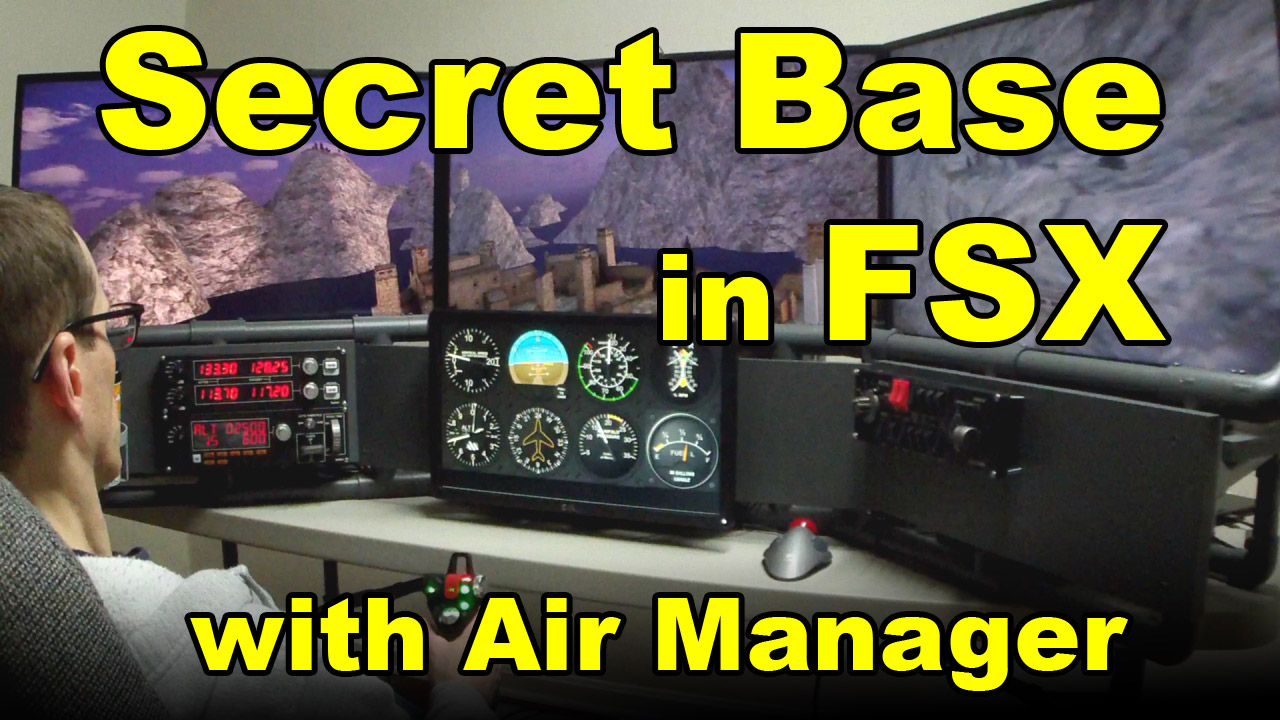
Air Manager $77.00 + separate monitor or computer

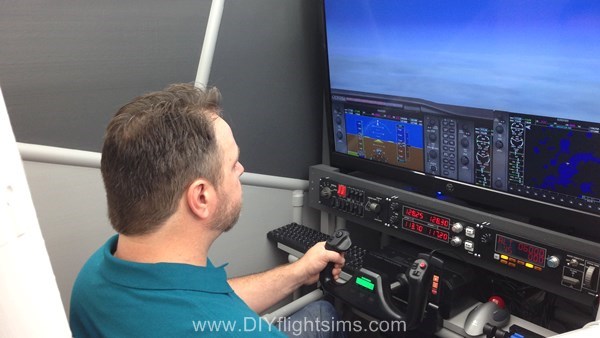
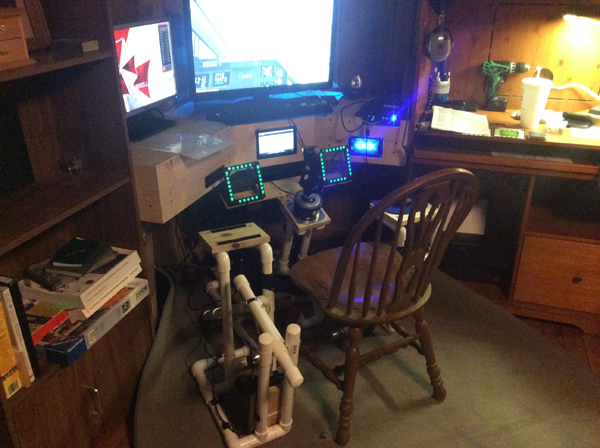
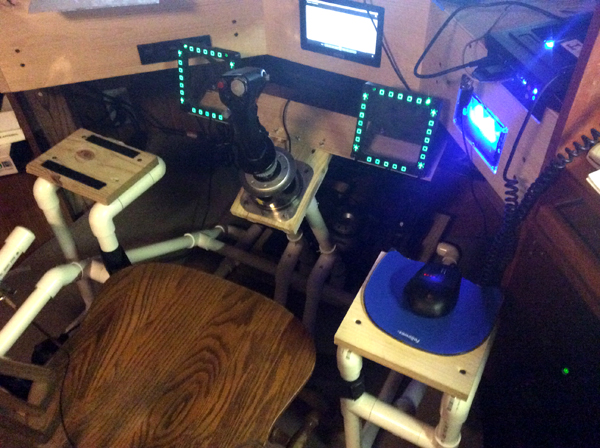
Air Manger works with Prepar3D, X-Plane 9, 10, and 11, FSX and FSX Steam. I’ve personally used Air Manager for displaying the flight simulator instrument panel on a separate screen. What I mean is, a totally separate monitor that is set aside for just the flight instruments. Flat panel computer monitors are so cheap that I literally have 3 in my house just waiting for a project. Air Manager can also work on an iPad or other tablet computer.

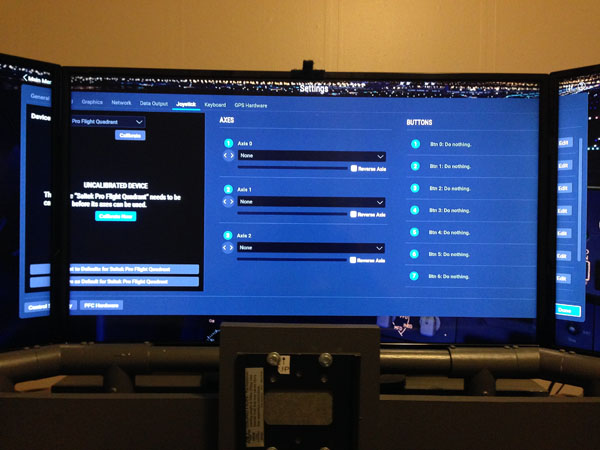
Air Manager is very versatile, see it above with the DIY Deluxe Desktop Flight Sim. I run the software on an old, obsolete computer (running Windows Vista) which is connected via network to my flight sim computer. A separate computer means there is zero impact on my frame rates. Download full flight simulator instrument panels, mix and match gauges (free), even create your own (also free).


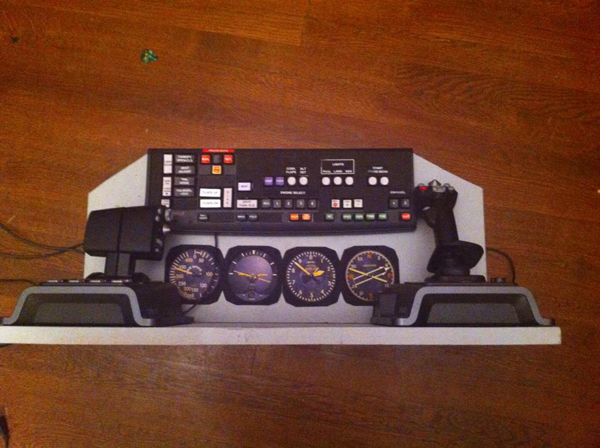
Saitek Pro Flight Instruments $169.99 each

The most expensive option is the Saitek Pro Flight Instrument gauges. I listed the price, but that is only for one single, physical USB gauge. Consequently, if you want a panel consisting of 6 flight instruments and an RPM gauge, that is 6 x $169.99 = $1019.94. I haven’t personally tried these gauges because they are so incredibly expensive. In addition, you are limited primarily to round-gauge type displays.


Flight Simulator Instrument Panel

In conclusion, there are several ways to display a flight simulator instrument panel and the method you choose will depend on your needs and your budget. Have you tried anything I haven’t listed here? If so, let me know in the comments (you don’t have to log in to comment).

How to Build a Flight Simulator

Introducing the Builder Academy

The Builder Academy is a comprehensive resource for learning all the basic flight sim building skills. What is it like to build a DIY Flight Sim project? The Builder Academy will show you. In addition, you can also learn about modifying the existing DIY Flight Sims projects. If you’re wondering how to build a flight simulator, this is your first, best resource. By the way, it’s free!

Builder Academy Content

What is in the Builder Academy? Some of the videos in the Builder Academy were formerly a part of the “Free Videos” folder included with some purchases. Other videos were first published on YouTube, but are now only available in the Builder Academy. Some of the content is new and available only at the Builder Academy. Finally, all of the content assists you in different ways when you’re learning how to build a flight simulator.
This is an overview of the course curriculum:

  • Recommended Tools
  • Building with PVC Pipe (new)
  • Self-Drilling Screws
  • Add a Monitor for the Flight Instruments
  • Display Flight Instruments with Air Manager
  • Install Saitek Switch Panels
  • Styrofoam Body Panels
  • Prototyping – How to Modify DIY Flight Sim Projects
  • Saitek Trim Wheel Adapter
  • X52 Saitek Throttle Fix
  • Saitek Yoke Modifications
  • CH Yoke Modifications
  • Paint for Home Flight Simulators
  • USB Cable Management
  • Change Log

Training Available Wherever You Are

The Builder Academy is available on nearly any device. As a result, you can view the training on a tablet or phone while you’re in your workshop or view it on a laptop or desktop. Also, there are some printouts and templates for certain projects, so you might need a printer at some point. I periodically add new content, so be sure to check the Change Log if you haven’t been there in a while. The Builder Academy is my platform to show everyone how easy it can be to build a home flight simulator. Even the most complex projects are really just a series of relatively easy steps. Visit the Builder Academy today and let me know what you think of it.

View the Builder Academy on your phone or tablet or anything

4 New Changes to Home Built Flight Simulators: Watch Video

I made four simple, yet significant changes to the D250 Deluxe Desktop home built flight simulators. Consequently, these changes bring me back into the beloved world of general aviation. See me in the video flying a Beechcraft Baron once agian.


1. Added a Yoke and Throttle Quadrant

I removed the side-mounted HOTAS joystick and throttle and added a Saitek flight yoke and throttle quadrant. I attached the trim wheel underneath the throttle quadrants, and that is the perfect location. Once again, I can fly multi-engine airplanes like the Beech Baron, or light general aviation airplanes like the Cessna 172.

Home built flight simulators with new mods

2. Raised the Instrument Panel Display

I use an inexpensive 19″ monitor to display the flight instruments on the D250. The yoke housing did not fit under the 19″ monitor, so I raised the monitor mount a few inches. I simply replaced the board for the Center Instrument Panel and attached an adapter board for the monitor mount.

Raised monitor mount for instrument display

3. Moved all Saitek Switch Panels

When you fly an airplane with a yoke, your left hand is typically on the yoke and your right hand is free to adjust the radio frequencies, dial in nav headings, and more. The D250 wasn’t set up like this because I used it to fly helicopters. As a result, the radios were on the left side of the cockpit, because a helicopter pilot typically keeps his right hand on the cyclic (joystick) and the left hand is free. I cut new 1×8 boards for the Left and Right Side Instrument Panels and re-arranged, and re-mounted the Saitek switch panels.

Yoke and throttle quadrant mod for the DIY flight sim

4. I Moved the Drink Holder

Don’t fly thirsty! I moved the drink holder to the right side of the cockpit so I could easily reach it with my right hand. The drink holder is the right size for a travel mug or a bottle with a drink coozie.

Important drink holder in the home flight sim

Plans for Home Built Flight Simulators

Do you want to build this same flight simulator for your home? If I get enough interest from my DIY community then I will create an additional Instruction Manual and include it with the original plans. In addition, customers who have already purchased this project will get the new plans for free.

System Specs and Peripherals

Notice these computers are not especially strong or new. You don’t have to spend $2000 on a computer to have great home built flight simulators.

DIY Deluxe Desktop Flight Sim, item #D250
Primary computer: Powerspec B634 with Intel i5-3450
Nvidia GeForce GTX 950 SSC
Windows 7, 64 bit
Flight yoke: Saitek Pro Flight
Saitek throttle quadrant
Saitek Pro Flight trim wheel
Pro Flight Cessna rudder pedals from Saitek
Switch panels: Saitek PZ55, PZ69, PZ70

Secondary computer: Dell Inspiron 530s with Pentum E2200
Windows Vista
Sim Innovations Air Manager

4 screen DIY flight sim with yoke and throttle quadrant

Innovative DIY Cockpit and Flight Simulators in the Customer Gallery

I’m always impressed by the many ways my customers modify the DIY Flight Sim projects to meet their needs. It’s one of the best things about this gig. Customers change the home cockpit plans a little or a lot depending on their needs and resources. Check out these innovative DIY cockpit solutions from the Customer Gallery.

Rich’s Quad Screen Flight Sim

My customer Rich built a T440 DIY Triple Screen Flight Sim and installed an additional screen for the flight instruments. This creates a stunning degree of realism because your instruments are positioned close and you focus your vision outside to see the surrounding environment. Similarly, I demonstrated a quad display setup with the DIY Deluxe Desktop Flight Sim and Air Manager powering the instruments.

You can see Rich added four Saitek switch panels and the K140 DIY Airliner Keyboard Mod. Do you think that is a Go Flight TQ6-ADV throttle quadrant? It’s not. It might be two Saitek throttle quadrants with after-market replacement handles attached. You can find such handles from FlightSimPM and others for your own innovative DIY cockpit.

Quad screen flight sim with switch panels, throttle quad by Rich

Thrustmaster Warthog HOTAS for Flight Sims

You can also see more usage of the Thrustmaster Warthog joystick and throttle with these projects. Here George modified the F331 DIY Easy Helicopter Collective to also include the Thrustmaster throttle. He can use it to simulate airplanes or spaceships in its shown configuration. He can also relocate the throttle to a platform below the collective handle and effectively simulate helicopters. Here is another example of flight sim builders buying quality hardware to equip their creations. Most of all, he built the whole simulator in a closet and included triple screens and Thrustmaster Cougar Multi-Function Panels (MFPs) for this innovative DIY cockpit.

Home flight sim helicopter collective, triple screens by George

A Very Special Triple Screen Flight Sim

Customer Ron built his T440 Triple Screen Flight Sim so it would fit on his desk. Keep in mind, the original plans are for a self-standing frame. Ron was able to modify the frame extensively so it fit neatly on his corner desk. He also added the Saitek yoke and throttle quadrant that we see so often in home flight simulators. Finally, the virtual cockpit you see there is from a Lockheed Constellation which is exactly what we use in the flight sim I built for the National Airline History Museum.

Desktop triple screen flight sim by Ron

More Innovative DIY Cockpit Solutions

Enjoy these other customer projects that I recently added to the Customer Galleries. More multi-screen projects and more modified frames for HOTAS and helicopter collectives. In addition, I have many more pictures to add to the gallery and I hope to do that in the coming weeks. Happy Landings! 

If you like this post, please leave a comment. That will enable the mystical internet algorithms to spread it to more people.


X-Plane 11 Beta on Triple Screens, First Look

You can download the X-plane 11 beta right now. Configuring the X-Plane 11 Beta on triple screens with a full flight simulator cockpit is a challenge. I’m using the DIY D250 Deluxe Desktop Flight Sim for this evaluation. The D250 uses three 32″ HDTVs running from a single Nvidia GeForce GTX 950 SSC.

The download and installation was straightforward, and furthermore X-plane automatically spanned all three screens when it booted. The software detected my Saitek Cessna rudder pedals and provided a quick calibration. Unfortunately, it assigned the pitch and roll axis to the toe brake functions. Also, I was unfamiliar with the user interface so it wasn’t apparent how I would properly assign the functions to my flight yoke.

X-Plane 11 assigned pitch and roll to the toe brakes

Immediately Airborne

The demo gets you into the air immediately. Unfortunately, I wasn’t able to assign the controls properly so I stopped after a few minutes. Also, I wasn’t able to zoom out the view, so the virtual cockpit was unseen, except for the wet compass.

X-plane 11 control menu with options behind the bezels

I found my way to the control settings menu to set up the yoke, throttle quadrant, and trim wheel. In addition I wanted to correct the rudder pedal assignments. On my triple-screen setup, some of the menu options are obscured behind the bezel. You don’t have the option to move the menu window around like you do in P3D. The only way to see these menu options would be to exit out of X-plane, turn off bezel correction in Nvidia Controls Panel, restart X-plane to run the menu, and then turn bezel correction back on afterwards. Or you can just guess what’s behind the bezel. I had some troubles with identifying which axis is which on the Saitek throttle quadrant.

X-Plane 11 graphics settings, some options hidden behind the bezel

X-plane allows you to manually set the screen resolution, which is a very nice option. I set it to the same screen resolution as my desktop with no trouble at all.

I’m using Air Manager to display the flight instruments in FSX and P3D. I think it requires additional configuration to use it with X-Plane 11. Air Manager has an excellent set of Beechcraft Baron flight instruments and I’m looking forward to using them with the Baron X-Plane 11.

I spent a lot of time stuck on the runway

Stuck on the Runway

I couldn’t get all my controls properly assigned and as a result, I spent a lot of time on the runway. I didn’t even attempt to set up the three Saitek control panels because they probably need an updated driver to work with X-plane. I’ll look into that.

The demo expired before I could set up the controls

And that was it. I ran out of time in the demo, in addition, I didn’t have any more time in my day to wrestle with the simulator settings. The message said that my “flight controls will no longer function.” To be clear, my controls never functioned properly because I couldn’t get them assigned. I will try X-Plane again and I hope to actually fly it next time.


Prepar3D with Triple Screens and More

What you’re seeing here is Lockheed Martin Prepar3D with triple screens and more. The software is Prepar3D version 3.4, the DIY Deluxe Desktop Flight Sim, the DIY Side Joystick Frame, Air Manager is running the instruments on the 4th display. The installation of P3D was straightforward and you’re looking at a stock installation with no add-ons (yet).


The three main displays are inexpensive 32″ HDTVs connected to a single Nvidia GeForce mid-level graphics card. The system specs are at the end of this blog post.

Prepar3D Installation

P3D recognized the Saitek X52 Pro and properly assigned its functions, which was very nice. For other flight simulator programs, assigning the controls correctly is an awful awful chore, but not for P3D. This is the first flight simulator software I’ve ever seen that correctly identified rudder pedals and successfully assigned them to the correct function. Including the toe brakes. So, kudos to Lockheed Martin. They also build spaceships, by the way. Just so you know.

It’s easy to combine the DIY Side Joystick Frame, (item 311), with the Deluxe Desktop Flight Sim project. I’m using the Saitek Pro Flight Cessna rudder pedals. Great rudder pedals. I updated the drivers for my Saitek switch panels that enabled them to work with P3D. That was easy.

You’ll notice that nothing here is expensive or exotic… or even new. For example, I’m using a second-hand computer to display the flight instruments. The second computer is so old it’s running Windows Vista.

Air Manager is the software that generates the flight instruments and it communicates through the local network connection with P3D on my primary computer. Air Manager also works with X-plane and Flight Simulator X.

System Specifications

DIY Deluxe Desktop Flight Sim, item #D250
DIY Side Joystick Frame, item #F311
Primary computer: Powerspec B634 with Intel i5-3450
Nvidia GeForce GTX 950 SSC
Windows 7, 64 bit
Saitek X52 Pro Flight HOTAS controls
Saitek Pro Flight Cessna rudder pedals

Secondary computer: Dell Inspiron 530s with Pentum E2200
Windows Vista

.

Prepar3D with triple screens and more

Fly to the Secret Base in FSX

The FSX Secret Base and the surrounding islands are featured in the second half of the Tokyo Executive Transport mission. The islands only appear during that mission so if you try to fly there during free flight, you will find only empty ocean. Try flying the mission. Sure, you get to see the islands and the Secret Base in FSX, but you have to fly the assigned Lear jet.

So how do you fly to the Secret Islands in free flight? How do you fly your choice of aircraft? You noticed in the video I was flying the Robinson R22. If you want to do something similar, you should add the Secret Islands as a scenery object. Fortunately, this is very easy.

Add the Secret Base in FSX

Add the Secret Islands (including the Base) as a scenery object in FSX. Check out this link: this is a freeware FSX scenery download that installs the Secret Base as a regular scenery object. Don’t forget to read the Read Me file.

The file installs the Secret Islands, the Secret Base, death ray guns on the mountain peaks, and some sort of suspicious weather station on the top of the highest mountain. The only object that is not included is the retractable water runway that leads to the hangar. The runway is present during the Tokyo mission, but not when you fly to the Secret Islands in free flight.

Air Manager

I use Air Manager software from Sim Innovations in the embedded video. This is a clever piece of software that makes it easy to display instruments on a separate monitor. I’m using it for the Robinson R22, but it works for a variety of default and add-on aircraft. Use it in FSX, FSX Steam, Prepar3D and X-Plane. Air Manager features over 300 flight instruments to choose from and more on the way.

approaching Secret Base in FSX
Secret Base in FSX