See Inside the Saitek Pro Flight Yoke
I’ve developed several ways to modify the Saitek Pro Flight Yoke, but first we need to open it up without damaging it or losing parts. Prepare to see inside the Saitek Pro Flight Yoke!
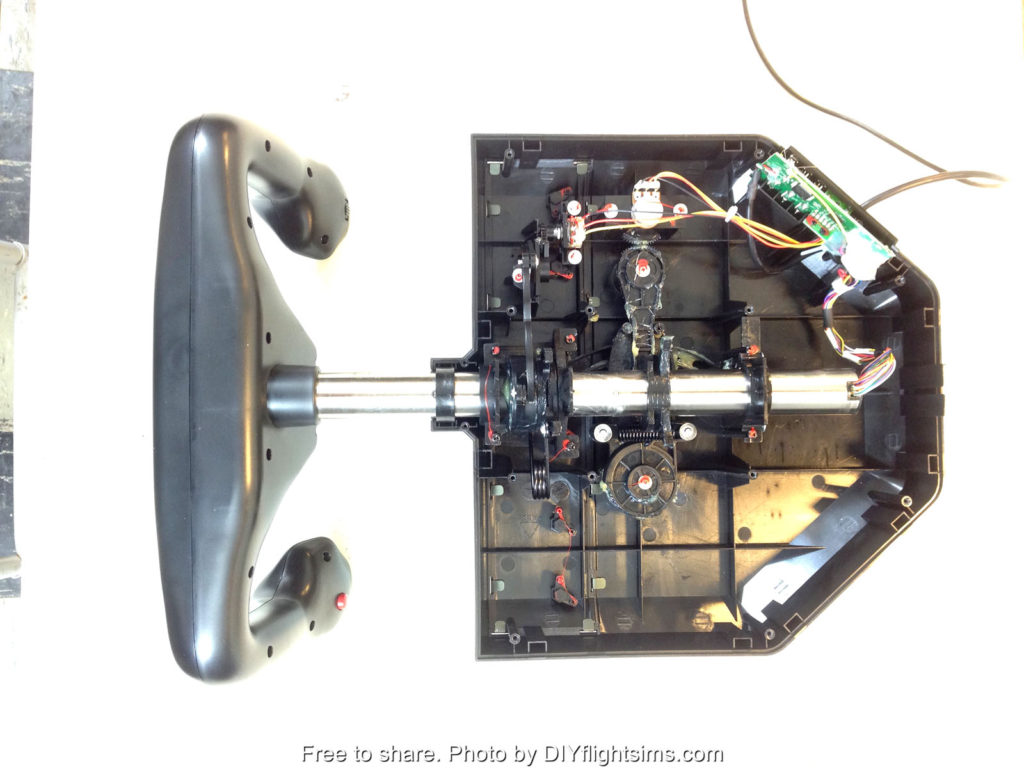
Saitek Yoke Disassembly
This is the very popular Saitek Pro Flight Yoke. This video will demonstrate how to take apart the control housing. You will also see how to remove parts of the pitch and roll mechanisms. We will then be able to modify and improve the pitch and roll movements in later videos.
Note: Disassembly of the Saitek yoke will void the manufacturer’s warranty. However, if you bought the yoke over two years ago, the warranty has already expired.
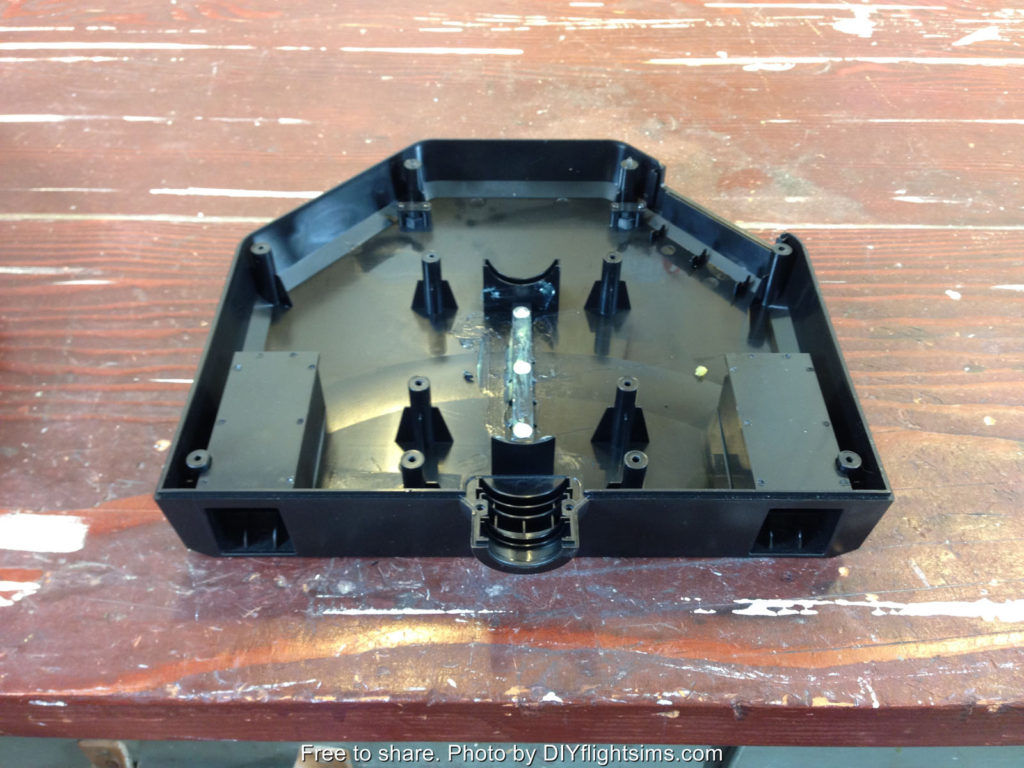
Let’s get started. Disconnect the yoke from your computer and then turn it upside down on a table. There are 12 screws that hold on the bottom of the control housing. Carefully loosen all of these screws. There are also 2 tiny screws at the base of the control shaft. Remove these and be careful not to lose them. Remove the bottom of the control housing. Most of the screws will probably remain in the housing, and that’s fine. That will save you the trouble of replacing them later.
See Inside the Saitek Pro Flight Yoke
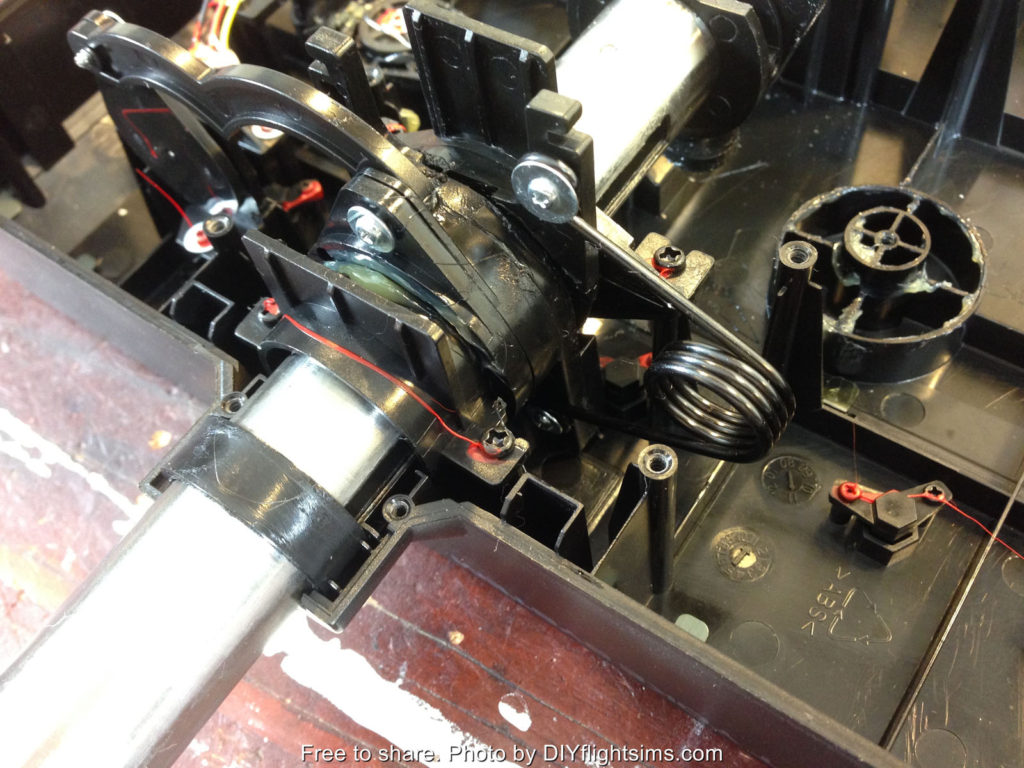
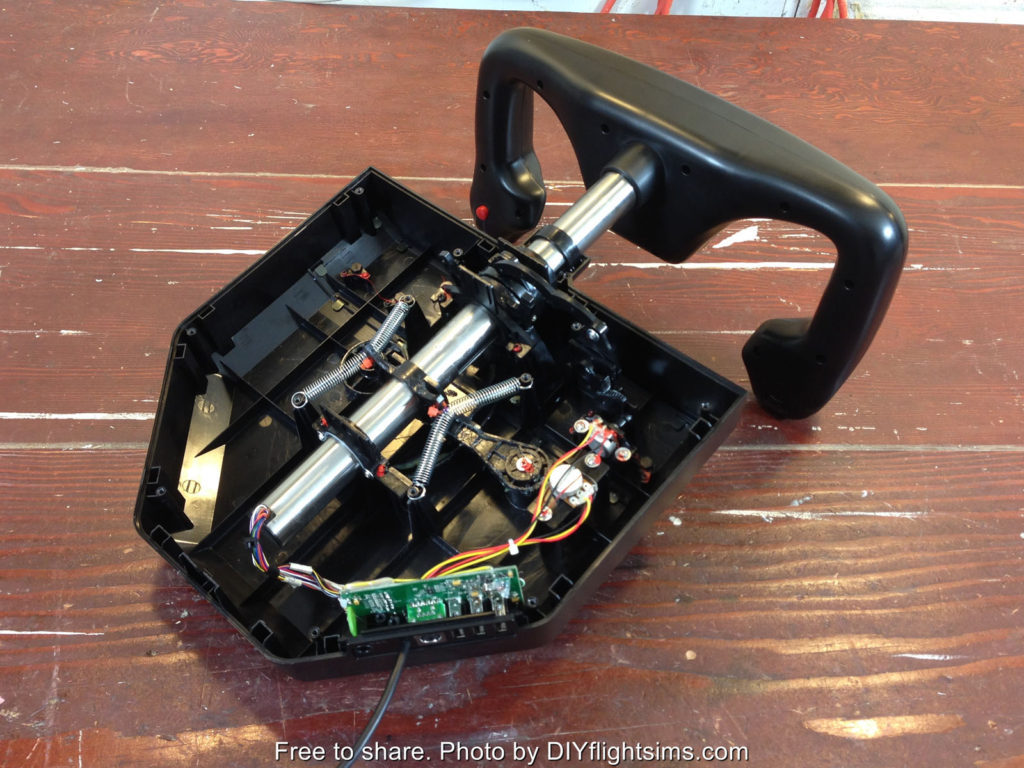
Let’s look at the major components of the yoke. Here is the spring that returns the yoke to its center pitch position. This spring and associated mechanism is what makes the yoke feel like it has a detent. It makes fine pitch adjustments difficult. Even if you’re trying to make small, precise pitch adjustments, you still have to overcome the full tension of this spring. We’re going to get rid of it. Let’s look at some of the other components. This is the pitch potentiometer over here and the potentiometer for the roll movement is here. Here’s another view of the roll movement. This is the roll return spring. This spring is not as objectionable as the pitch return spring, but we will show you how to remove it anyway.
Pitch Axis
Let’s get to work on that nasty pitch return spring. Remove the screw from one side of the spring. The spring is under tension, so carefully unhook it from the post and remove the other screw. Now we see there is actually a second spring underneath the first one! The pitch spring is connected to two swing arms and the swing arms come together at this elbow. Remove this pivot screw (this is where your hands get greasy). Reach in and hold the control arm steady with your left hand and then use your right hand to pull up on the elbow to remove it from its seat. The swing arms are held in tension by the spring, so you’ll need to unhook them from the spring also. Remove both swing arms and then you will see that nasty spring. Verify the control arm is still attached and is still moving the pitch potentiometer. The yoke now moves freely forward and back with no centering feature at all as a result, it is prepared for whatever modification you would like to make.
Roll Axis
The roll movement on the Saitek yoke is not nearly as problematic as the pitch. However, if you still wish to modify it, here is how you remove the return spring. The return spring is held in place with only two screws. The top screw is easy to reach with a small screwdriver. The spring is under tension so carefully unhook it from the mounting post. Turn the yoke all the way to the left. The bottom screw is here, but it’s hard to reach. It’s not a straight shot, but you can still reach it with a small screwdriver so carefully loosen the bottom screw. Be careful not to round out the head of the screw. Remove the screw and the spring from the control housing. Now there are no centering mechanisms for either the roll axis or the pitch axis.
Reassembly
After you’ve completed your modification, you will need to reattach the bottom of the control housing. There are three tabs that must fit into three slots on the bottom of the housing. If you don’t have all three tabs aligned with the slots, the housing won’t fit. Sometimes it takes some wiggling to get the housing to fit correctly. There is also a tab at the back of the housing that must fit inside the lip. Now you know how to take apart the Saitek yoke and how to put it back together again. The remaining videos in this series will show several ways to modify and improve the yoke.
Below are some high-resolution photos of the major components inside the Saitek Pro Flight Yoke….


Saitek Pro Flight Yoke Modification Videos

1 Comment
The modifications to this stick are great, but to get really smooth movement you have to remove the plastic bearing from the front of the stick. It will look like a real plane. The big problem is the pick and pull springs and the bearing that stops the smooth movement.
Write a Comment
Tag Cloud
Categories
Recent Posts
Recent Comments
Meta
Recent Posts
Recent Comments
Archives
Categories
Meta