The Best and Cheapest Way to Build a Home Flight Simulator

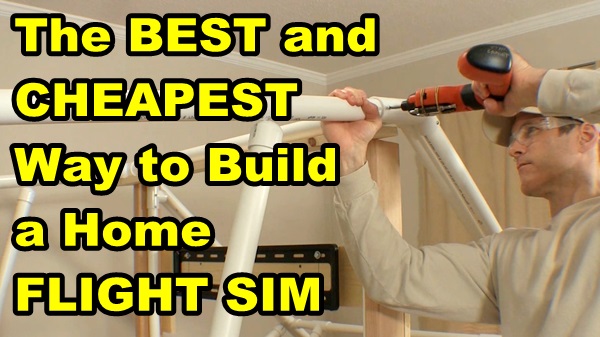
The Best and Cheapest Way to Build a Home Flight Simulator – 5 Steps

Frequently Asked Question: “What is the best and cheapest way to build a home flight simulator? BTW, don’t have much money.”
Answer: Fortunately, you can build an exceptional DIY Flight Sim with a little work and some planning. It might cost a lot less than you think.

The Best and Cheapest Way to Build a Home Flight Simulator

The home flight simulator of your dreams may seem a daunting and far-away goal. However, following this tried-and-true method, you can divide a huge job into small, workable, steps. Plan the work and work the plan: this is the best and cheapest way to build a home flight simulator.

Step 1: Plan Ahead

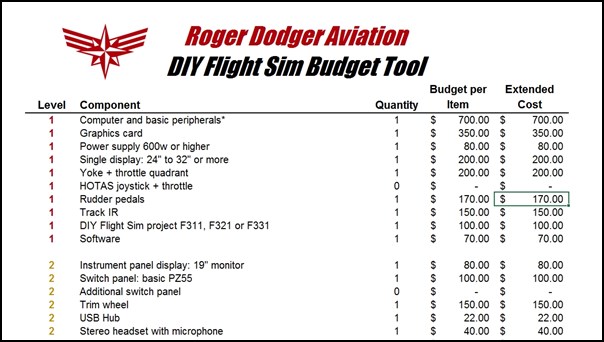
How much is this all going to cost? Before you pick up your credit card, pick up a pencil and figure this out. I made this really easy for you with the DIY Flight Sim Budget Tool. It is a flexible method for determining cost and takes into account components you may already have. Once your budget is in place, it’s easy to identify where you can save money.

In addition, an organized plan can help you get support from your spouse.

Step 2: Use What You Got

Want to know the best and cheapest way to build a home flight simulator? You may be able to re-purpose, repair or modify some components you already have. For example, you might re-purpose an old desk for use with your home flight sim by painting it. You will be delighted at what an inexpensive can paint can do.

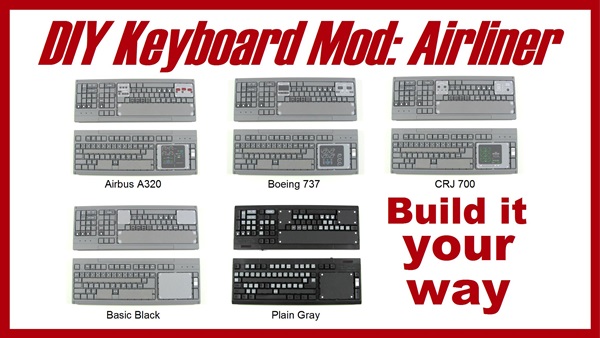
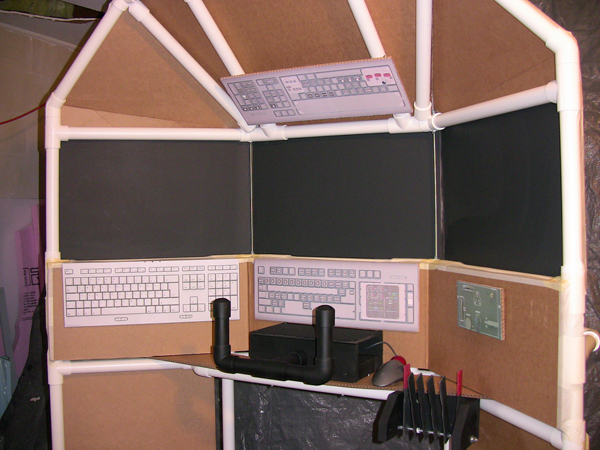
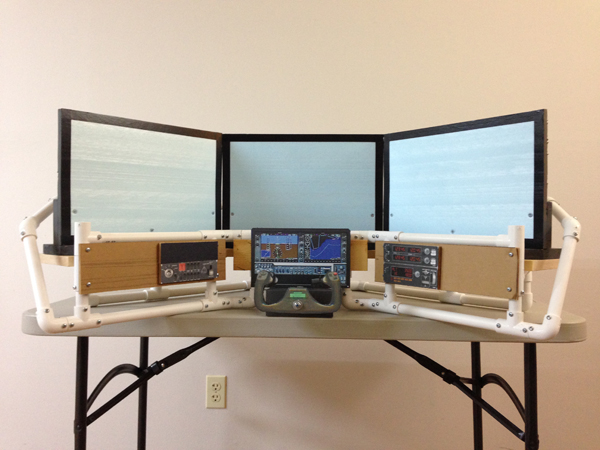
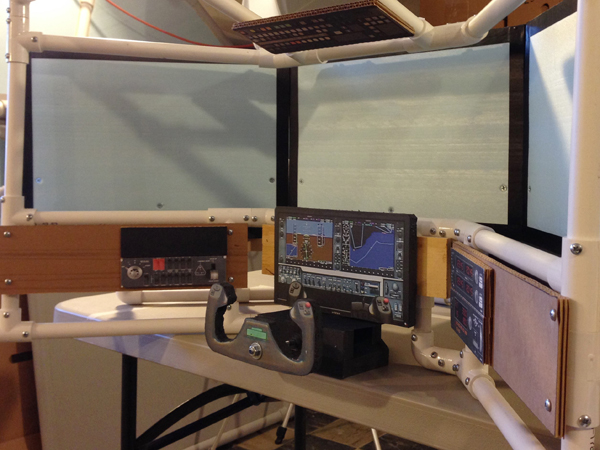
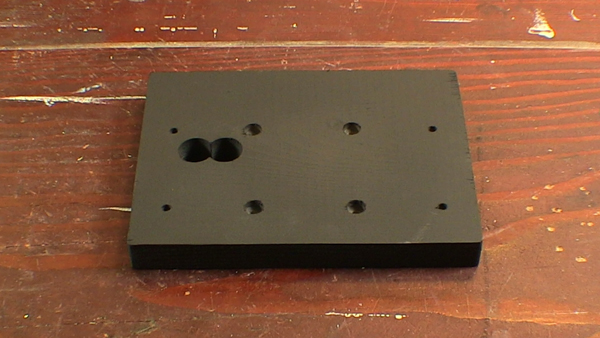
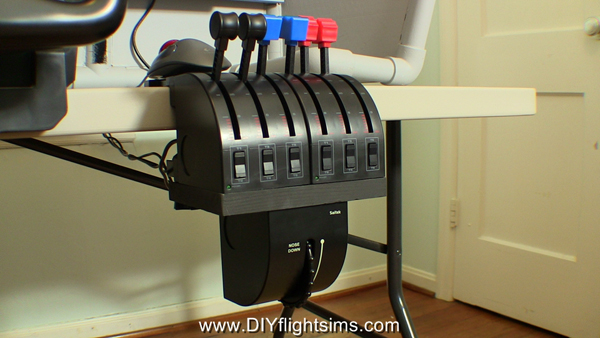
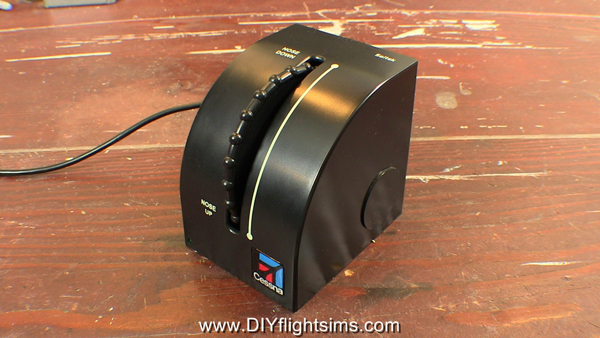
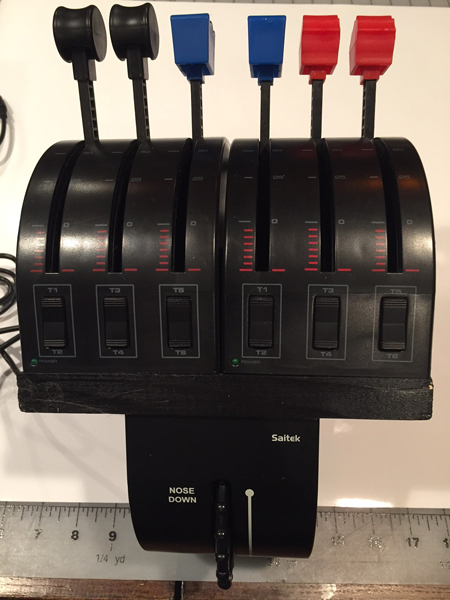
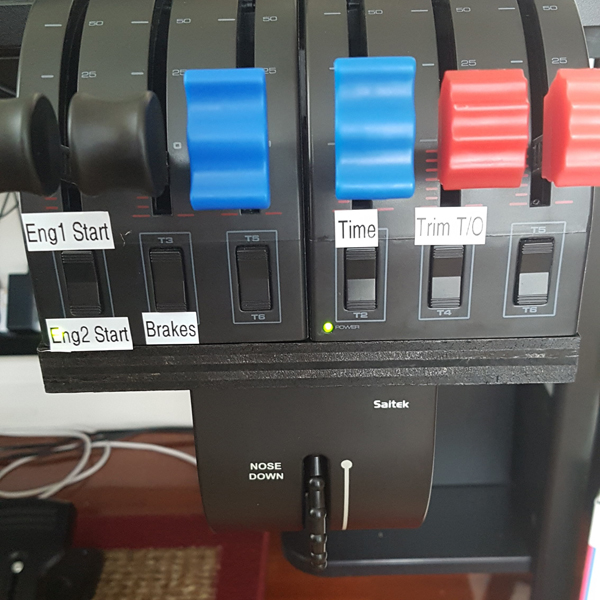
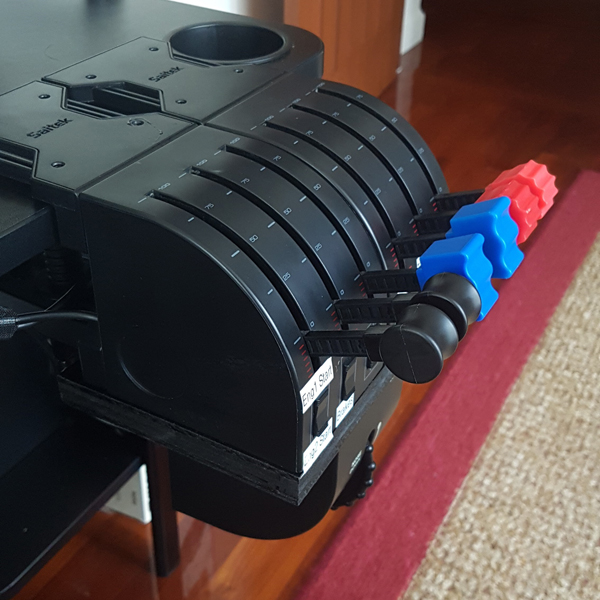
Furthermore, you might modify an old flight yoke with this guide or this guide. Also try the DIY Keyboard Mod tutorial to make control panels from common, inexpensive keyboards.


Step 3: Sales, Sales, Sales

Pro tip: online flight sim retailers run a sale every month or two. You can get discounts on software and also flight sim controls and peripherals. In addition, check individual manufacturer and developer websites for sales. And don’t forget Steam.com!

Finally, shop Amazon. When you place an item on your Wish List, it will alert you if the price falls.

Step 4: Source Local Materials

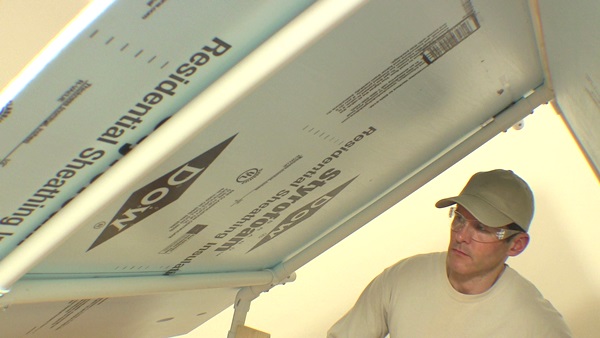
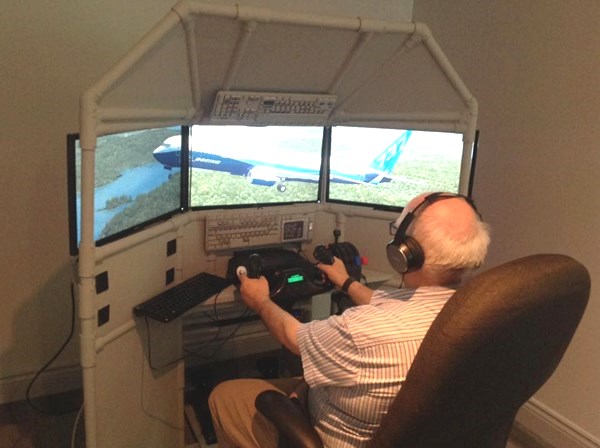
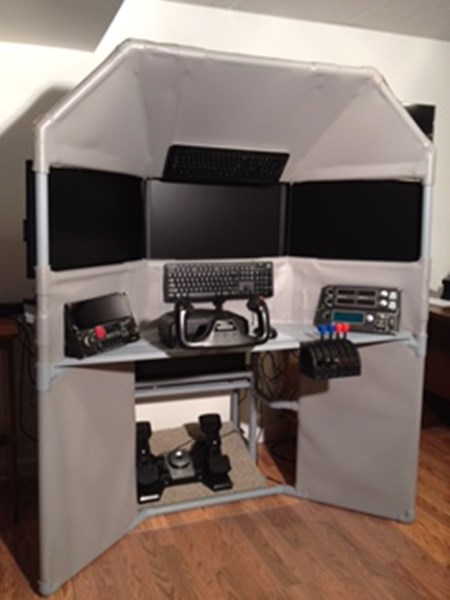
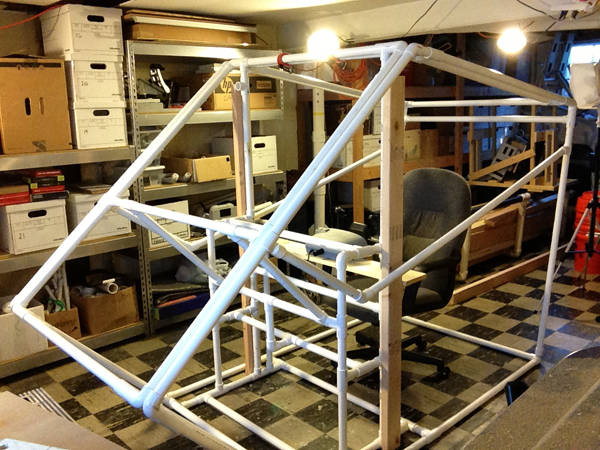
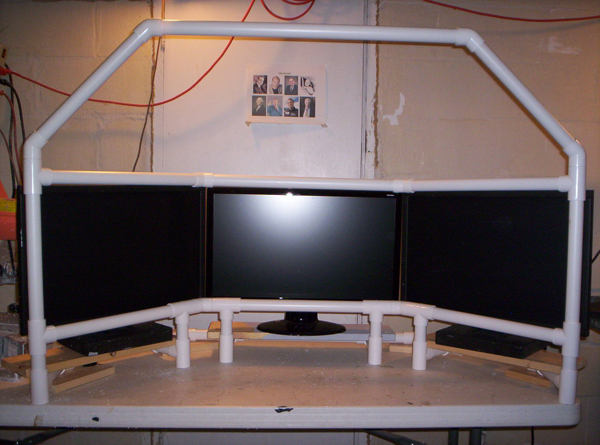
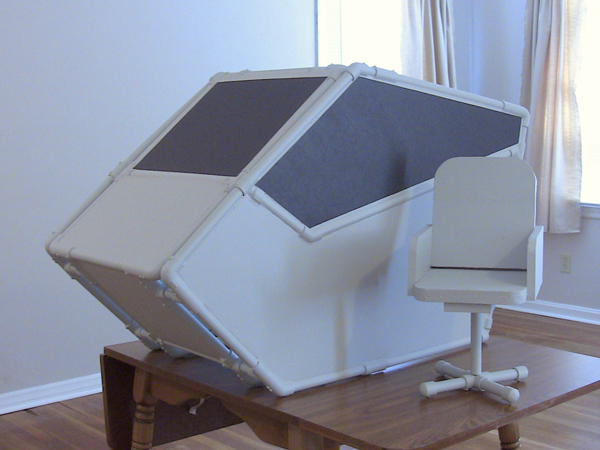
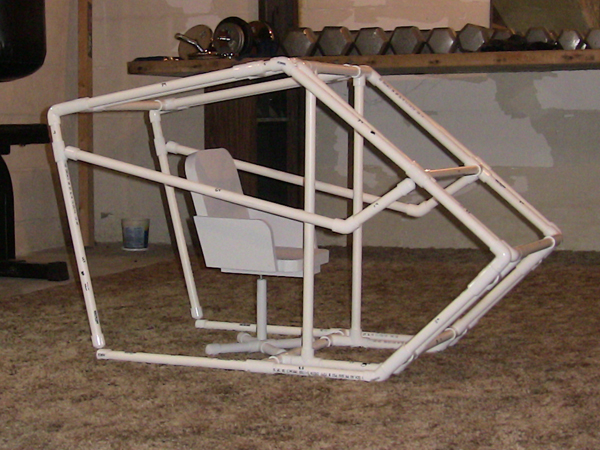
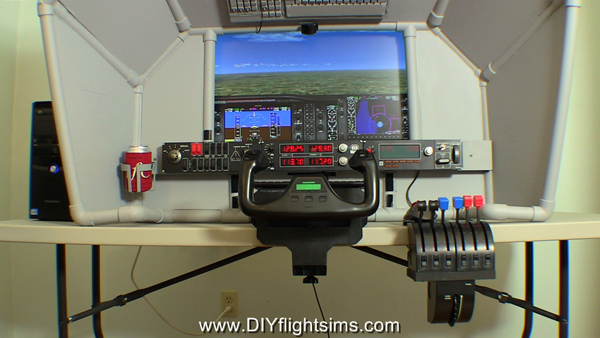
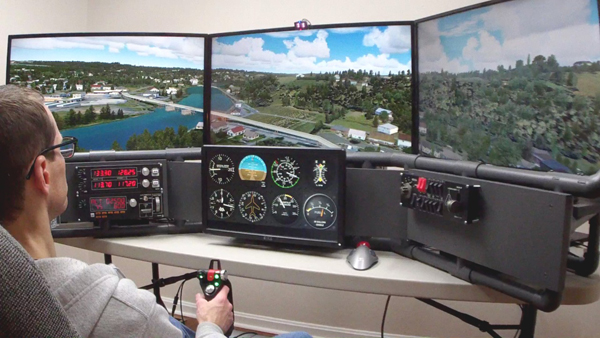
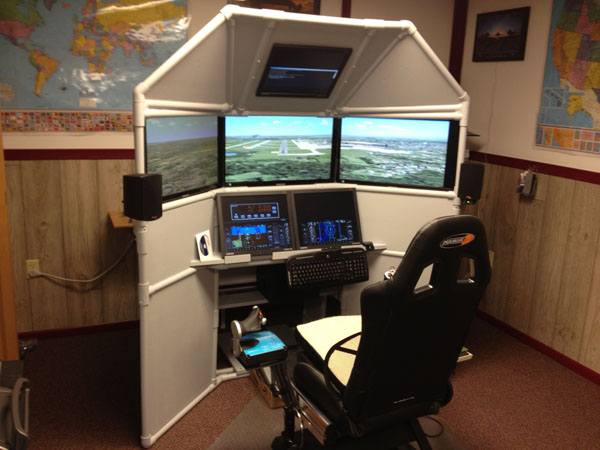
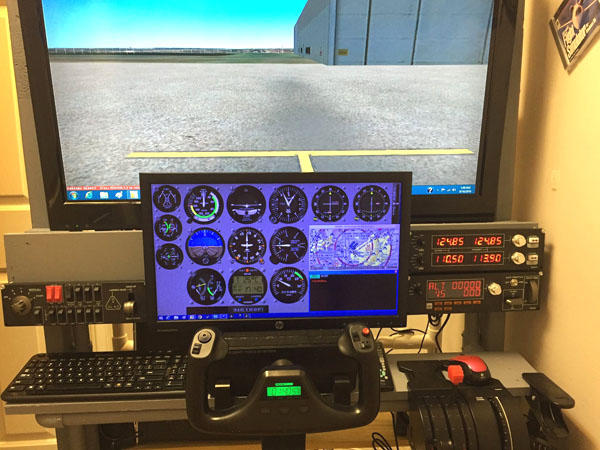
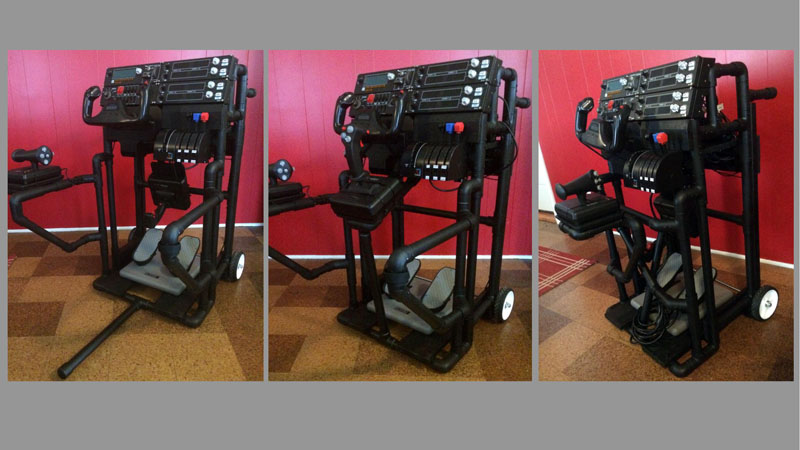
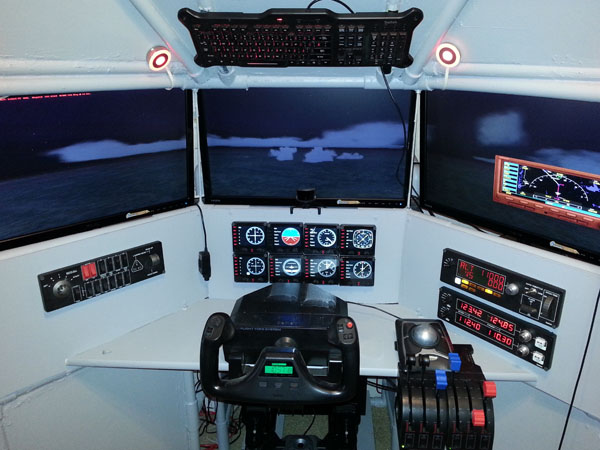
You can build impressive, functional flight sim frames and enclosures with materials from your local home improvement store. All you need are common hand tools that you probably already have. It’s easy to build with PVC pipes, Styrofoam insulation, and wood boards. This is, by far, the best and cheapest way to build a home flight simulator.

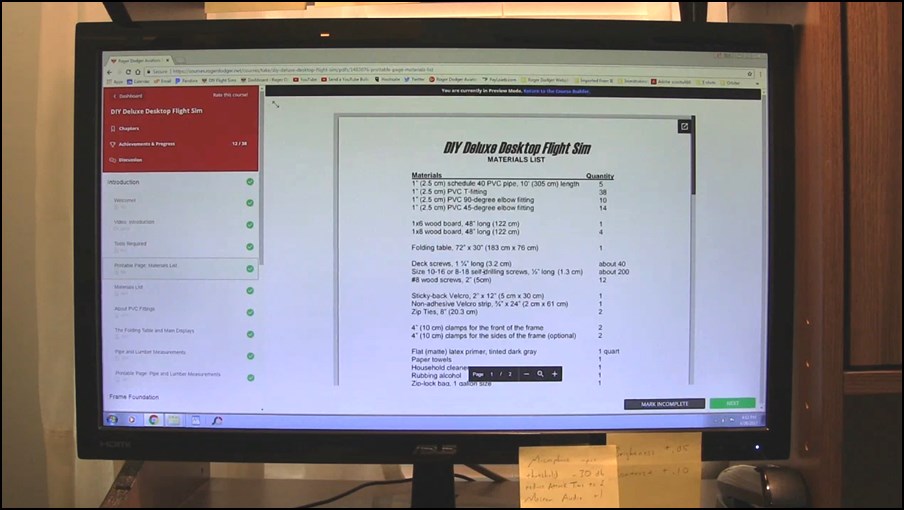
Check out the Builder Academy for a wealth of information on using inexpensive materials for home flight sims. You can enroll for free!

Don’t forget to keep your receipt from the home improvement store. You can easily return any materials you don’t use.


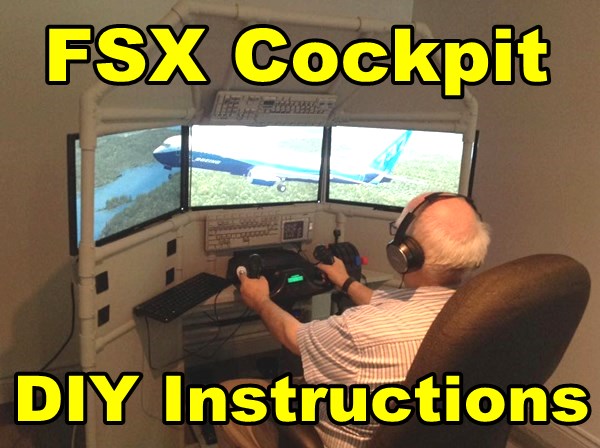
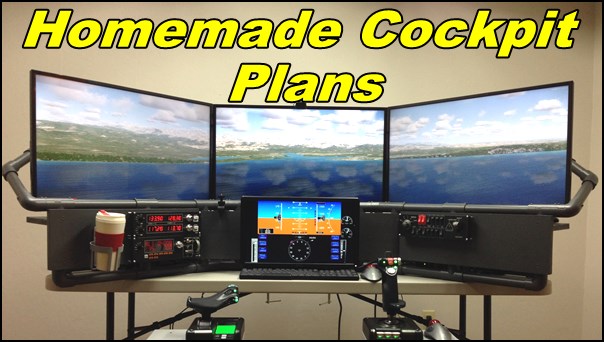
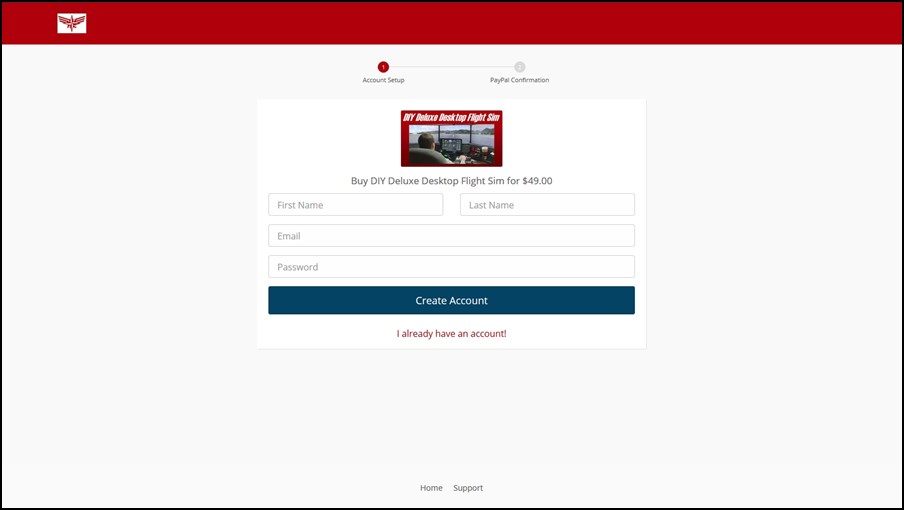
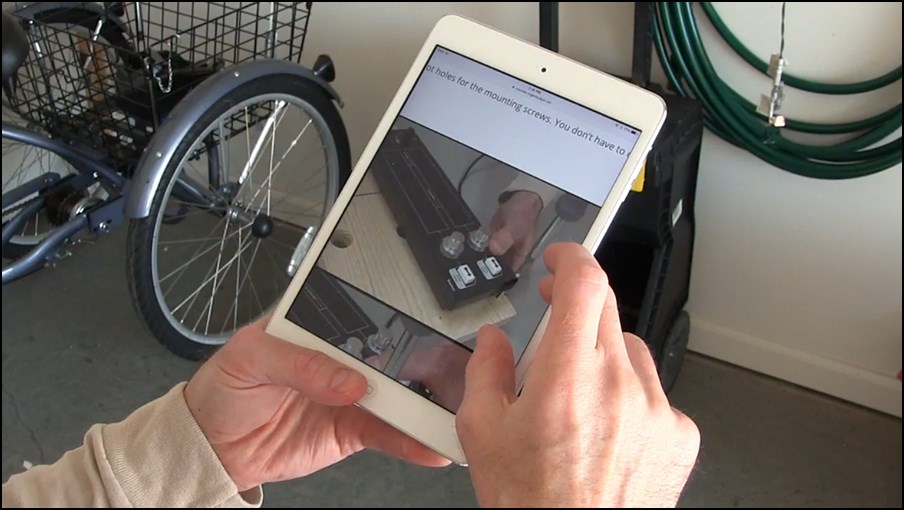
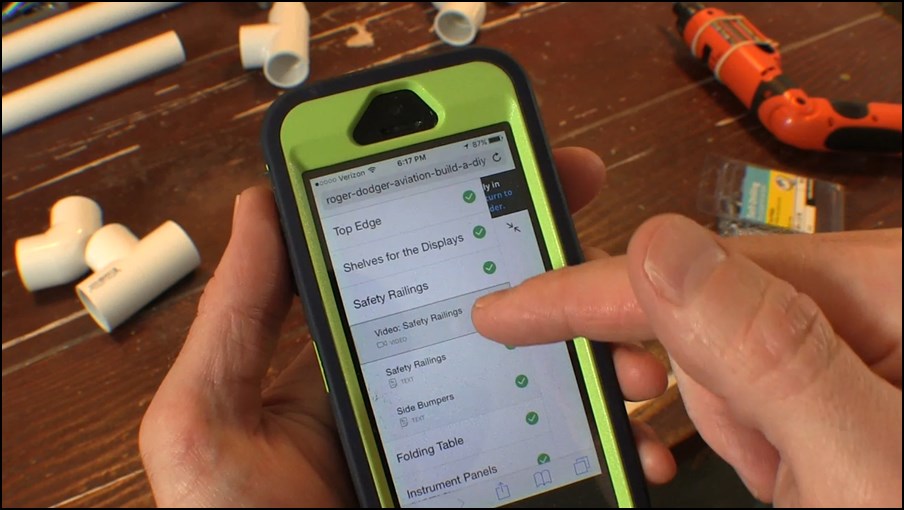
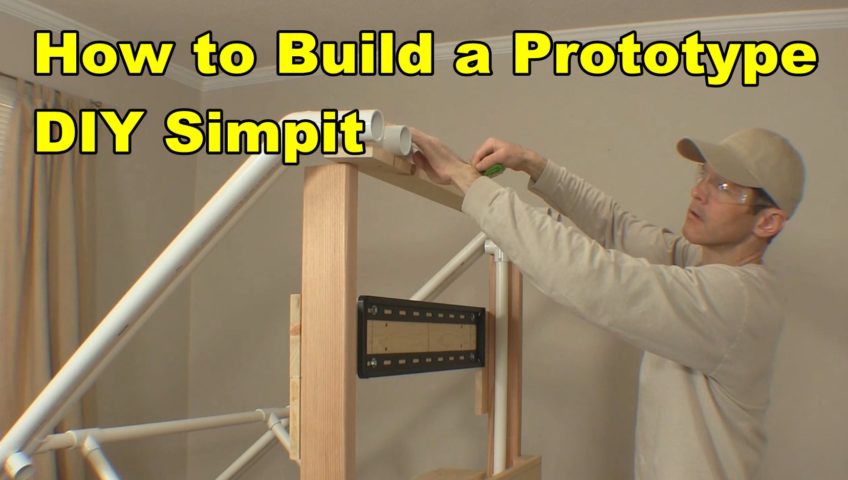
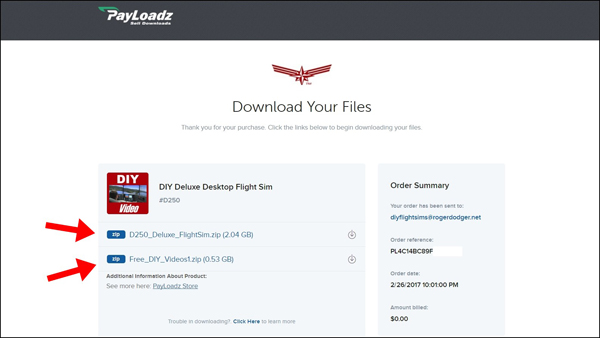
Step 5: DIY Flight Sim Online Tutorials

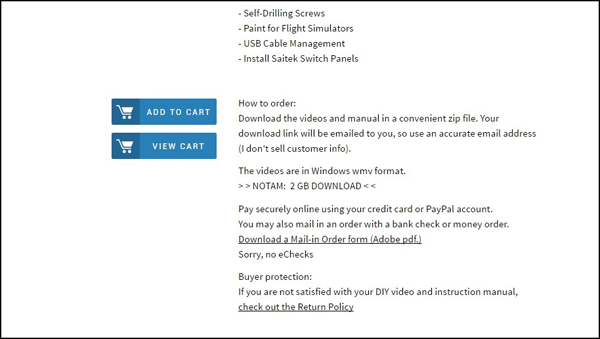
Know what to expect before you even start the project. These online courses show you every step of the building process with video clips, diagrams, pictures, printouts, and complete instructions. The tutorials are the least expensive part of your project, but most of all, they save you money and frustration with your project.

My customers finish their projects and get back to flying!


the best and cheapest way to build a flight simulator - finished DIY flight sim
Finish your project and take off!


FSX cockpit DIY instructions

These Builders Completed Their FSX Cockpit DIY Projects

This is the greatest difference between Roger Dodger Aviation and the other guys: my customers actually complete their projects! My online courses include instructions for each step of the project including video clips, diagrams, pictures, and printouts. You can build a FSX cockpit DIY project like these guys!

DIY Deluxe Desktop Flight Sim

First of all, look at this beautiful DIY Deluxe Desktop Flight Sim item #D250. It was built by Greg in Savannah Georgia, USA. This is one of my favorite designs because it is so versatile. Builders can create exactly the type of home cockpit they need to match their flying interests. You can install a yoke and throttle quadrant in the #D250. On the other hand, you can also use a HOTAS joystick and throttle or even a helicopter collective.

Pair the #D250 with the DIY Side Joystick Frame, or the DIY Center Joystick Frame, or the DIY Easy Helicopter Collective. These projects provide a sturdy mounting base for your joystick, throttle, and rudder pedals.


DIY Deluxe Desktop Flight Sim
DIY Deluxe Desktop Flight Sim built by Greg

DIY Triple Screen Flight Sim

The DIY Triple Screen Flight Sim, item #T440 is still my most popular DIY course. As a result, I get more T440 pictures than any other project. Two customers recently sent me pictures of their completed projects (see below). Wayne and Richard both build the same project but built it to suit their particular simulation requirements.


Help Spread the Word: FSX Cockpit DIY Projects

Don’t let Facebook bury these success stories! These men worked hard on their FSX cockpit DIY projects and deserve to be congratulated. When I post on Facebook, the message only goes out to 10% of my fans. Please LIKE, COMMENT, and SHARE to spread the word. If you are reading this as a blog post, please link to it or share it with friends. Let’s show these guys our community appreciates a job well done.

How much does it cost?

How Much Does it Cost to Build a Flight Simulator?

I get this question a lot. It is a valid question, but it’s difficult to answer. People will often ask, “How much does it cost to build a flight simulator?” Does that mean they’re talking about the DIY framework of PVC pipe, lumber, and Styrofoam? Or do they really mean they are starting at zero, where they don’t even own a PC and a monitor? Or are they actually asking about the flight controls and switch panels?

In reality, DIY Flight Sim builders have a wide variety of choices for equipping their home cockpit to match their needs. They may start with a single display now, and then add more displays later. They may start with just a yoke and rudder pedals, but add switch panels later. So when we ask how much does it cost to build a flight simulator, are we talking about how much it costs on day one, or how much it costs after slowly adding and upgrading components after a few years?


DIY Flight Sim Budget Tool

I decided the best way to answer this question is to customize the answer just as each individual builder customizes their home cockpit. I built a Budgeting Tool to help determine the total price for a home flight sim setup. The Budget Tool shows how much to budget for each component and then adds those costs for a grand total. You decide how much you need to spend on your DIY Flight Sim.

But what is an acceptable home flight sim? Some people require three screens or more to consider it a real flight simulator, some people are happy with just one. So, I also introduced three phases (levels) of progression in the Budget Tool. Phase 1 is the bare-bones minimum amount of equipment you need to have a functioning flight sim. I’m assuming a fairly decent computer and graphics card (with power supply). You also have the choice of flight controls: either a yoke + throttle quadrant or HOTAS joystick + throttle. In addition, you really need Track IR if you only run one display. And don’t forget the rudder pedals. Airplanes have rudder pedals, so you should too.

At Phase 2 and Phase 3, I added more components to the Budget Tool. Each component gives the pilot more functionality and a better flight experience, but also adds cost. This is the trade-off you see in any budget. For any given component you can either budget an amount, or zero if you don’t need it yet.


How much does it cost to build a flight simulator?


Where to Purchase Components

People tend to have their favorite sources for computer equipment and flight gear, and I’m no different. For computers, I normally go to a local place called Micro Center where I’ll typically buy a computer, but immediately upgrade the graphics card with power supply. However, the last computer I purchased was from Cybertron. The Cybertron rig was already built for gaming, so I didn’t have to upgrade anything, which was very nice. They also sent me a free t-shirt!

You have a staggering amount of choices for displays. TVs are high-definition so you can use them for your flight sim, but make sure they have a fast refresh rate. Just Google for prices on HDTVs or monitors, and get the best deal you find.

I used to always shop Amazon for flight controls and switch panels, but now they don’t always have the best price. I recommend starting at Amazon, but also check prices at other online retailers like FlightSim Pilot Shop. Some guys buy their gear from E-bay, so that’s always an option too.


Ok, so How Much Does it Cost to Build a Flight Simulator?

I recommend that you customize the Budget Tool for you. The Budget Tool is only a starting point. I posted it here as an Excel file… DIY Flight Sim Budget Tool v1.2  so you can change it, add to it, do whatever you need to make it useful for you. This is my first attempt at a Budget Tool, so please let me know your thoughts on this. It’s probably not perfect and I anticipate making improvements to it.

Build a DIY flight simulator with these homemade cockpit plans

Homemade Cockpit Plans | How to Order

I can teach you how to build a DIY flight sim with these homemade cockpit plans. You can improve your flight sim significantly with inexpensive materials that are available at your local home improvement store. In addition, buy your flight controls from Amazon or other online retailers, and use standard computer equipment. My homemade cockpit plans are videos, illustrated instructions, plan drawings, and printouts that show you the construction of an actual DIY flight sim.


Homemade Cockpit Plans

It’s easy to order my homemade cockpit plans. Every project is a full-featured online tutorial, so you never have to wait for shipping. I don’t sell the building materials, you already have them in your neighborhood at your local hardware store.


Step-by-step Ordering Instructions

  1. Find the homemade cockpit plans your want and click “View Course”.
  2. Click “Buy” to enroll in the course.
  3. Click “Fee Trial” to see the sample sections of the plans.
  4. Enter your name, email, and password (or just log in if you already enrolled in Builder Academy).
  5. Select “Check Out with PayPal” at the order screen or “Have a coupon” if you have a coupon code.
  6. Complete the purchase on PayPal. You don’t need a PayPal account.
  7. View the plans on any device: tablet, smartphone, desktop, or laptop.


Plan Formats

View all of the content in an internet browser, so you don’t have to worry about file formats, or downloading folders, or extracting files, or anything like that. You can focus on the project, not the computer programs. A few printouts are included too. You can either view them on screen, or print a hardcopy, if you prefer.


Lose Your Password?

Did you lose your password? No problem. My website has a standard password recovery/reset function. You can get access to the plans again and get back to building in no time.

100% online: How to build a home flight simulator

Online Training: Learn How to Build a Home Flight Simulator

I can now teach you how to build a home flight simulator in a online streaming format instead of selling downloads! This is a huge step forward for my little company. Look at the picture above… you can actually view an entire DIY Flight Sims project on a phone or tablet!

9 Reasons Why this is Awesome:

  1. The video and text content is now integrated. For each step, there is a video clip and the corresponding text it there with it. So in one example, I chopped up a 40 minute video into smaller segments. Each video clip appears with the corresponding step in the text.
  2. Accessible on any device: phones and tablets as well as laptops and desktops. There were no smart phones when I started making these DIY projects 10 years ago. But now, you can take the lesson to the workshop with you.
  3. A real affiliate program! My fans can also be my partners. If you have a blog or website, you can sell DIY Flight Sims products and earn a commission!
  4. No more cumbersome downloads. 95% of the emails I get from customers are people that lost their downloaded material and I have to manually send them a new download link. So then they have to wait on me to get their message and get to my computer. Well they don’t have to wait any more.
  5. Standard password recovery. Lose your password? No problem. Just re-set it like on any other website.
  6. Free updates for existing customers. I can give free access to customers that purchased the download version of these products. I can simply issue a 100% off coupon and that gives them access.
  7. Freebies! I used to include many basic training videos in a “Free Video” folder with each purchase. I’ve moved all of this content, and added new content to the Builder Academy.
  8. We still have printouts! People are already asking me, how do they print out the templates or button sheets? The online format still allows you to print Adobe pdf files. It’s just as easy as ever.
  9. It’s a secure website with SSL protection. Browse safely, and then build safely.

I built a new website and the online training system is ready! You can check it out right now. Please let me know what you think of this new direction for my little company.

How to Build a Prototype DIY Simpit

How to Build a Prototype DIY Simpit

One of the common questions I get is about altering the DIY Flight Sim designs. Most builders modify the designs in some way to match their specific needs or equipment. For examples, take a look at Customer Gallery 1 and Customer Gallery 2 and notice how no two Simpits are alike. Once a builder deviates from the plans, the project becomes a prototype DIY simpit. There is no way I can predict how people will modify my DIY Flight Sim projects, so that is why I use building materials that are inexpensive and easy to use. Don’t be scared! Prototyping is a wonderfully creative process that can give you real satisfaction with your project.

What Does “Prototype” Mean?

You don’t really know if a flight sim design is going to work until you build it in real life. Really! If some anonymous person on a forum says an idea will work or not work, they don’t really know, because anyone can type words on a screen. You only gain true knowledge by building a DIY simpit in real life. That is prototyping.

So when someone asks me if a design modification will work, I’m very cautious about my answer for several reasons…

  • I don’t know if my understanding of their message matches what they’re imagining.
  • I don’t know if a proposed modification will require an additional structural reinforcement.
  • I don’t know someone’s skill level. Have they built things before, or is this the first time?
  • I don’t know if they have adequate tools. Are they building in a workshop or a dorm room, etc?

Prototyping means you try your idea, then adjust it and try it again, then adjust it and try it again, and keep at it until you are happy with your work. Fortunately, PVC pipe is a wonderful material for prototyping a DIY simpit (more about that below).


Scale models

When I am designing large DIY simpit projects I make a scale model of my idea. As a result, this helps me find any major flaws and get a feeling for what it will look like before I build it full size. I use 1/2″ PVC pipe when I build a scale model. The smaller pipe saves me money because I use less 1″ pipe when I later build the full size prototype.

I also make scaled down controls, displays, and switch panels. This isn’t Computer Aided Design, but I still call it CAD: Cardboard Aided Design.


7 Steps for Prototyping a DIY Simpit

So how do you modify a DIY Flight Sim project if you need to scale it up or scale it down? Here’s an example. Let’s say you want to build the D250 Deluxe Desktop Flight Sim. However, the project is built around 32″ HDTVs but you want to use 27″ monitors. How do you scale this down?

  1. First of all, buy an extra length of pipe in case you need it (PVC pipe is cheap)
  2. Scale with a percentage.  27″ is about 16% smaller than 32″ Here’s the math: 32 – 27 = 5 and then 5 / 32 = .156, which is about 16%
  3. Decrease the measurements of pipes by that same percentage. Only scale the pipes adjacent to the displays, for now.
  4. Cut the pipes and assemble them with the PVC fittings. Start with just the pipes adjacent to the displays. Observe if the frame fits well compared to the displays or if you need to make changes.
  5. If some pipes are a little too long, remove them and cut them shorter. If some pipes are too short, that’s why you bought extra pipe. It’s easy to assemble/disassemble the PVC pipe frame to test different frame dimensions.
  6. Once you have pipe lengths that you are happy with, secure the PVC fittings with self-drilling screws.
  7. Scale the rest of the pipes to fit with the part of the frame you changed. This is much easier now that you have a starting point.
Saitek Trim Wheel Adapter Template

Build a Saitek Trim Wheel Adapter

You can install the Saitek Trim Wheel underneath dual Saitek Throttle Quadrants… but only if you use an adapter plate. I made instructions, a DIY video, and a template to help you build a Saitek Trim Wheel Adapter  just like the one you see in the pictures.

I’m very happy with the Saitek Trim Wheel mainly because proper elevator trim is such a vital and basic skill in real flying. We are lucky that an inexpensive and robust trim wheel is readily available for our home flight simulators. Unfortunately, there is no way to clamp the stock Saitek Trim Wheel to a reasonable location. Believe me, I tried. A pilot should be able to adjust the elevator trim without looking for it the trim wheel. As a result, most trim wheels in real airplanes are located under the throttle or next to the pilot seat. Therefore, I made this Saitek Trim Wheel Adapter plate so you can install your trim wheel in a very natural location for your home flight simulator.


You Can Build a Saitek Trim Wheel Adapter

Take a look at these two examples of Saitek Trim Wheel Adapters built by Flight Sim enthusiasts just like You! Most noteworthy, you will see their Adapters look exactly like the one I built. They used the exact same build template that I offer free on my website. Many thanks to builders Dennis and Ben for sending me their pictures. I would love to see your finished Adapter too. If you build one, please send me pictures of your project to diyflightsims@rogerdodger.net.


Download the Free Template

Build your own Saitek Trim Wheel Adapter. Start by downloading and printing out the template. Get the template free by signing up for my monthly newsletter, the Roger Dodger Insider. You will be the first to know about product updates, sales, building tips, and more. It’s a monthly email so you won’t be bombarded with a bunch of stuff in your inbox and you can unsubscribe at any time. Become a Roger Dodger Insider here.

DIY flight simulator cockpit plans

DIY Flight Simulator Cockpit Plans | How to Order

I can show you how to build your own home flight simulator. You can build an impressive home cockpit with materials from a home improvement store, flight controls from Amazon, and standard computer equipment. Best of all, my website has more than just DIY flight simulator cockpit plans, each project includes detailed videos and instruction manuals.

DIY Flight Simulator Cockpit Plans

The slides below show you step by step how to order a DIY Flight Sims digital project. Every project is an instant digital download and as a result you don’t have to wait for shipping. I do not sell the building materials, therefore you just buy them from your local hardware store.


Step-by-step Order Instructions

  1. Find the DIY Flight Simulator cockpit plans project you want and click “Add to Cart”
  2. Review your choice at the Shopping Cart screen and click “Next”
  3. Choose your payment method: Credit Card or PayPal
  4. Again choose your payment method. The Credit Card option is at the bottom
  5. Enter your payment information
  6. You will receive an email from Roger Dodger Aviation with the download link at the bottom of the email
  7. Click the download link to go to your private download page
  8. Click the link to save the zip file to your computer. There may be more than one zip file, so be sure to save them all. Pay attention to where you save the zip file, it might be in your Downloads folder or desktop
  9. Right click the zip file and extract the contents. Windows will create a new folder with the extracted contents
  10. Open the new folder.
  11. Click on the pdf files to read the DIY Flight Simulator cockpit plans and manuals or print the labels. Click the video files to view the instructional videos


The instruction manuals and labels are in Adobe pdf format. You can download the free Adobe reader here.

The videos are in Windows Media Video (wmv) format. Your computer should be able to play them.

If you are using an Apple Mac or other Apple product, you will probably need a couple of free apps to view the files. You can download the Adobe reader for Mac here and you can download the free Windows Media Video viewer here.

Alternatively, you can print out a paper order form and mail in your order. Get the order form here.


This Winter, People Around the World are Building Home Flight Simulators

People around the world are building home flight simulators this winter. These guys find inexpensive materials at home improvement stores and build their own airplane cockpit at home.

January is BUILD MONTH

Why is January a great time to build a DIY (Do It Yourself) flight sim project? First of all, many people get new flight simulator software and computer equipment for Christmas and are ready to upgrade their home cockpit. Also, the holidays are over and now people are returning to their hobbies. Flight simulation is a great way to learn about aviation during the cold winter months. Consequently, I typically see an increase in DIY Flight Sim business and website traffic starting in January.

You don’t necessarily need a workshop for building home flight simulators, so many people build their project in an apartment or even a dorm room. You don’t need outside ventilation because no harsh chemicals, paints, or adhesives are used with these projects so you can build indoors. Let it snow!


Inexpensive Components and Materials

Is your home flight simulator nothing more than a desk with a few monitors and a joystick? You can make a more realistic airplane cockpit with inexpensive materials from a home improvement store. These guys build home flight sims with PVC pipes, lumber, and Styrofoam insulation panels. Notice they also painted their projects because painting is also inexpensive, easy, and gives the project a truly finished appearance.

We are fortunate to live in a time when we have so many affordable choices for computer equipment and flight controls. For example, it is now possible to use multiple high-definition HDTVs as displays for a flight simulator. In addition, computers and graphics cards are more powerful than ever. We have more choices than ever for flight sim control yokes, rudder pedals, throttle quadrants, switch panels, and more. Finally, the flight sim software of today is better than ever. Lockheed Prepar3D, X-Plane 11, FSX Steam, and Aerofly FS2 all boast improved performance and functionality.

Combine inexpensive building materials with affordable computer equipment and you can have a powerful and realistic flight simulator for your home.

Customizing and Building Home Flight Simulators

Builders modify their projects to match their needs and resources. For example, they can scale a frame to fit around 24″ monitors, or 27″, or 32″ or whatever. Also, they can use one large display, or multiple displays. Some builders add modified keyboards, additional lights, or even drink holders. Are you building in a spare room or just a spare closet? These guys can fit a fully functional flight sim just about anywhere. If you typically fly airplanes with a yoke and throttle quadrant, then that is what you will want to build. On the other hand, if you use a HOTAS joystick and throttle, then you will want a DIY frame that supports those flight controls. If you fly helicopters, there’s a helicopter collective project for you too. See all these examples of customized flight sim projects in the Customer Gallery.

Get Started!

The most difficult part of any building project is just getting started, so get going now. You may make some mistakes along the way, but they will be inconsequential because you’re using inexpensive materials. Get building and get done, so you can get flying!


Six Screen Home Flight Simulator


Saitek Pro Flight Instrument Panel in a DIY Triple Screen Flight Sim

Our customer, Tom, sent in these pictures of his completed project. He installed a Saitek Pro Flight Instrument Panel in a DIY Triple Screen Flight Sim. Actually these are eight separate units that combine to work as a complete instrument panel, therefore he has the standard six flight gauges, plus two VOR displays. 

T440 Triple Screen Flight Sim customer completion

Saitek Pro Flight Instrument Panel

The Saitek Pro Flight Instrument Panel you see in the picture is eight separate flight instruments. Each unit can be set individually to display whatever instrument you choose, in addition, you have 15 different displays to choose from. The units cost $170 to $190 USD depending on where you purchase from. 

The instrument panel is the perfect addition to Tom’s DIY Flight Sim. He says: “Had great fun building this triple screen, with your instructions and videos even I couldn’t mess it up!”

T440 Triple Screen Flight Sim customer completion

Merchandise Shortage

But wait, can you even purchase the Saitek flight instruments right now? On mypilotstore.com they note a merchandise shortage with the following message: 

Out of Stock. There is a massive, world-wide, back-order situation on all Saitek Pro Flight merchandise.  All orders will be filled on a first-come, first-served basis.  Order now to reserve your spot in line. You will not be charged until the order ships and you can cancel at any time prior to shipment.  Orders placed now are expected to be shipped in 6 to 12 weeks.

MadCatz recently sold Saitek to Logitech. Gameindustry.biz reports that MadCatz purchased Saitek in 2007 for $30 million, but is now selling it to Logitech for only $13 million. We can only hope that Logitech can keep the Saitek product line in production and going strong for years to come. I’ve owned several Logitech products (keyboards, mice, etc.) and I’ve always been happy with their reliability and functionality. I know that there have been concerns lately about the workmanship in Saitek products and consequently I hope the sale to Logitech improves the reliability of the entire Saitek product line.