More DIY Flight Sim Completions in the Expanded Customer Gallery

I added more pictures of DIY Flight Sim completions to the new expanded Customer Gallery. Note there are now three distinct examples of customers adding the popular Thrustmaster Warthog HOTAS joystick to the #F321 DIY Center Joystick Frame.


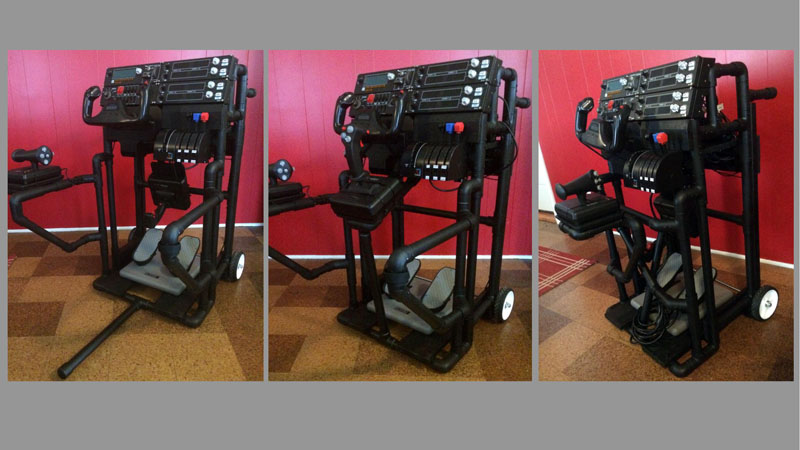
Thrustmaster Warthog and other Additions

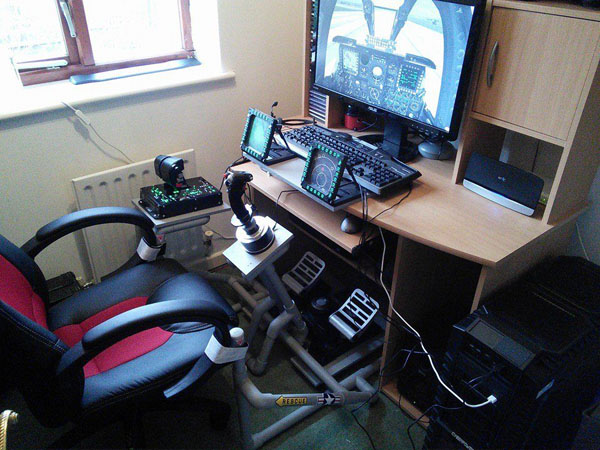
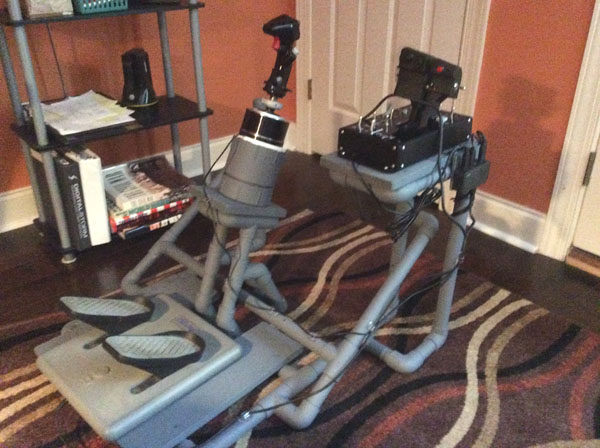
Several customers modified the #F321 Center Joystick project slightly to accommodate the Thrustmaster Warthog joystick. They did this by shortening the center joystick stand by several inches and then bolting on the joystick. The Thrustmaster Warthog originally comes with a flat, square base which can be easily removed. Notice that the DIY Center Joystick Frame works well with Saitek rudder pedals because of their wide stance. You can comfortably straddle the center joystick to reach the pedals. Note the Saitek Combat Rudder Pedals installed on the #F321, but you can also use the Saitek Cessna Rudder Pedals. I originally designed the #F321 project around the early model Saitek Pro Flight Rudder Pedals, witch still work well. You can use the CH Rudder Pedals but they are difficult to use because they are narrow and makes it harder to straddle the center joystick stand.

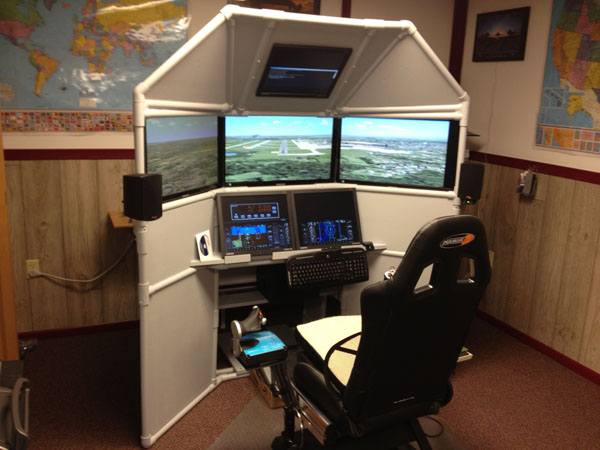
Center Joystick or Side Joystick?

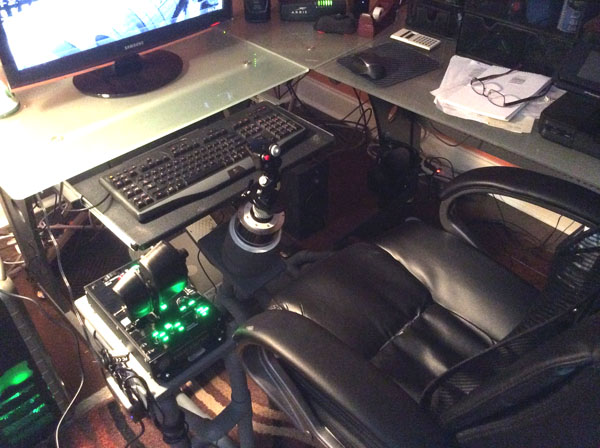
Check out Craig’s pictures in the new Customer Gallery 2. Craig created one of the most attractive DIY Flight Sim completions. He built the #F321 with a removable center stand and with side stands on both sides. He can now switch between a traditional center joystick and a HOTAS side joystick. Notice the D-ring fasteners he uses to attach the center stand.

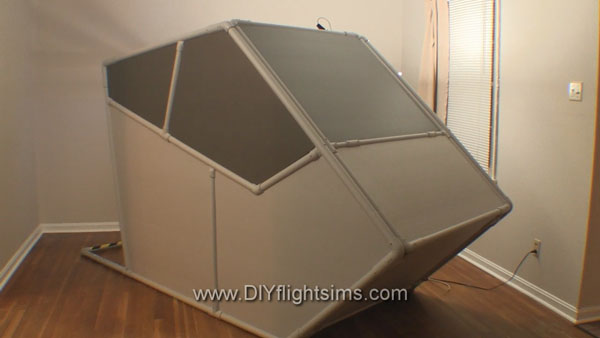
DIY Flight Sim Completions: Modified DIY Roll-Away Flight Sim

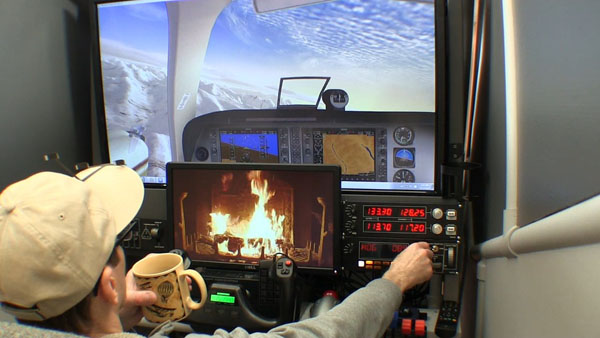
Rob modified the #E420 DIY Roll-Away Flight Sim to match his needs and style of flying. He added an expanded mid-shelf for the Saitek yoke and throttle quadrant and a swing-out platform for the compact mini-keyboard. Also note the additional platform for the mouse and mouse pad. The Roll-Away Flight Sim frame is wonderfully mobile because Rob installed four castering wheels to it. Two of the castering wheels can be locked in place so he can comfortably use the rudder pedals without worrying about the frame rolling away. You should always use rudder pedals, they are an important part of DIY Flight Sim completions.


Beautiful painted PVC frame for HOTAS flight controls by Craig

Warm Fireplace Inside a Flight Simulator

This project combines two of my favorite things: a cozy fireplace and my flight simulator. Why not simulate a nice cozy fireplace inside a flight simulator?!

This DIY flight sim is ready for winter! I combined the warm atmosphere of a crackling fireplace with the fun of flying my simulator. It’s just the thing for those freezing winter months. You can do this too, it’s easy to set up.

Create a Fireplace Inside a Flight Simulator

My flight simulator has two displays connected to the graphics card. The large display is a 40″ HDTV and the smaller display is a 19″ VGA computer monitor. Typically, I display the flight simulator outside view on the large screen and the flight instruments on the smaller screen. For today’s project, I’m only running FSX on the large screen. Start FSX and start a flight. Select Windowed Mode from the View Menu and resize the window so it fits on one screen (the large screen in my example).

Next start a web browser on the second monitor and find a fireplace video on YouTube. Play the video and select full screen. This is how I my smaller display shows a cozy, crackling fireplace.

The flight simulator you see in the pictures and video is the DIY Flight Sim Pod. You can build this same thing in your own home. These instructional videos and manuals show you how to build a big, beautiful, flight simulator. The yoke, throttle quadrant, switch panels, etc. all came from Amazon.

Don’t Fly Thirsty

All we need now is a nice hot apple cider. I recently discovered sugar free apple cider from Alpine. It doesn’t need any sugar because of what we add next: cinnamon flavored bourbon. Apple and cinnamon… oh it’s so, so good!
Leave the ice and snow outside, you’re flying in comfort.
Happy Landings!

Warm fireplace in your Flight Sim!

This Winter, People Around the World are Building Home Flight Simulators

People around the world are building home flight simulators this winter. These guys find inexpensive materials at home improvement stores and build their own airplane cockpit at home.

January is BUILD MONTH

Why is January a great time to build a DIY (Do It Yourself) flight sim project? First of all, many people get new flight simulator software and computer equipment for Christmas and are ready to upgrade their home cockpit. Also, the holidays are over and now people are returning to their hobbies. Flight simulation is a great way to learn about aviation during the cold winter months. Consequently, I typically see an increase in DIY Flight Sim business and website traffic starting in January.

You don’t necessarily need a workshop for building home flight simulators, so many people build their project in an apartment or even a dorm room. You don’t need outside ventilation because no harsh chemicals, paints, or adhesives are used with these projects so you can build indoors. Let it snow!


Inexpensive Components and Materials

Is your home flight simulator nothing more than a desk with a few monitors and a joystick? You can make a more realistic airplane cockpit with inexpensive materials from a home improvement store. These guys build home flight sims with PVC pipes, lumber, and Styrofoam insulation panels. Notice they also painted their projects because painting is also inexpensive, easy, and gives the project a truly finished appearance.

We are fortunate to live in a time when we have so many affordable choices for computer equipment and flight controls. For example, it is now possible to use multiple high-definition HDTVs as displays for a flight simulator. In addition, computers and graphics cards are more powerful than ever. We have more choices than ever for flight sim control yokes, rudder pedals, throttle quadrants, switch panels, and more. Finally, the flight sim software of today is better than ever. Lockheed Prepar3D, X-Plane 11, FSX Steam, and Aerofly FS2 all boast improved performance and functionality.

Combine inexpensive building materials with affordable computer equipment and you can have a powerful and realistic flight simulator for your home.

Customizing and Building Home Flight Simulators

Builders modify their projects to match their needs and resources. For example, they can scale a frame to fit around 24″ monitors, or 27″, or 32″ or whatever. Also, they can use one large display, or multiple displays. Some builders add modified keyboards, additional lights, or even drink holders. Are you building in a spare room or just a spare closet? These guys can fit a fully functional flight sim just about anywhere. If you typically fly airplanes with a yoke and throttle quadrant, then that is what you will want to build. On the other hand, if you use a HOTAS joystick and throttle, then you will want a DIY frame that supports those flight controls. If you fly helicopters, there’s a helicopter collective project for you too. See all these examples of customized flight sim projects in the Customer Gallery.

Get Started!

The most difficult part of any building project is just getting started, so get going now. You may make some mistakes along the way, but they will be inconsequential because you’re using inexpensive materials. Get building and get done, so you can get flying!


Six Screen Home Flight Simulator