I designed the DIY Kinetic Motion Flight Sim as a direct-control moving platform. As a result, it works with all flight simulation software. It is the only inexpensive motion flight simulator for Aerofly FS2.
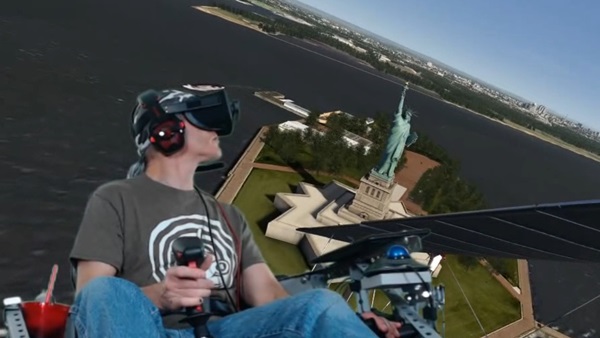
Statue of Liberty in Aerofly FS2 looks magnificent
Inexpensive Motion Flight Sims for Everyone
My dream is to create a DIY tutorial that shows how to build a motion flight sim. The most inexpensive way to build a one is to use materials from a home improvement store. As a result, you can build a motion flight sim for just a few hundred dollars instead of a few thousand.
Would the flight sim community embrace such an idea? I posted several demonstration videos to gauge people’s reaction. Unfortunately, when I posted a video to the Aerofly FS2 fan group, I only received negative comments. This makes no sense when you consider how a motion flight simulator for Aerofly FS2 improves the flying experience exponentially.
Motion Flight Simulator for Aerofly FS2
Aerofly FS2 is one of the lesser-known flight sim titles, but it has two things that are essential for virtual reality. Namely, high frame rates with dense, quality scenery. Take a look at the embedded video. I’m flying over New York City over hundreds of buildings, yet the frame rates remain smooth.
Next, imagine what it feels like to add a motion flight simulator for Aerofly FS2. The experience is totally immersive. I thought the Aerofly FS2 user base would recognize how this inexpensive DIY project could enhance their flight experience. I guess I was wrong.
What’s Next
Obviously I won’t be posting any more demonstration videos for Aerofly FS2. However, I’ll gladly continue to use Aerofly FS2 with my motion flight simulator because it’s so enjoyable.
I give extra time and effort to set up the lights, camera, OBS software, etc. when I make a video, and I only want to spend the effort for people that will appreciate my work. It didn’t work out for Aerofly FS2, consequently I will focus on other sim titles like X-Plane 11, DCS World, and IL-2 Battle of Stalingrad.
The Elite Dangerous fans are greatly supportive, so I will post more videos for them also.
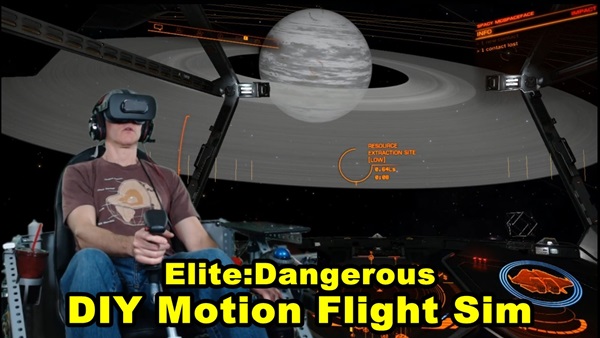
I built my DIY Elite Dangerous Motion Flight Simulator with supplies from a home improvement store. It works with a variety of flight simulator titles, not just Elite:D. I call this motion rig the “Kinetic Flight Sim.”
How it Moves
I designed the movement system by examining the control linkages of actual Sport Aviation aircraft. Nearly all small airplanes have control systems consisting of cables, pulleys, bell cranks, and levers. The Kinetic Flight Sim uses similar technology.
The motion system is not software-specific. Not only is this an Elite Dangerous Motion Flight Simulator, it will work with any flight simulator software. I’ve already tested it with AeroflyFS2 (see video), War Thunder, and DCS World. I plan to test it with X-plane 11 and IL-2 Battle of Stalingrad once I upgrade the computer’s video card.
DIY Elite Dangerous Motion Flight Sim leaving dock
HOTAS Controls
The Kinetic’s controls are HOTAS (Hands On Throttle And Stick). The joystick is a CH Products Combatstick. I used this type of joystick because I have experience modifying this type and simply because I had one available for use. The throttle is the Saitek/Logitech X52, and the pedals are Saitek Pro Flight rudder pedals. I plan to upgrade to Thrustmaster Warthog controls if I receive adequate funding.
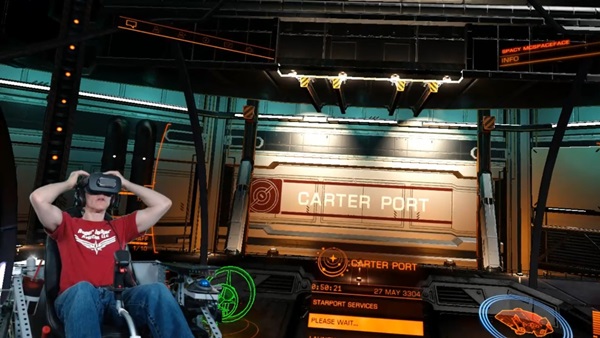
The HOTAS controls are especially important because of virtual reality. When the pilot wears the Oculus Rift VR Headset, he can only see the virtual cockpit. The controls are not visible (and neither is my drink holder).
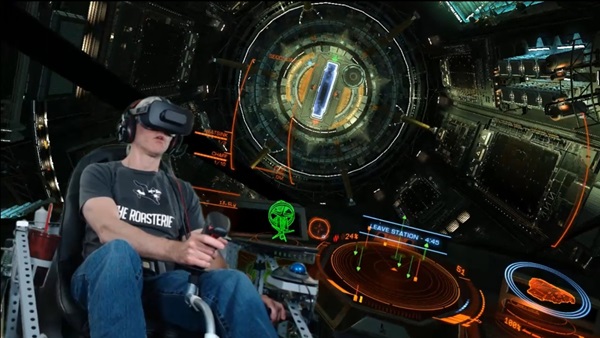
Elite Dangerous Motion Flight Sim at a space station
Elite Dangerous Motion Flight Simulator
Check out these demonstration videos. I’m using the Kinetic flight sim with Elite Dangerous and flying the new Krait MkII. Elite:D works particularly well with my gaming computer and VR headset. It’s an absolute joy to fly in space with a motion flight sim. I could produce longer videos but I’m not sure if people really want to see that.
Should I livestream longer flights? I hope to try that soon.
The following video is an exclusive! It’s only available to the readers of this blog article. I call it “Dodging Icebergs” Enjoy ! ! !
Home Flight Simulator Plans – How to Install Larger Displays
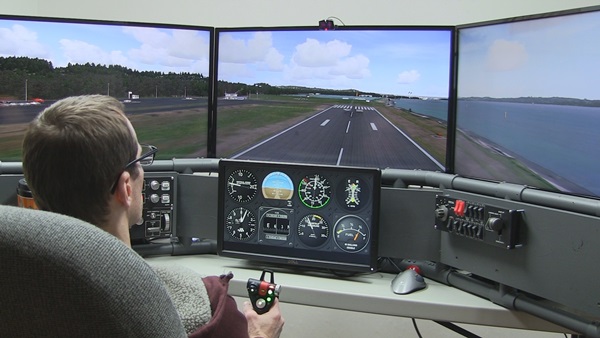
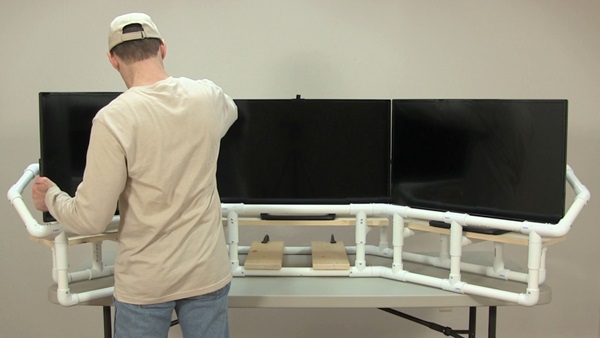
The DIY Deluxe Desktop home flight simulator plans are designed around three 32” HDTVs used as the main displays. But what if you want to use displays that are larger (or smaller)? Many DIY Flight Sim builders modify the plans to match their unique requirements. Furthermore, PVC pipe is a great material for experimental trial-and-error. It’s no wonder so many builders modify their projects.
DIY Deluxe Desktop Flight Sim
Home Flight Simulator Plans
Gary is a DIY Flight Sim builder. He developed a useful spreadsheet to use when using larger (or smaller) displays with the DIY Deluxe Desktop home flight simulator plans. He was kind enough to share it with me, so I’m providing it to you in the course content. First of all, Gary’s spreadsheet is really clever. You simply enter in the dimension of the displays you want to use and then spreadsheet calculates how much to change the affected PVC pipes. Also the relevant pipes are identified in a new Pipe Frame Map.
You still may require a little trial-and-error because different PVC manufacturers make the fittings differently. Fortunately, PVC pipe is inexpensive and easy to work with.
First of all, as I introduce the subject of motion flight sim theory, it helps to start with a foundational understanding of how our bodies sense movement and orientation. Movement is our sense of acceleration/deceleration and the notion that we are traveling through a space. Orientation is our attitude in space, our sense of pitch, roll, and yaw. The quality of a motion flight sim is in its ability to fool the human sensation of movement and orientation. For many normal flight attitudes in an airplane, there is a corresponding flight sim action that can emulate how it should look and feel from the cockpit. Consequently, this is the basis of motion flight sim theory.
Motion Flight Sim Theory: How do we know we’re moving?
The human body has three systems that inform the brain about movement and orientation:
Visual system – the eyes that sense position by what is seen
Vestibular system – the inner ear organs that senses balance and orientation
Somatosensory system – the nerves in your body that sense position and movement. For example, when you accelerate forward, you feel pressed back into your seat.
Valid motion flight sim theory states that a moving rig, like the Kinetic motion flight sim, does specific things to fool each of these systems.
Visual System
A pilot recognizes his position in space by seeing the simulated environment produced by the flight sim software. It is vital that the pilot only sees the simulated environment, and nothing else. For example, imagine you’re looking at the flight sim displays, but you can also see the walls of the room in your peripheral vision. As a result, your brain will not be fooled.
One way to create an immersive visual experience is to seat the pilot in an enclosed cabin like the expensive flight sims used by airlines. Even when a pilot uses an inexpensive DIY rig like the DIY Flight Sim Pod he can feel immersion because all he sees is the simulated flight environment. The other option is to use a high-quality virtual reality headset. In either case, the pilot must not see the room beyond the flight sim.
Even with a static flight sim, an effective visual system can give you a feeling of movement… or even motion sickness if you are prone to it.
Vestibular System (the Inner Ear)
In our airplane, we control movement around the pitch axis, the roll axis, and the yaw axis. Coincidentally, the inner ear contains three semicircular canals that are aligned roughly the same way – pitch, roll, and yaw. How do we fool the inner ear? You already know at least one way to do it. We discover as little kids that if we spin around and around, we get dizzy and lose our balance. The effect is so profound that even when we stop spinning, we still stagger around for a bit before fully regaining our balance.
The semicircular canals contain tiny hairs and a special fluid. When the fluid is displaced by movement, the hairs are pushed around by the moving fluid. The brain interprets this signal as motion.
In a motion flight sim that moves in pitch, roll, and yaw, the inner ear will also detect that same movement. In real airplanes, there are certain scenarios that can confuse a pilot’s inner ear and cause spatial disorientation. Furthermore, some of these scenarios can be emulated in a simulator.
Motion Flight Sim Theory – Semicircular Canals
Somatosensory System
Imagine accelerating down a runway. You can feel yourself being pressed back into your seat. Now imagine you’re in a regular chair and you simply lean back in it. You can feel yourself being pressed into the back of that seat too. Your somatosensory system will give you a similar feeling for the two situations, to a certain extent. A motion flight sim can fool your somatosensory system for mild maneuvers and mile acceleration/deceleration.
When you’re in a real airplane, and you’re making a steep bank, your somatosensory system will tell you when you’re starting to pull G forces. In a 60 degree bank, you will feel two G’s as you are pressed down in your seat. If you fly inverted, you will feel one negative G as you hang upside-down from your seatbelt. Unfortunately, we can’t simulate G forces like that in a simulator. But certain motion flight sims can simulate heave, like turbulence, or like a hard landing.
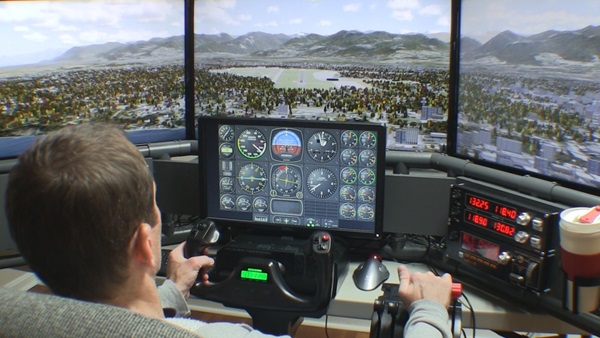
Putting it All Together: Motion Flight Sim Theory
For example, imagine a pilot is in the Kinetic motion flight sim and he starts a climbing turn. He can see the simulated horizon and as he banks the wings, he can see the corresponding bank angle. Also, shadows inside the cockpit move as the airplane turns. This is a climbing turn, so the pilot also pulls back on the joystick. His inner ear detects that he is pitching nose up. The pilot also feels that he is being pressed back in his seat slightly, that’s his somatosensory system.
The pilot should feel like he’s flying. If the pilot is in a quality motion flight sim, then the machine is able to fool the pilot’s sense of motion and orientation.
Frequently Asked Question: “What is the best and cheapest way to build a home flight simulator? BTW, don’t have much money.”
Answer: Fortunately, you can build an exceptional DIY Flight Sim with a little work and some planning. It might cost a lot less than you think.
The Best and Cheapest Way to Build a Home Flight Simulator
The home flight simulator of your dreams may seem a daunting and far-away goal. However, following this tried-and-true method, you can divide a huge job into small, workable, steps. Plan the work and work the plan: this is the best and cheapest way to build a home flight simulator.
Step 1: Plan Ahead
How much is this all going to cost? Before you pick up your credit card, pick up a pencil and figure this out. I made this really easy for you with the DIY Flight Sim Budget Tool. It is a flexible method for determining cost and takes into account components you may already have. Once your budget is in place, it’s easy to identify where you can save money.
In addition, an organized plan can help you get support from your spouse.
Step 2: Use What You Got
Want to know the best and cheapest way to build a home flight simulator? You may be able to re-purpose, repair or modify some components you already have. For example, you might re-purpose an old desk for use with your home flight sim by painting it. You will be delighted at what an inexpensive can paint can do.
Pro tip: online flight sim retailers run a sale every month or two. You can get discounts on software and also flight sim controls and peripherals. In addition, check individual manufacturer and developer websites for sales. And don’t forget Steam.com!
Finally, shop Amazon. When you place an item on your Wish List, it will alert you if the price falls.
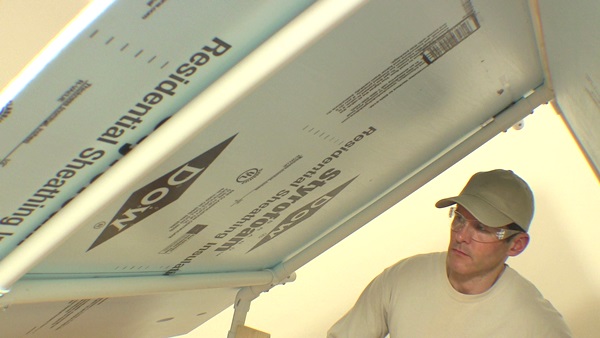
Step 4: Source Local Materials
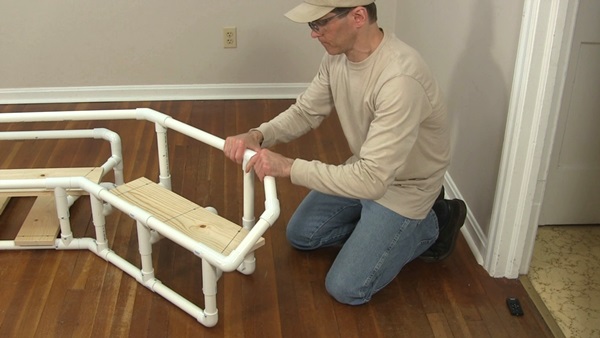
You can build impressive, functional flight sim frames and enclosures with materials from your local home improvement store. All you need are common hand tools that you probably already have. It’s easy to build with PVC pipes, Styrofoam insulation, and wood boards. This is, by far, the best and cheapest way to build a home flight simulator.
Check out the Builder Academy for a wealth of information on using inexpensive materials for home flight sims. You can enroll for free!
Don’t forget to keep your receipt from the home improvement store. You can easily return any materials you don’t use.
Building with PVC pipe
Building with Styrofoam panels
Step 5: DIY Flight Sim Online Tutorials
Know what to expect before you even start the project. These online courses show you every step of the building process with video clips, diagrams, pictures, printouts, and complete instructions. The tutorials are the least expensive part of your project, but most of all, they save you money and frustration with your project.
My customers finish their projects and get back to flying!
Proper flight sim painting will make your home flight simulator look finished and professional. The paint has an almost magical transformative effect. Most importantly, it turns a framework of pipes, wood, and foam into a complete, comprehensive aviation solution. Check out these # tips for flight sim painting.
Tip 1: Materials
It’s actually inexpensive to paint a DIY Flight Sim project, so it’s well worth doing it. Here’s what you’ll need for flight sim painting:
Latex primer. Ask the paint associate at the store to tint this to your desired color. Latex primer covers well and it dries with a flat sheen (not glossy).
Paper towels and a household cleaner like Formula 409 or something similar. Clean the PVC pipe frame before painting. PVC pipe can be rather dusty, even when it’s brand new.
Disposable 2″ wide paint brushes for the pipe frame. These can be re-used and then later thrown away.
3″ wide paint rollers (and handle) for foam body panels. If you have many wood boards to paint, then also use the rollers for those. If you only have a couple of boards, the brush will do.
Paint tray for the rollers.
Plastic drop cloths to catch drips.
Scrap boards to prop up the frame for painting.
Quart ziplock bags and gallon ziplock bags.
Tip 2: Tint
Yes, you can tint latex primer. The store clerk might tell you that the color may not turn out exactly the same as the paint chip because it’s primer. That’s ok, just tell them you are a pro at flight sim painting and you know what you’re doing.
Here are the colors I use:
Dover Gray D58-4 by Olympic. This is a light gray that I use for nearly all of my DIY Flight Sim projects.
Knight’s Armor D25-5: This is a dark gray that I use for the windows of the DIY Flight Sim Pod and the frame for the DIY Deluxe Desktop Flight Sim.
You don’t have to use these exact colors for your flight sim painting project. One builder reported a problem using Olympic paint + primer combo on PVC pipes. He said it did not to adhere adequately to the PVC. On the other hand, I haven’t heard of any other builders that encountered that problem. It might be best to just stick with regular latex primer.
Tip 3: How Many Coats?
I usually end up putting three coats on a flight sim painting project. Especially when it is a simple PVC frame like Item #F311 DIY Side Joystick Frame. First of all, start painting the frame right side up and allow it to dry. Next, turn the framework upside down and you’ll see all the places you missed. Apply another coat and allow it to dry. Finally, flip the framework right side up again and apply the final coat.
Usually, I remove the wood boards from the frame, label them, and then paint them separately. That’s actually much easier than keeping them in place.
Tip 4: Keep Fresh
You can use your brush and roller multiple times without worrying about them drying out. Simply put the brush in a quart size ziplock bag and keep it in your refrigerator between coats. Push out as much air as you reasonably can from the bag. The same works for the paint roller, but use a gallon sized ziplock bag. Therefore, you can use the brush and roller as many times as you need during your flight sim painting project. Finally, then throw away the brush and roller when you’re finished.
Tip 5: Why not Spray Paint?
Why don’t I recommend spray paint for flight sim painting? Using spray paint on a PVC pipe frame is actually pretty difficult. It’s hard to paint pipes, because you always miss a spot and you end up applying 5 or 6 or more coats. Plus, you need adequate ventilation for spray paint.
Latex primer, on the other hand, is safe to use indoors. This is especially important because many DIY builders work on their projects during the winter months.
Tip 6: Light
Finally, make sure you have good lighting so you can catch the drips or any areas you may have missed. This is common sense, but many people ignore it. I recommend you set up additional lights around your flight sim painting project.
Flight Sim Painting Tips
You can learn more about this topic and many others in the Builder Academy. You’ll also receive updates about new, free DIY Flight Sim content.


Recent Comments