DIY Flight Sim Pod Final Assembly
DIY Flight Sim Pod Final Assembly
DIY Flight Sim Pod Final Assembly Video Transcript
This is an excerpt from the DIY Flight Sim Pod instructional video. The video and associated manual show you every step in building this home flight simulator project.
In this final section, we’re going to populate the Inner Frame with computer hardware. Furthermore, we will assemble all the pieces of the Flight Sim Pod. Your new flight simulator will soon be finished!
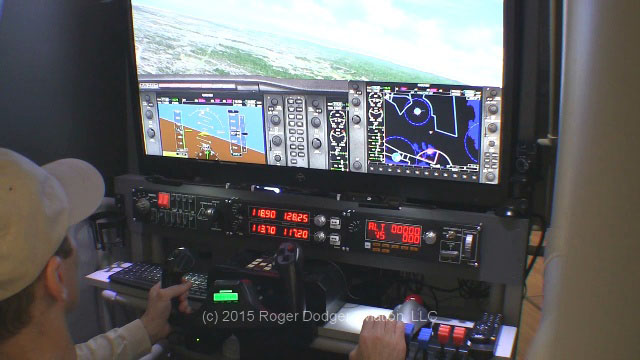
We see here the Inner Frame, all painted and masking tape removed, lt’s look at the right side of the frame. Here on the Computer Shelf we can set a desktop computer, and a powerstrip on the Top Shelf.
Next: the monitor or HDTV. It is a very good idea to get help from a friend while mounting the HDTV. You can’t actually see the bracket when you clip onto it, so it helps to have a second pair of eyes watching. Make sure it’s centered in the frame also.
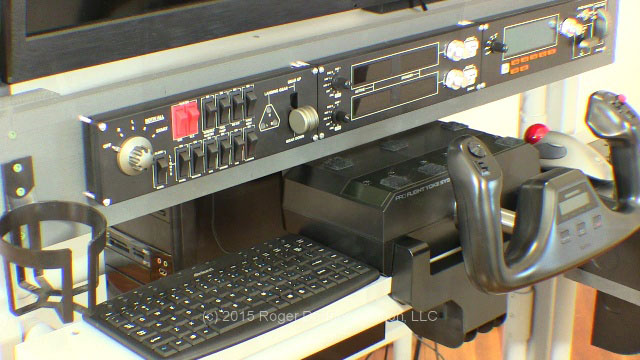
Install the switch panels and then add the yoke, and beside the yoke, the throttle quadrant. I have attached Velcro to the top of the throttle quadrant for the trackball mouse. There is enough room on the yoke housing for a mini-keyboard, or it can go beside the yoke. Don’t forget a drink holder!
Attach the rudder pedals, and add the speakers. Remember the Chair Staytheres? I painted these also. They have Velcro that loops over this horizontal bar. Notice when you use the Chair Staythere you have to reach way down to get it and you might want an easier way. I simply measured 7” from the end of the pipe and drilled two holes and then I tied on a piece of boot string and hung it from the pipe above. I did this on both sides.
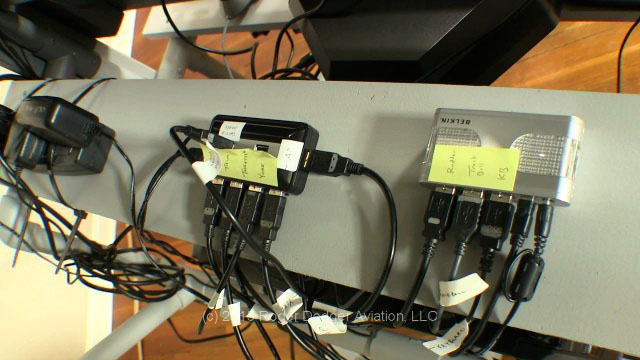
Now I don’t have to reach down so far. With all the peripheral equipment on this machine, we end up with a lot of wires. I loop the wires and use strips of Velcro to keep them organized. If I need a USB extension, I use Velcro straps to help keep it secure. Use it for the rudder pedals so the wire won’t get tangled up with your feet. I secured the USB hubs with Velcro too. I recommend labeling the USB wires, there are so many of them
Once everything is hooked up, it’s time for a test drive! Make sure all the peripherals work correctly.
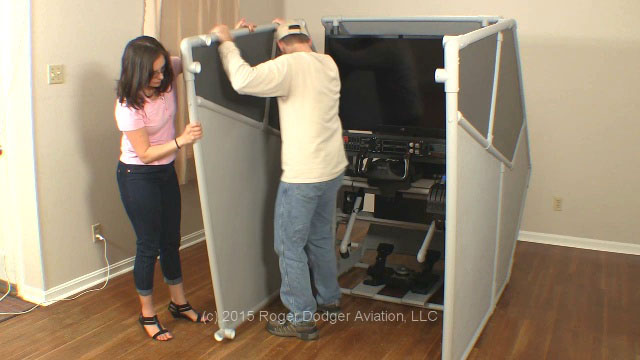
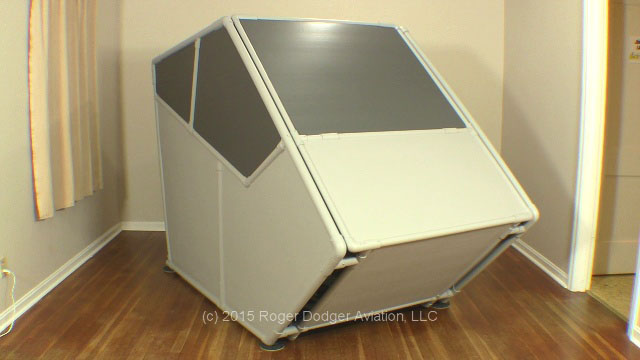
We’re almost finished with the DIY Flight Sim Pod Final Assembly. For the final step, I really recommend you get help from a friend because you’ll need someone to hold the Side Wall in place while you attach it to the three interface points. The first point is near the Side Boards. There are two points in the front that slide into place also
Secure each interface point with a self-drilling screw. That Side Wall will stand by itself so you can attach the other Side Wall. Attach all three interface points with self-drilling screws. Next replace this bottom support pipe, or the tail end extension, your choice. Secure with self-drilling screws.
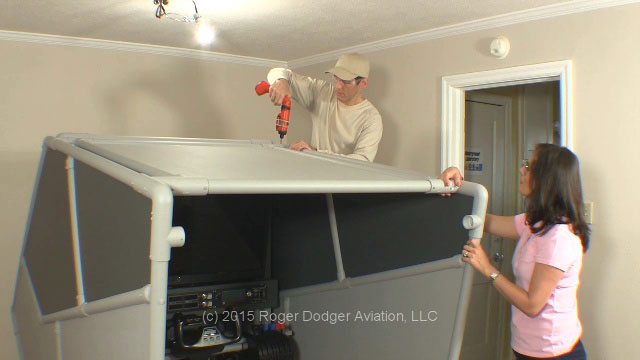
Carry in the Top Canopy, and set the 1×4 board on the ledge near the top of the support pillars. Have your partner hold the back of the Top Canopy while you attach the front. Once the front two corners are in, you can attach one of the back corners. Secure the front two corners with self-drilling screws.
Now we can attach the top support pipe. First insert it in the left side. Remember, we left the right side of the Top Canopy loose for this reason. Attach both pipes simultaneously. Attach four self-drilling screws: The two back corners of the Top Canopy, and both sides of the top support pipe.
You can build your own DIY Flight Sim Pod with this instructional video and manual.
.

Write a Comment