I designed the DIY Kinetic Motion Flight Sim as a direct-control moving platform. As a result, it works with all flight simulation software. It is the only inexpensive motion flight simulator for Aerofly FS2.
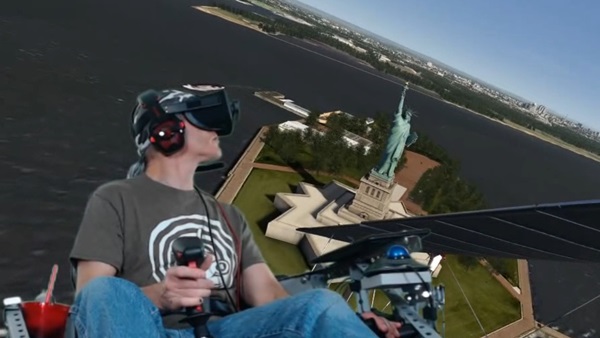
Statue of Liberty in Aerofly FS2 looks magnificent
Inexpensive Motion Flight Sims for Everyone
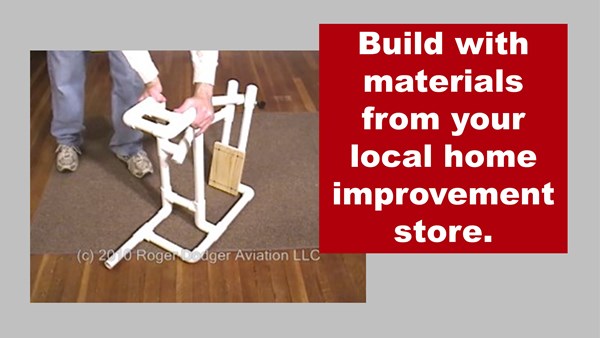
My dream is to create a DIY tutorial that shows how to build a motion flight sim. The most inexpensive way to build a one is to use materials from a home improvement store. As a result, you can build a motion flight sim for just a few hundred dollars instead of a few thousand.
Would the flight sim community embrace such an idea? I posted several demonstration videos to gauge people’s reaction. Unfortunately, when I posted a video to the Aerofly FS2 fan group, I only received negative comments. This makes no sense when you consider how a motion flight simulator for Aerofly FS2 improves the flying experience exponentially.
Motion Flight Simulator for Aerofly FS2
Aerofly FS2 is one of the lesser-known flight sim titles, but it has two things that are essential for virtual reality. Namely, high frame rates with dense, quality scenery. Take a look at the embedded video. I’m flying over New York City over hundreds of buildings, yet the frame rates remain smooth.
Next, imagine what it feels like to add a motion flight simulator for Aerofly FS2. The experience is totally immersive. I thought the Aerofly FS2 user base would recognize how this inexpensive DIY project could enhance their flight experience. I guess I was wrong.
What’s Next
Obviously I won’t be posting any more demonstration videos for Aerofly FS2. However, I’ll gladly continue to use Aerofly FS2 with my motion flight simulator because it’s so enjoyable.
I give extra time and effort to set up the lights, camera, OBS software, etc. when I make a video, and I only want to spend the effort for people that will appreciate my work. It didn’t work out for Aerofly FS2, consequently I will focus on other sim titles like X-Plane 11, DCS World, and IL-2 Battle of Stalingrad.
The Elite Dangerous fans are greatly supportive, so I will post more videos for them also.
I built my DIY Elite Dangerous Motion Flight Simulator with supplies from a home improvement store. It works with a variety of flight simulator titles, not just Elite:D. I call this motion rig the “Kinetic Flight Sim.”
How it Moves
I designed the movement system by examining the control linkages of actual Sport Aviation aircraft. Nearly all small airplanes have control systems consisting of cables, pulleys, bell cranks, and levers. The Kinetic Flight Sim uses similar technology.
The motion system is not software-specific. Not only is this an Elite Dangerous Motion Flight Simulator, it will work with any flight simulator software. I’ve already tested it with AeroflyFS2 (see video), War Thunder, and DCS World. I plan to test it with X-plane 11 and IL-2 Battle of Stalingrad once I upgrade the computer’s video card.
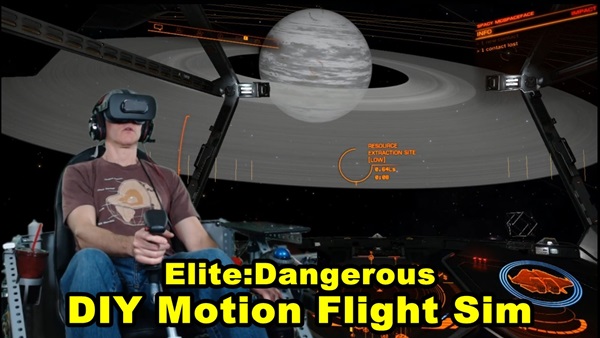
DIY Elite Dangerous Motion Flight Sim leaving dock
HOTAS Controls
The Kinetic’s controls are HOTAS (Hands On Throttle And Stick). The joystick is a CH Products Combatstick. I used this type of joystick because I have experience modifying this type and simply because I had one available for use. The throttle is the Saitek/Logitech X52, and the pedals are Saitek Pro Flight rudder pedals. I plan to upgrade to Thrustmaster Warthog controls if I receive adequate funding.
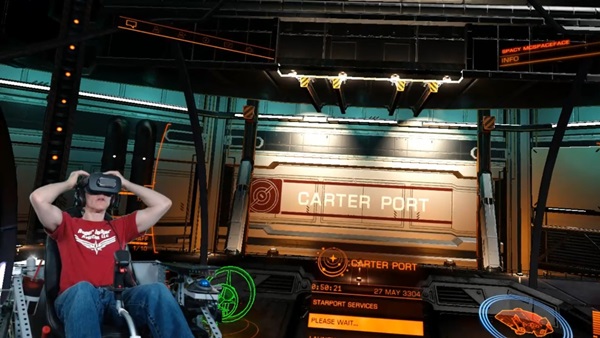
The HOTAS controls are especially important because of virtual reality. When the pilot wears the Oculus Rift VR Headset, he can only see the virtual cockpit. The controls are not visible (and neither is my drink holder).
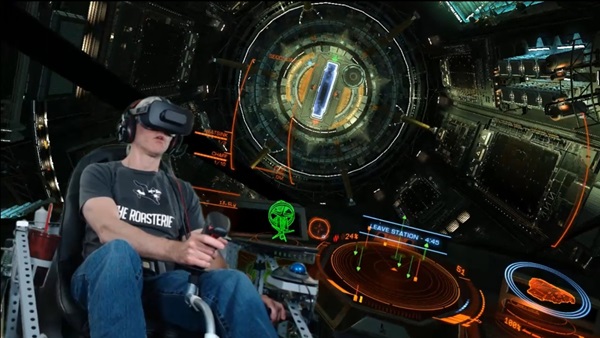
Elite Dangerous Motion Flight Sim at a space station
Elite Dangerous Motion Flight Simulator
Check out these demonstration videos. I’m using the Kinetic flight sim with Elite Dangerous and flying the new Krait MkII. Elite:D works particularly well with my gaming computer and VR headset. It’s an absolute joy to fly in space with a motion flight sim. I could produce longer videos but I’m not sure if people really want to see that.
Should I livestream longer flights? I hope to try that soon.
The following video is an exclusive! It’s only available to the readers of this blog article. I call it “Dodging Icebergs” Enjoy ! ! !
First of all, as I introduce the subject of motion flight sim theory, it helps to start with a foundational understanding of how our bodies sense movement and orientation. Movement is our sense of acceleration/deceleration and the notion that we are traveling through a space. Orientation is our attitude in space, our sense of pitch, roll, and yaw. The quality of a motion flight sim is in its ability to fool the human sensation of movement and orientation. For many normal flight attitudes in an airplane, there is a corresponding flight sim action that can emulate how it should look and feel from the cockpit. Consequently, this is the basis of motion flight sim theory.
Motion Flight Sim Theory: How do we know we’re moving?
The human body has three systems that inform the brain about movement and orientation:
Visual system – the eyes that sense position by what is seen
Vestibular system – the inner ear organs that senses balance and orientation
Somatosensory system – the nerves in your body that sense position and movement. For example, when you accelerate forward, you feel pressed back into your seat.
Valid motion flight sim theory states that a moving rig, like the Kinetic motion flight sim, does specific things to fool each of these systems.
Visual System
A pilot recognizes his position in space by seeing the simulated environment produced by the flight sim software. It is vital that the pilot only sees the simulated environment, and nothing else. For example, imagine you’re looking at the flight sim displays, but you can also see the walls of the room in your peripheral vision. As a result, your brain will not be fooled.
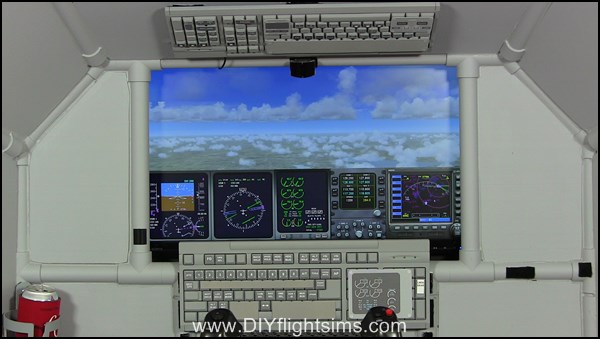
One way to create an immersive visual experience is to seat the pilot in an enclosed cabin like the expensive flight sims used by airlines. Even when a pilot uses an inexpensive DIY rig like the DIY Flight Sim Pod he can feel immersion because all he sees is the simulated flight environment. The other option is to use a high-quality virtual reality headset. In either case, the pilot must not see the room beyond the flight sim.
Even with a static flight sim, an effective visual system can give you a feeling of movement… or even motion sickness if you are prone to it.
Vestibular System (the Inner Ear)
In our airplane, we control movement around the pitch axis, the roll axis, and the yaw axis. Coincidentally, the inner ear contains three semicircular canals that are aligned roughly the same way – pitch, roll, and yaw. How do we fool the inner ear? You already know at least one way to do it. We discover as little kids that if we spin around and around, we get dizzy and lose our balance. The effect is so profound that even when we stop spinning, we still stagger around for a bit before fully regaining our balance.
The semicircular canals contain tiny hairs and a special fluid. When the fluid is displaced by movement, the hairs are pushed around by the moving fluid. The brain interprets this signal as motion.
In a motion flight sim that moves in pitch, roll, and yaw, the inner ear will also detect that same movement. In real airplanes, there are certain scenarios that can confuse a pilot’s inner ear and cause spatial disorientation. Furthermore, some of these scenarios can be emulated in a simulator.
Motion Flight Sim Theory – Semicircular Canals
Somatosensory System
Imagine accelerating down a runway. You can feel yourself being pressed back into your seat. Now imagine you’re in a regular chair and you simply lean back in it. You can feel yourself being pressed into the back of that seat too. Your somatosensory system will give you a similar feeling for the two situations, to a certain extent. A motion flight sim can fool your somatosensory system for mild maneuvers and mile acceleration/deceleration.
When you’re in a real airplane, and you’re making a steep bank, your somatosensory system will tell you when you’re starting to pull G forces. In a 60 degree bank, you will feel two G’s as you are pressed down in your seat. If you fly inverted, you will feel one negative G as you hang upside-down from your seatbelt. Unfortunately, we can’t simulate G forces like that in a simulator. But certain motion flight sims can simulate heave, like turbulence, or like a hard landing.
Putting it All Together: Motion Flight Sim Theory
For example, imagine a pilot is in the Kinetic motion flight sim and he starts a climbing turn. He can see the simulated horizon and as he banks the wings, he can see the corresponding bank angle. Also, shadows inside the cockpit move as the airplane turns. This is a climbing turn, so the pilot also pulls back on the joystick. His inner ear detects that he is pitching nose up. The pilot also feels that he is being pressed back in his seat slightly, that’s his somatosensory system.
The pilot should feel like he’s flying. If the pilot is in a quality motion flight sim, then the machine is able to fool the pilot’s sense of motion and orientation.
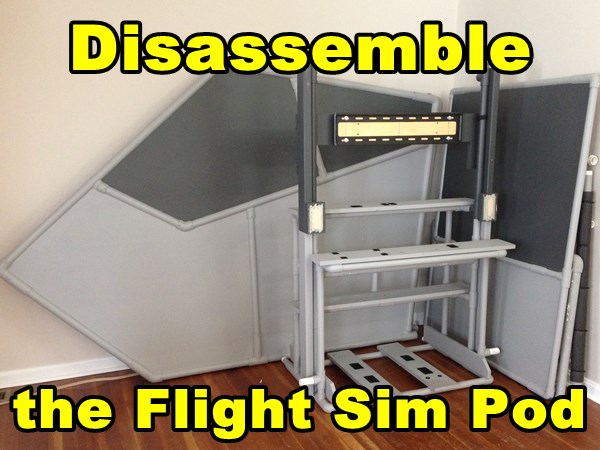
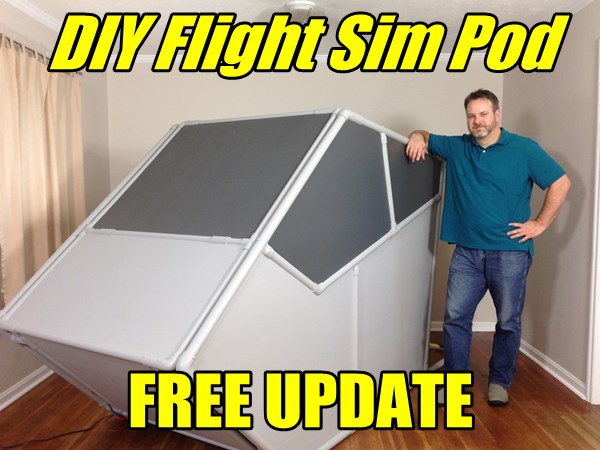
The DIY Flight Sim Pod is a fully enclosed flight sim cockpit and your view is completely filled with the simulated environment. Therefore, you don’t see the other things in the room like furniture, book shelf, plants, etc. You fly in a totally immersive environment. In addition, when you strap into the Pod to start a flight, it really feels like you’re preparing to go somewhere. It’s relatively easy to disassemble the Flight Sim Pod because it’s a modular structure. This is how to disassemble this enclosed flight sim.
Enclosed Flight Sim Components
The entire project includes three major assemblies, three subassemblies, flight simulator hardware (including computer), and displays.
Major assemblies
Inner Frame
Left fuselage side
Right fuselage side
Subassemblies
Nose cone (top and bottom)
Top Canopy with Bumper
Tail
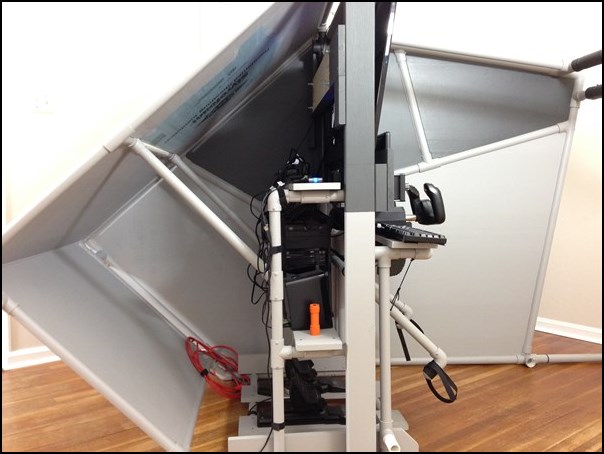
Enclosed flight sim Pod, partial disassembly
Disassemble the Enclosed Flight Sim
Start by removing the Tail, Top Canopy with Bumper and Tail. The Bumper is simply the single padded PVC pipe that attaches the Left and Right Fuselage Sides just below the Top Canopy. Unscrew the self-drilling screws as needed to free the PVC fittings.
Next, remove the Left and Right Fuselage Sides. This leaves the Inner Frame still packed with computer hardware and displays. Again, unscrew all self-drilling screws necessary to free the applicable fittings.
Carefully remove the 40” HDTV main display, cushion it, and place in moving box. Do the same with the instrument panel display. Finally, remove and box all computer hardware and flight controls.
Disassemble the Inner Frame
The Inner Frame consists of lumber and PVC pipe and is consequently the strong center structure of the enclosed flight sim. The Nose Cone is the pipe and foam structure that attaches to the front of the Inner Frame.
The top and bottom of the Nose Cone is glued together. However, you can separate the bottom Nose Cone panel by cutting just under the point of the Nose Cone. Cut from across the top edge of the bottom Nose Cone panel and also the top corners around the fittings. This will separate the top and bottom of the Nose Cone leaving only the fittings to hold them together. Remove self-drilling screws as required.
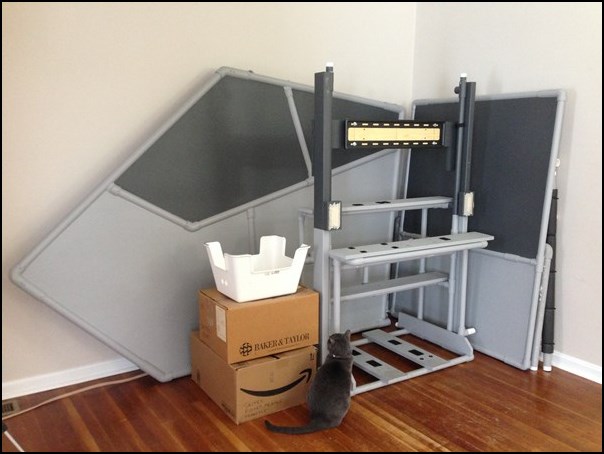
Enclosed flight sim, ready to move
The Pod on the Move
If you load the Pod into a moving van, note how many of the parts can lay flat. Even the Inner Frame doesn’t take up much room because it’s like a shelf – you can load boxes onto it. Your flight sim controls will all fit into boxes as shown in the picture.
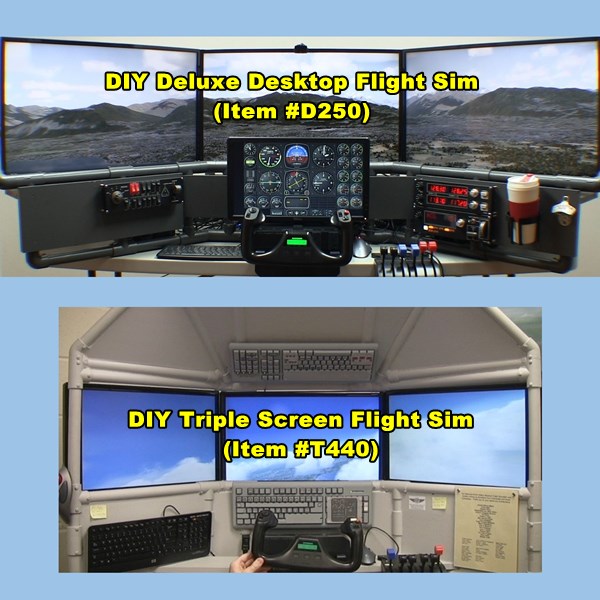
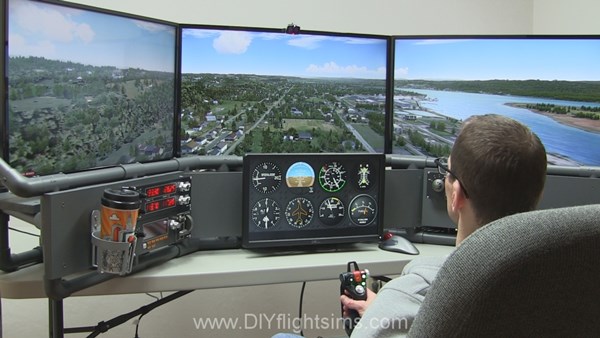
You’re looking for a home flight simulator for sale and you come across two similar DIY projects. How do you tell the two apart? The DIY Deluxe Desktop Flight Sim and the DIY Triple Screen Flight Sim are similar, but there are some significant differences too. Here are 7 ways to choose the best multi-screen DIY Flight Sim for you.
The D250 Deluxe is much more adaptable than the T440 Triple Screen.
D250: You can build the D250 with a yoke and throttle quadrant, or pair it with one of the DIY floor frames so you can use HOTAS style controls or even a helicopter collective. Match the D250 with the #F311 Side Joystick Frame, the #F321 Center Joystick Frame, or the #F331 Easy Helicopter Collective.
T440: On the other hand, the T440 is great with a yoke and throttle quadrant as originally designed. But if you want a joystick and side throttle, you would need to invent some modifications.
2. Recent Work
The D250 instructional video is much newer than the T440.
T440: I produced the T440 video in 2011 as a part of a successful Kickstarter campaign. I had a very short amount of time to design and build the project and a short time to film, edit, and publish the video. It’s still a great project though.
D250: I produced the D250 video in 2016 so it has better lighting, better sound, I used a better camera, and I had more experience editing than I did in 2011.
Deluxe Desktop Flight Sim with Side Joystick Frame
3. Displays
The D250 has larger screens.
D250: I used 32” HDTVs for the three main displays. The combined screen width is over 6 feet wide.
T440: I used 24” monitors for the three main displays. The combined screen width is less than the D250, but still impressive.
4. Keyboard Modification
The T440 was designed to have an overhead panel like an airliner. For this reason, the T440 Triple Screen bundle includes the DIY Airliner Keyboard Modification. The D250 doesn’t have a place for an overhead panel.
Home flight simulator for sale
5. Styrofoam
The T440 has Styrofoam, the D250 does not.
Builders use ½” styrofoam sheets when constructing the T440 Triple Screen project. Styrofoam may be cheap or expensive depending on where you live in the world.
6. Instrument Panel on a 4th Monitor
T440: You will see several builders in the Customer Gallery added a 4th monitor to display the flight instruments. I didn’t include anything about that in the instructions, those clever builders modified their projects on their own.
D250: I included instructions to add an optional 4th monitor for the flight instruments.
DIY Easy Helicopter Collective paired with the Deluxe Desktop Flight sim
7. Ease of construction
I think the D250 is easier to build than the T440.
D250: The project doesn’t require gluing any Styrofoam panels in place. But the D250 does include 1×8 boards. If your saw won’t cut 1×8 boards, you’ll need to get that done at the store when you buy them.
T440: The project doesn’t require you to cut any lumber wider than a 1×6. You do cut Styrofoam with a utility knife, but it is not difficult just a little time-consuming.
Home Flight Simulator for Sale
You have a lot of choices when it comes to your home flight sim project. I hope this comparison helps you.
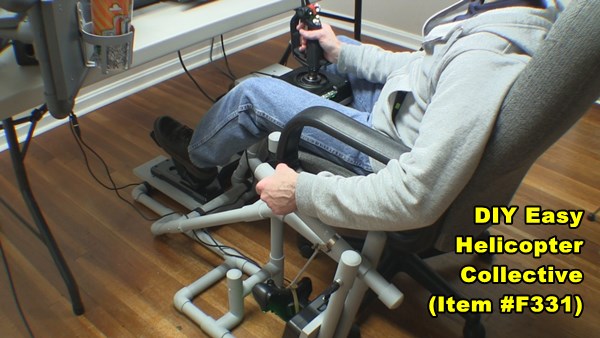
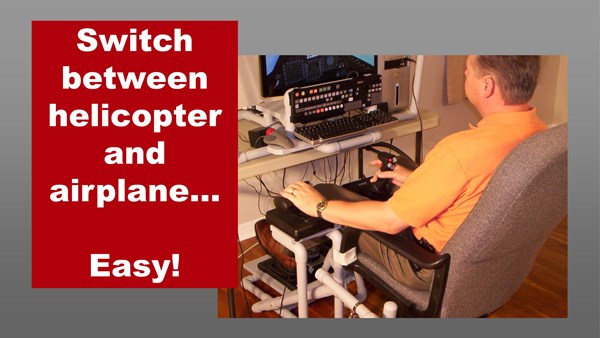
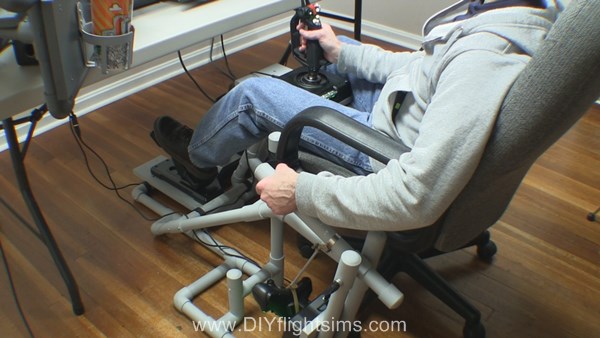
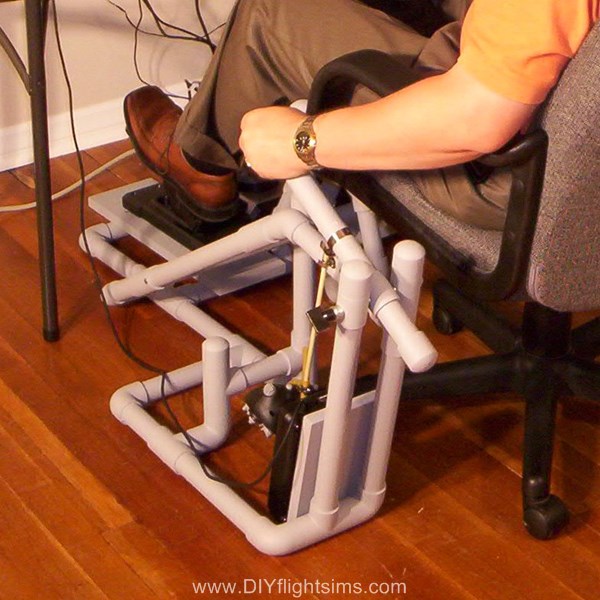
When you try to fly helicopters with regular HOTAS flight sim controls one thing is perfectly clear: a throttle is definitely not a collective. A legitimate helicopter collective control is essential if you fly (or are learning to fly) helicopters. Unfortunately, retail collective controls are surprisingly expensive. Consequently, I created an online course that shows you how to build your own helicopter simulator controls.
The DIY Easy Helicopter Collective
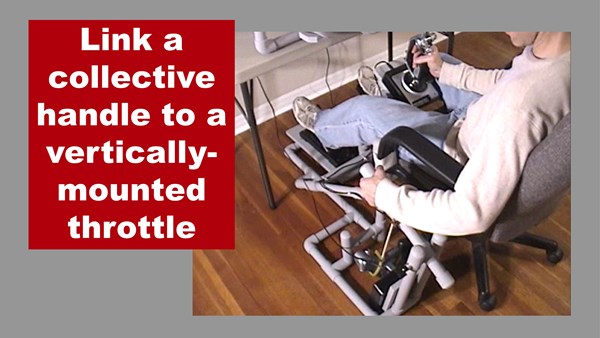
This project does two major things. Firstly, it allows you to use a standard HOTAS throttle as a collective. The PVC pipe framework suspends the throttle vertically and connects it to a collective lever via a linkage. Most noteworthy: you don’t have to modify the throttle because the linkage straps onto the throttle handle without harming it. You can adjust the sensitivity of the collective by moving the linkage. Also, you can adjust the collective resistance with a friction knob.
The second thing this project does is make it easy to switch back to airplane configuration. Maybe you still want to fly an airplane once in a while. You can add the optional throttle stand and easily move the throttle for a HOTAS (hands on throttle and stick) control configuration. Best of all, you don’t have to change the control assignments in the flight sim software. It’s so easy! It’s also easy to build your own helicopter simulator collective. That’s why I named this project the DIY Easy Helicopter Collective.
DIY Easy Helicopter Sim Collective
For your Helicopter Sim
Link to a Vertical Throttle
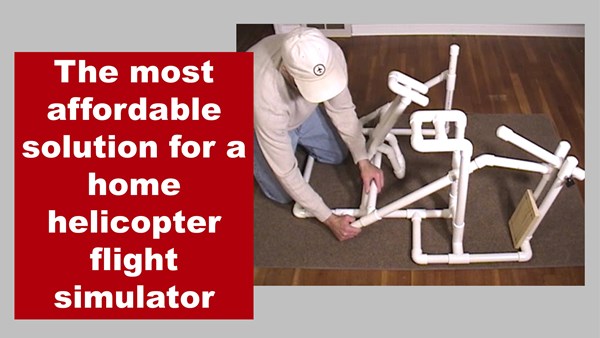
Most affordable helicopter sim collective
DIY Easy Helicopter Collective
Build with inexpensive materials
Easy to build
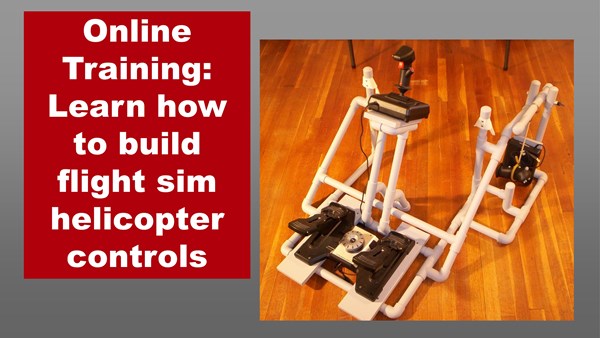
Online course
I produced an affordable, online course that shows you how to build your own helicopter simulator collective. I show you how to build this project with inexpensive materials from your local home improvement store. We’ll be working with PVC pipe, lumber, paint, and other materials.
This comprehensive course includes:
Video clips
Full text instructions
Diagrams and pictures
Pipe frame maps in US and Metric measurements
Printouts
You can view the course on nearly any device even smart phones and tablets. See the full curriculum and a free trial at this link. Most noteworthy, the DIY Easy Helicopter Collective course is available now at a new lower price!
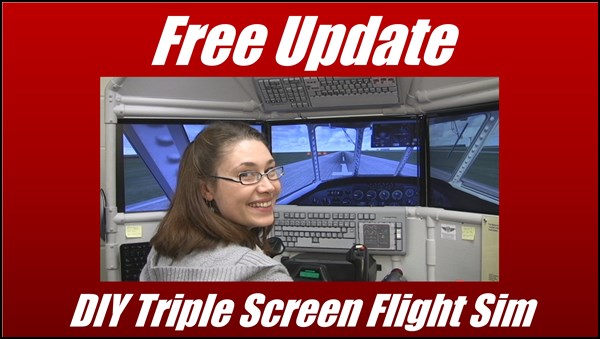
Roger Dodger Aviation’s defining project is probably the Triple Screen Flight Simulator, item #T440. This project has sold well since it was published in 2011. In addition, hundreds of people have flown the sim at the KC Maker Faire and at the National Airline History Museum. I’m proud to announce this DIY project is now available as a online e-learning course. If you already purchased the DIY Triple Screen Flight Simulator project as a download, you will be upgraded to the online course for free.
What is the DIY Triple Screen Flight Simulator Update?
The new version is the same content, but in an online e-learning format. This means the student sees the video clip, instructions, pictures, and diagrams for each particular step. You no longer have to look through an hour long video or 100 page manual to find something. Furthermore, you can access the course on mobile devices like smart phones and tablets as well as standard desktop and laptop computers.
Build with materials from a hardware storeDIY Triple Screen Flight Simulator online course
How do You Get the Update?
If you’ve already purchased item T440 DIY Triple Screen Flight Simulator, the new update is FREE. Just email me at DIYflightsims@rogerdodger.net to get the new updated version. In addition, tell me what email address you used so I can look up your order. Then, I’ll send you a coupon code that allows you access to the update for free. Also, you get free access to the Builder Academy where you can learn all the basic skills for building DIY Flight Sim projects.
DIY Triple Screen Flight Simulator free update
What About the Keyboard Mod?
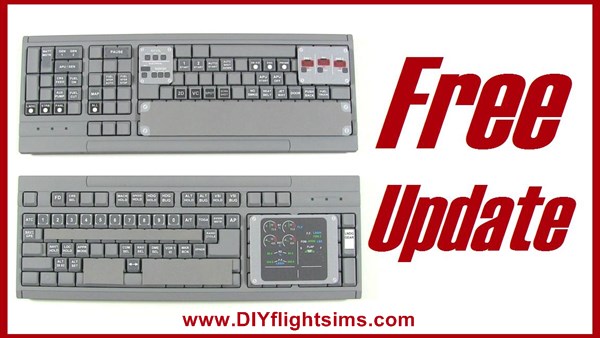
You get it too! The original DIY Triple Screen Flight Simulator project always came with the DIY Airliner Keyboard Mod project, item #K140B. The reason was that it was so easy to install an overhead panel in to this type of cockpit. The keyboard mod is also in an online e-learning format.
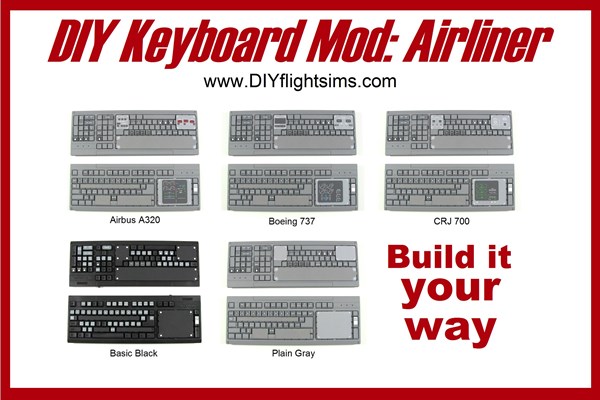
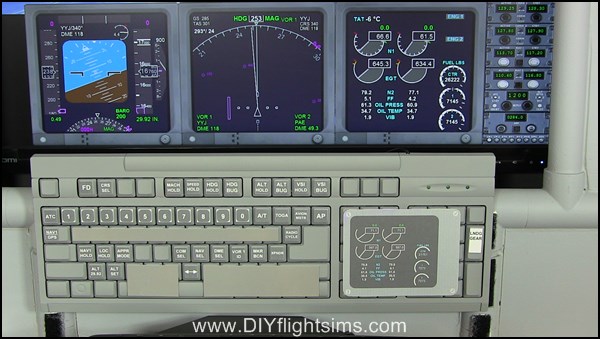
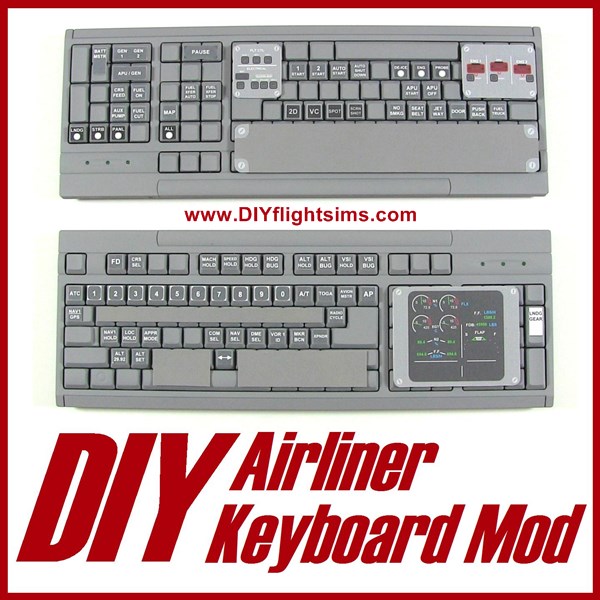
My finest keyboard modification project by far is the DIY Airliner keyboard Mod, item #K140B. This project replicates an overhead panel and Mode Control Panel from popular modern airliners. This product is more than simple flight sim keyboard stickers, this is a comprehensive DIY project complete with an online tutorial. If you have this product, you get the update for free.
DIY Airliner Keyboard Mod, build it your way
What is the Update?
The new version is in a totally online format. This means that you see a video clip, instructions, pictures, and diagrams for each step. As a result, the new course is a much improved, learner-centered presentation. The printout flight sim keyboard stickers are also included. In addition, you can access the course on mobile devices like tablets and smart phones as well as the standard desktop and laptop computers. See the free trial version here.
How do you get the Update?
It’s easy! If you’ve already purchased item K140B DIY Airliner Keyboard Mod, the new version is FREE. Simply email me at DIYflightsims@rogerdodger.net to get the new updated version. In addition, tell me what email address you used so I can look up your order. Then, I’ll send you a coupon code that allows you access to the new version for free. Don’t forget, you also get free access to the Builder Academy. Learn all the basic skills for building a DIY Flight Sims project.
Flight Sim keyboard stickers printout and DIY
DIY Flight Sim Keyboard stickers and FSX
Flight Sim keyboard mod
Flight Sim keyboard mod for home cockpit
DIY flight sim keyboard stickers for your home cockpit
More about the DIY Airliner Keyboard Mod
I first created this product in 2008, and it has been a great help to many home cockpit builders. Consequently, I’ve updated the project several times. I also included it with the purchase of the DIY Triple Screen Flight Sim, item #T440. You can see a preview of the newest version here and also check out the demo video below…
If I had to choose my favorite DIY Flight Sim project, I think it would be the Pod. It’s my only enclosed flight simulator project so you actually enter it like a vehicle. When you take a flight in the Pod, it’s more like leaving on a trip. Plus… it’s big. This enclosed flight simulator is more than just a shell packed full of hardware, it also has an attractive exterior. I dreamed about having a flight sim like this for a long time before I had the opportunity to build one. Plus, I worked on the DIY videos, instructions, pictures, and drawings for over a year. Now I can present the entire project to you, step-by-step, so you can build one too.
DIY enclosed flight simulator cockpit
What is the Update?
The updated version of these plans are in a new, online tutorial format. This means that for each step of the project you see a video clip and the associated instructions, pictures, or printouts. Recall the original Pod video is over 2 hours long and the manual is 130 pages. The new course is a better, learner-centered presentation. In addition, you can access the course on nearly any device like tablets and smart phones in addition to desktops and laptop computers. This means it’s easy to take the tutorials with you into your garage or workshop while you build. There are a few printout templates, and yes, you can still print them out. You can see a free trial here.
Krystal flying the enclosed flight simulator Pod
How do you get the Update?
This new online version is FREE if you’ve already bought the E430 DIY Flight Sim Pod enclosed flight simulator course. Email me at DIYflightsims@rogerdodger.net to get your updated version. Be sure to tell me what email address you used when you ordered so I can look you up. Then, I’ll send you a coupon code that will allow you access to the online lessons for free. Start the epic journey of building and flying the DIY Flight Sim Pod!
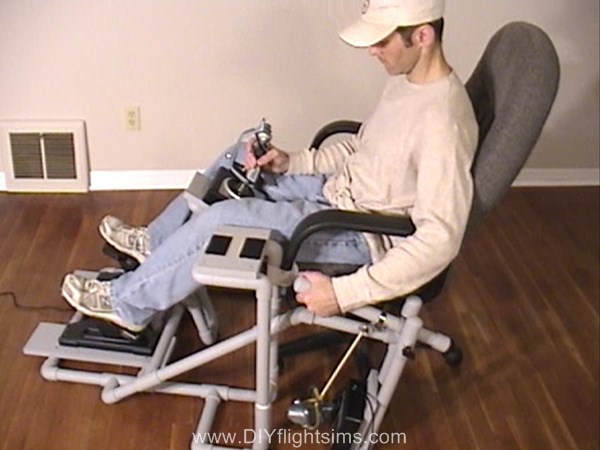
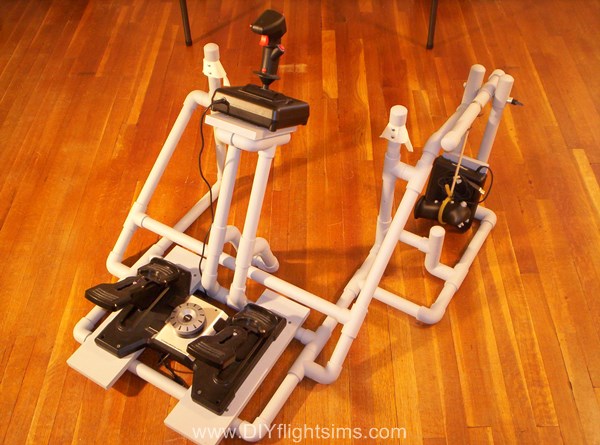
The F331 DIY Easy Helicopter Collective is one of my favorite projects because it fills an urgent need in the flight sim community. Try to find a helicopter collective control for a reasonable price. You will not find one, they are all hundreds of dollars. My DIY Helicopter Simulator Controls are still, after several years, the most cost-effective solution for home flight sim pilots. My tutorials show you how to build a framework from PVC pipe. You then attach standard HOTAS joystick/throttle and rudder pedals. The new, upgraded version of these tutorials are completely online and can be accessed with any device. No more cumbersome downloads!
DIY Helicopter Simulator Controls and flight sim
This is how to build DIY Helicopter Simulator Controls
DIY Easy Helicopter Collective you can build
DIY Helicopter Simulator Controls online tutorial
This is how you build the DIY Easy Helicopter Collective
How do you get the Upgrade?
This new online version is FREE if you’ve already bought the F331 DIY Easy Helicopter Collective. Email me at DIYflightsims@rogerdodger.net to get your upgraded version. Be sure to tell me what email address you used when you ordered so I can look you up. Then, I’ll send you a coupon code that will allow you access to the online lessons for free. You can then build your own DIY Helicopter Simulator Controls and get flying… and hovering.
More about the DIY Helicopter Simulator Controls
Have you ever tried to fly a helicopter with a regular flight sim throttle? It’s not enjoyable. There is a reason why helicopter controls look different than airplane controls – they ARE different. Once you try a helicopter collective, you will never want to go back to a regular throttle. When you use a collective, the movement is completely natural, you don’t have to even think about the controls any more, just make the helicopter do what you need it to do. I could never hover, or even land a helicopter before I built my collective. Now everything is easier.
Below is a demonstration of the DIY Easy Helicopter Collective, among other things…


Recent Comments