Saitek Pro Flight Yoke Ultimate Fix
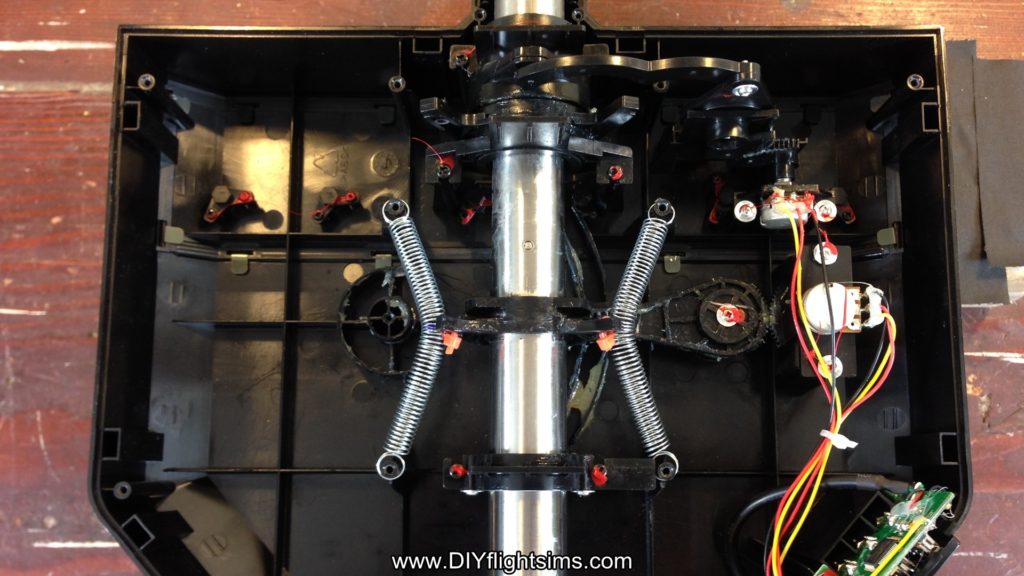
This modification to the Saitek Pro Flight Yoke uses zip ties and springs that I bought from a home improvement store. It’s a very popular modification that I’ll call the Saitek Pro Flight Yoke Ultimate Fix. The springs will attach to the center shaft and the four screw posts.
NOTE: modifying the Saitek yoke will void the warranty. However, if you purchased the yoke over two years ago, the warranty has already expired.
Credit for this idea should go to Tom Gromko who published this method on the AVSIM forum.
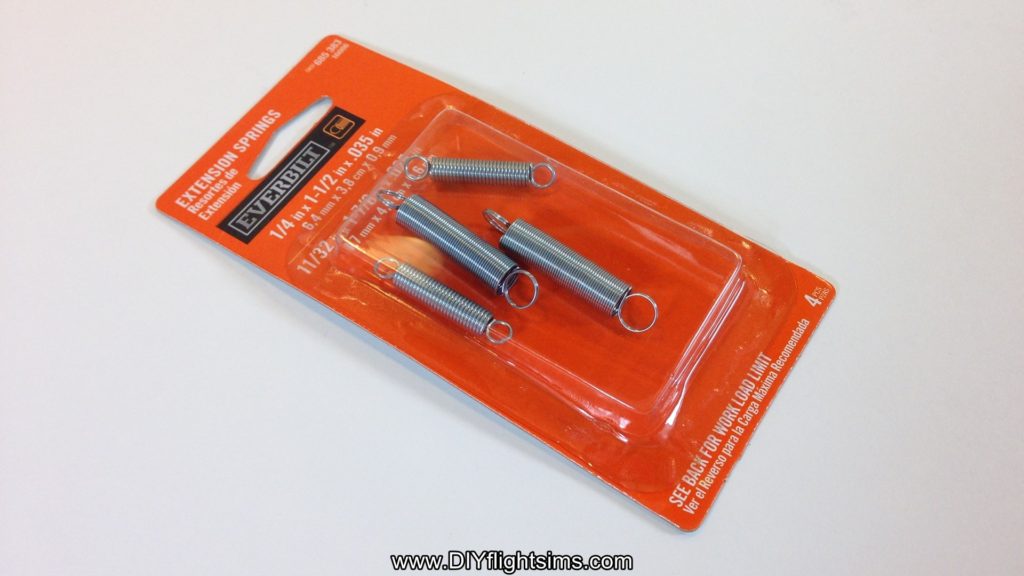
Springs for the Saitek Yoke
Before we start, I’m assuming you’ve already removed the pitch spring and swing arms as shown in the disassembly video. You can leave the roll return spring in place for this mod, or if you want less resistance, you can remove it. You’ll notice that I’ve removed it for this video.
The springs we are using are from Home Depot and it costs less than $4.00 USD. This package comes with four springs, but we will only use the larger two. If you can’t find these springs exactly, find ones with a similar load limit – about 2.4 pounds.
Home Depot Extension Springs
Store SKU 685383
Model # 16086
Internet # 202045462
Modify the Control Horns
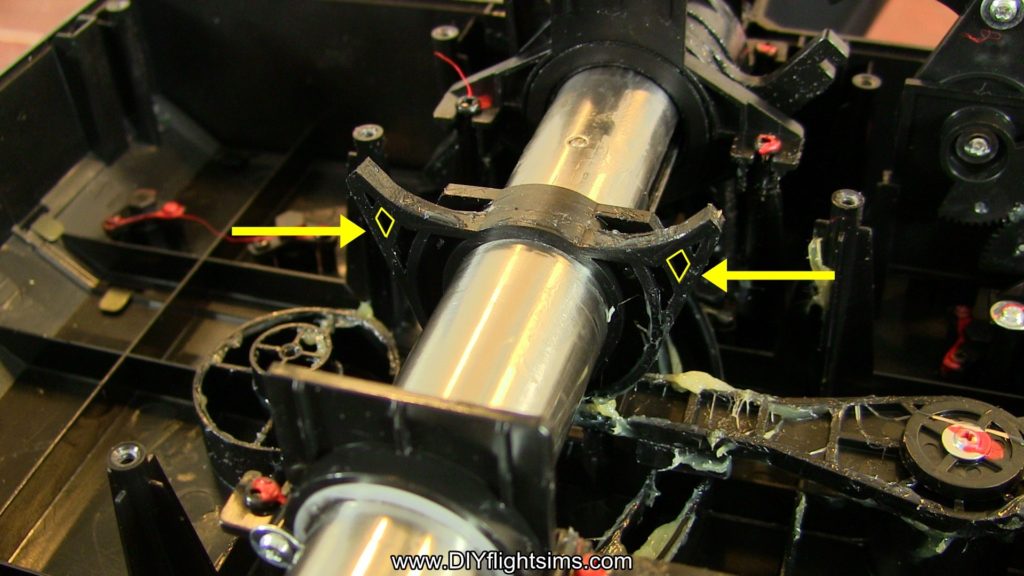
Let’s get started. Rotate the yoke so the back of the control housing is facing you and it’s best to prop up the yoke on some boards or something. Locate these horns on the center shaft and specifically locate this small gap in the plastic structure. Use a drill and a 1/8” drill bit to make a hole right through that small gap and then repeat on the other side.
A 1/8” hole should be large enough for these mini Zip Ties to fit through them. The springs will loop over the screw posts on the left side and the right side and then attach to the center shaft. Unfortunately, the springs tend to slide off of the screw posts while we’re working with them, so use a small file to create a groove in the plastic. This file is actually three-sided, therefore it’s really handy for this job. This groove we’re making faces the back of the yoke. For this screw post, file a groove on the front side, towards the yoke handle. The spring stretches easily between the posts and it fits nicely in the groove.
When you work on this post, be very careful not to damage the circuit board or any wiring here so it’s ok to take your time with this step.
Install Replacement Springs
Now we want to attach the horn on the center shaft to the exact center of the springs. I used calipers to determine the middle point of the spring. You don’t have to use calipers, you can measure carefully or you can even count the strands on the spring to determine the middle. Mark the middle three strands with a sharpie and then remove the spring. The spring can be a little hard to hold on to, consequently, use a zip tie to hold the ends while you fold it over like this.
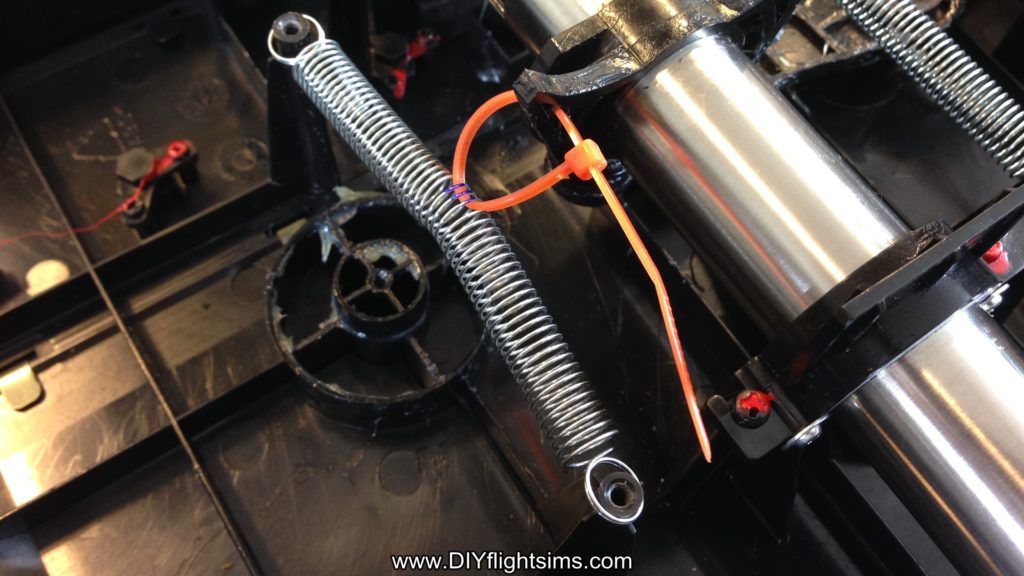
Look for the mark you made and use a small screwdriver to loop under those three strands on the spring. Then, loop a zip tie under those same three strands and remove the screwdriver. This green zip tie was just temporary and we’re going to cut it off now.
Stretch the spring between the two screw posts again and loop the zip tie through the hole you drilled in the horn and then attach the zip tie like this. Repeat this process on the other side. Now tighten both zip ties all the way and clip off the excess from the zip ties.
Finishing Steps for the Saitek Pro Flight Yoke Ultimate Fix
Finally, replace the lid and try it out.
Hold down the yoke housing with one hand. Note how easy it is to make small pitch changes when you don’t have to struggle against that center detent. You may notice some noise coming from the springs if you are making large control inputs. But if you’re otherwise happy with the results, reattach the control housing. There are 14 screws.
And give it a test flight!
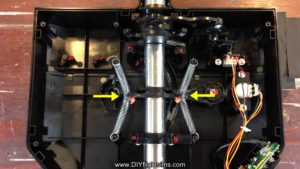
Saitek Pro Flight Yoke Modification Videos

3 Comments
HELP!!!
Does anyone have any idea of what the power control board for Saitek Pro Flight Yoke is technically called? I need to replace the PCB, but I’ve been looking everywhere to no avail! Is there a model # or a specific replacement part # I can order? This is driving me nuts!!! Thanks for your assistance!!!
Another issue the saitek yoke suffers from is binding. The shaft isn’t round around that slot that is cut into it. Mine binds like a SOB and has since new. Also the rear bushing binds as well because the shaft is slightly larger in diameter where the bushing rides(backwards I know)
When they cut the slot in the shaft the tubing the pipe flares out and those corners now stick out. I have mine torn down finally and getting it work better. I have had to sand off quite a bit of material to get the bushings to slide freely. This is not a repair the typical person will have the tools for. Also the bushings are too short and tend to bind and release because the case is so flexible. A longer bushing would make a big difference.
I have spent about an hour and a half sanding deburring and polishing with air tools getting the bushings to slide freely. They need a little bit more so they move easily and the yoke will recenter with the new springs.
The new springs are better but I will be replacing them with some stiffer ones as they just don’t provide enough forward and aft strength.
I was going to do the bungee conversion years ago but never got around to it. I may end up getting a 1″ stainless pipe or ground shaft and make a yoke from scratch and use the circuit board and pots from the old one. But I also have a spare logitech joystick I could use as a donor.
FYI mine is roughly 10 years old or so.
Hello,
Does anybody have scheme of power control board of this yoke? I really need it
Regards
Write a Comment
Tag Cloud
Categories
Recent Posts
Recent Comments
Meta
Recent Posts
Recent Comments
Archives
Categories
Meta