5 Modifications for a DIY HOTAS Chair for Virtual Reality and More

The DIY Side Joystick Frame is one of my most popular projects, and it’s very versatile. Even though I published this project 6 years ago, the design has stood the test of time. Yet, as great as it is, I have recently made a few modifications to the design that you might find helpful for your project. Read on for 5 Modifications for a DIY HOTAS Chair for Virtual Reality and More.

A True HOTAS for your Flight Sim

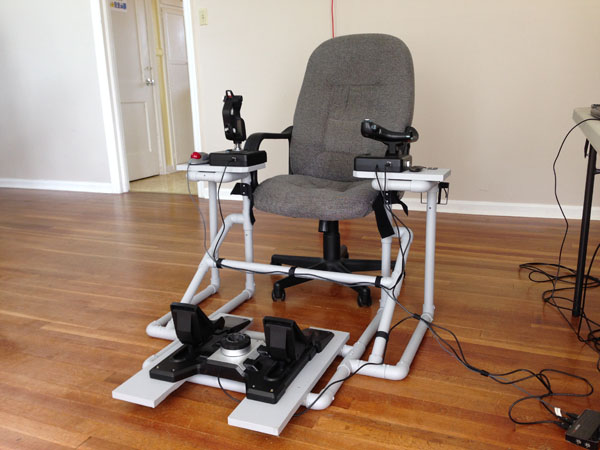
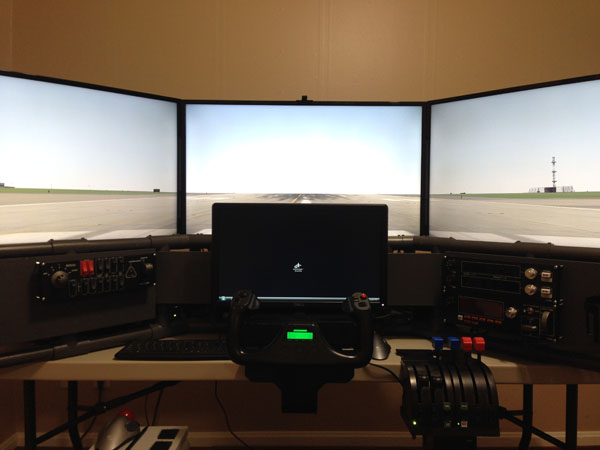
The DIY Side Joystick Frame, Item #F311, makes a true HOTAS (Hands On Throttle And Stick) possible for your flight simulator because the project also includes rudder pedals. True pilots use rudder pedals, not joystick twisty grips so always remember that. I originally envisioned the F311 as useful primarily for jet fighter simulators, but now, many customers are using it for space sims like Elite Dangerous and Star Citizen.

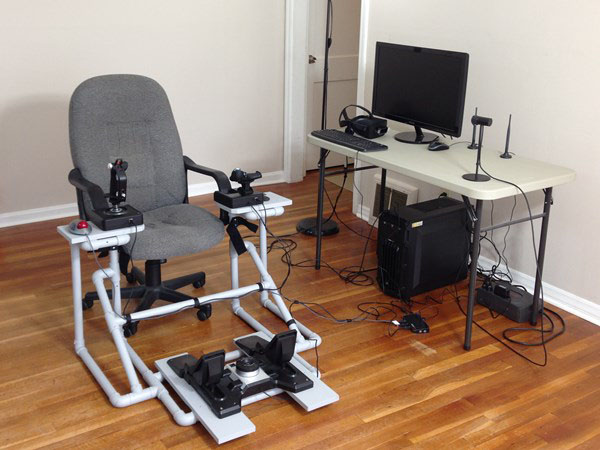
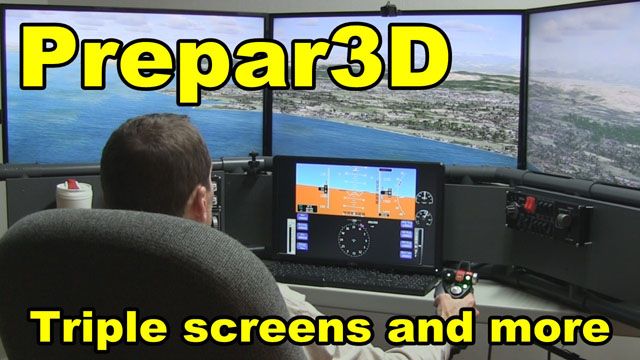
Use the F311 in combination with a Virtual Reality headset. Remember, when you wear a VR headset, you can’t see your keyboard any more and any functions you have assigned to your keyboard keys are literally out of sight. You can also use the F311 with a traditional multi-monitor setup like the DIY Deluxe Desktop Flight Sim (Item D250). The F311 is delightfully versatile and useful. Use these 5 Modifications for a DIY HOTAS Chair to update the F311.


5 Modifications for a DIY HOTAS Chair

I made five main modifications to adapt the F311 Side Joystick Frame for my current requirements. None of these modifications are difficult. If you can build the F311 in the first place, you can certainly make these modifications or include these changes during the initial build.

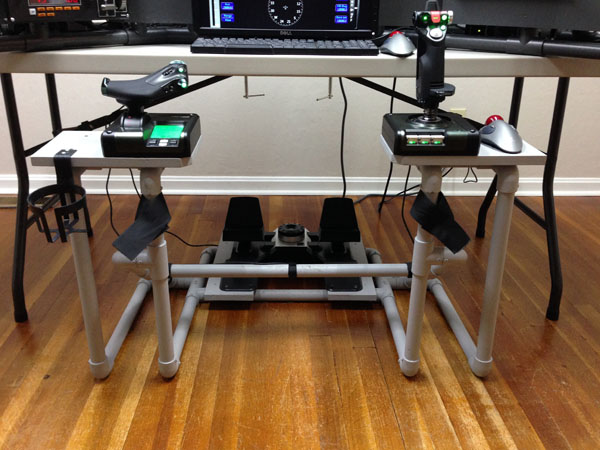
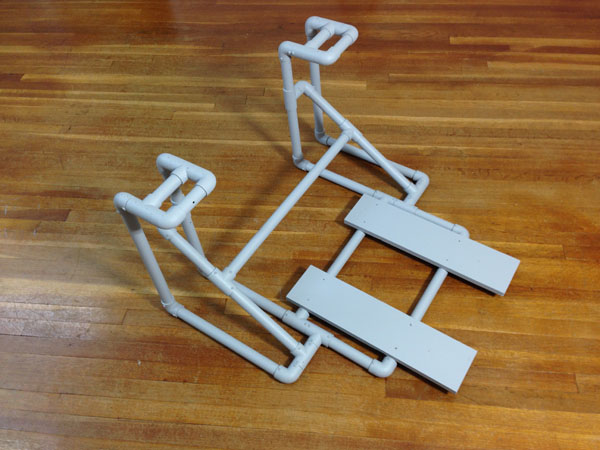
1. Wider Side Stand Platforms

First of all, I installed wider side stand platforms, cut from 1×8 boards. To be clear, the PVC pipe side stands did not change, just the the boards that attach to the top of the stands. I topped the side stands with 1×8 boards, 12″ long. The wider boards give you room for a trackball mouse next to the joystick and give you room next to the throttle to set down your phone or whatever. Most importantly, you can place the controls in a more ergonomic location. This means placing the joystick and throttle in line with the chair’s arm rests. This is so important! Place the joystick and throttle so that your arms sit straight on the chair’s arm rests. This will allow you to fly comfortably for hours.

In addition, I attached the joystick and throttle with wood screws instead of Velcro. I also trimmed the inside corners of the 1×8 boards by 1″ and sanded the edges so my legs wouldn’t get caught on the corners.

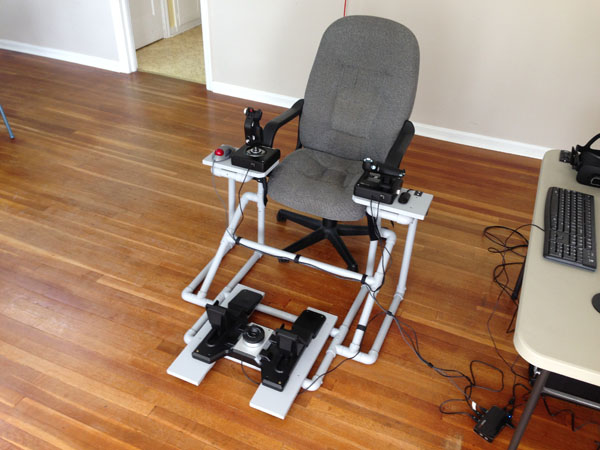
2. Longer floor boards

I use the Saitek Pro Flight Cessna Rudder Pedals, and I really like them, but they have to be positioned further away from the pilot. The rudder pedals attach to the Floor Boards with Velcro, but the original boards were too short. Therefore, I replaced them with two 1×6 boards, 22″ long. You might not need to make this change for your rudder pedals.

3. Raised center stabilizer

I also raised the center stabilizer bar to allow room for the Saitek Pro Flight Cessna Rudder Pedals. Specifically, the back of my ankles banged into the stabilizer bar, so I had to move it. It is now 6.5″ higher than it was before.

4. Self-drilling screws

I now use self-drilling screws in everything I build. Back in 2010 when I designed this project, I used Liquid Nails Project Glue to attach all the PVC pipes and fittings. This allowed for some cost-savings, but self-drilling screws are far superior. The screws allow for a simpler assembly with no overnight dry time. In addition, the screws create a much stronger frame. Lastly, you can remove the screws later if you decide to modify the frame. I absolutely recommend using 1/2″ self-drilling screws to build DIY Flight Sims from PVC pipe.

Video: Learn more about self-drilling screws for DIY Flight Sim projects

5. Cup holder

Don’t fly thirsty! I include a cup holder with almost every project I design. The cup holder is located next to the throttle and it’s easy to find it, even when wearing a VR headset. I use these inexpensive cup holders from Amazon.

If you’ve already built the DIY Side Joystick Frame, Item F311, or if you haven’t built one yet, these 5 Modifications for a DIY HOTAS Chair can enhance your home flight simulator experience for years to come.


5 Modifications for a DIY HOTAS Chair

X-Plane 11 Beta on Triple Screens, First Look

You can download the X-plane 11 beta right now. Configuring the X-Plane 11 Beta on triple screens with a full flight simulator cockpit is a challenge. I’m using the DIY D250 Deluxe Desktop Flight Sim for this evaluation. The D250 uses three 32″ HDTVs running from a single Nvidia GeForce GTX 950 SSC.

The download and installation was straightforward, and furthermore X-plane automatically spanned all three screens when it booted. The software detected my Saitek Cessna rudder pedals and provided a quick calibration. Unfortunately, it assigned the pitch and roll axis to the toe brake functions. Also, I was unfamiliar with the user interface so it wasn’t apparent how I would properly assign the functions to my flight yoke.

X-Plane 11 assigned pitch and roll to the toe brakes

Immediately Airborne

The demo gets you into the air immediately. Unfortunately, I wasn’t able to assign the controls properly so I stopped after a few minutes. Also, I wasn’t able to zoom out the view, so the virtual cockpit was unseen, except for the wet compass.

X-plane 11 control menu with options behind the bezels

I found my way to the control settings menu to set up the yoke, throttle quadrant, and trim wheel. In addition I wanted to correct the rudder pedal assignments. On my triple-screen setup, some of the menu options are obscured behind the bezel. You don’t have the option to move the menu window around like you do in P3D. The only way to see these menu options would be to exit out of X-plane, turn off bezel correction in Nvidia Controls Panel, restart X-plane to run the menu, and then turn bezel correction back on afterwards. Or you can just guess what’s behind the bezel. I had some troubles with identifying which axis is which on the Saitek throttle quadrant.

X-Plane 11 graphics settings, some options hidden behind the bezel

X-plane allows you to manually set the screen resolution, which is a very nice option. I set it to the same screen resolution as my desktop with no trouble at all.

I’m using Air Manager to display the flight instruments in FSX and P3D. I think it requires additional configuration to use it with X-Plane 11. Air Manager has an excellent set of Beechcraft Baron flight instruments and I’m looking forward to using them with the Baron X-Plane 11.

I spent a lot of time stuck on the runway

Stuck on the Runway

I couldn’t get all my controls properly assigned and as a result, I spent a lot of time on the runway. I didn’t even attempt to set up the three Saitek control panels because they probably need an updated driver to work with X-plane. I’ll look into that.

The demo expired before I could set up the controls

And that was it. I ran out of time in the demo, in addition, I didn’t have any more time in my day to wrestle with the simulator settings. The message said that my “flight controls will no longer function.” To be clear, my controls never functioned properly because I couldn’t get them assigned. I will try X-Plane again and I hope to actually fly it next time.


Prepar3D with Triple Screens and More

What you’re seeing here is Lockheed Martin Prepar3D with triple screens and more. The software is Prepar3D version 3.4, the DIY Deluxe Desktop Flight Sim, the DIY Side Joystick Frame, Air Manager is running the instruments on the 4th display. The installation of P3D was straightforward and you’re looking at a stock installation with no add-ons (yet).


The three main displays are inexpensive 32″ HDTVs connected to a single Nvidia GeForce mid-level graphics card. The system specs are at the end of this blog post.

Prepar3D Installation

P3D recognized the Saitek X52 Pro and properly assigned its functions, which was very nice. For other flight simulator programs, assigning the controls correctly is an awful awful chore, but not for P3D. This is the first flight simulator software I’ve ever seen that correctly identified rudder pedals and successfully assigned them to the correct function. Including the toe brakes. So, kudos to Lockheed Martin. They also build spaceships, by the way. Just so you know.

It’s easy to combine the DIY Side Joystick Frame, (item 311), with the Deluxe Desktop Flight Sim project. I’m using the Saitek Pro Flight Cessna rudder pedals. Great rudder pedals. I updated the drivers for my Saitek switch panels that enabled them to work with P3D. That was easy.

You’ll notice that nothing here is expensive or exotic… or even new. For example, I’m using a second-hand computer to display the flight instruments. The second computer is so old it’s running Windows Vista.

Air Manager is the software that generates the flight instruments and it communicates through the local network connection with P3D on my primary computer. Air Manager also works with X-plane and Flight Simulator X.

System Specifications

DIY Deluxe Desktop Flight Sim, item #D250
DIY Side Joystick Frame, item #F311
Primary computer: Powerspec B634 with Intel i5-3450
Nvidia GeForce GTX 950 SSC
Windows 7, 64 bit
Saitek X52 Pro Flight HOTAS controls
Saitek Pro Flight Cessna rudder pedals

Secondary computer: Dell Inspiron 530s with Pentum E2200
Windows Vista

.

Prepar3D with triple screens and more

Saitek X52 Throttle Fix

Saitek X52 Throttle Fix

Saitek X52 Throttle Fix

The Saitek X52 throttle includes two detents in its throttle movement

There are actually many situations where you don’t want to feel detents as you’re adjusting the throttle setting.

This is an easy Saitek X52 Throttle Fix. This video shows you how to remove this tiny part, so you can get back to smooth flying.

A detent is a mechanical resistance to rotation. The two detents in this throttle are at the 25% position and the 75% position.

If you’re using this throttle with the DIY Easy Helicopter Collective, you definitely do not want detents in the throttle movement.

This is a pretty easy modification, so let’s get started. I like to begin by placing a piece of tape over the USB cable to keep the dirt out.

Reduce the setting to zero on the tension knob.

I recommend placing the throttle on something soft so it won’t get scuffed up

There are 8 screws that hold the throttle base together. Two in the middle.

Two near the tension knob

Two screws in opposite corners

And two more in the corners underneath the rubber non-skid pads

By the way, disassembly of this product will void the warranty. Just so you know.

Let’s tackle the hidden fasteners first. I’m using a small screwdriver to pry up the rubber pad to reveal the screw underneath.

Now I can remove this first screw. A magnetic screwdriver can help in this situation.

Repeat with the screw in the opposite corner.

Next remove the screws in the middle.

Note that this screw is different.

There are three different types of screws: the four corner screws, two longer screws for the middle, and two tiny screws for the tension knob. Do not get these mixed up.

Here I’m using a smaller screwdriver for these small screws under the tension knob.

Finally, we’ll remove the last two screws in the corners.

The two halves of the base are snapped together. There is plastic latch inside there holding it together.

That’s the latch

As we open it, observe how the parts fit together. See that slimy looking thing there? That’s what we will remove, like pulling a tooth.

Here as I’m moving the throttle grip, you can see two ridges on the rotating axle. Those ridges are what rub against the tooth and cause the resistance you feel when you move the throttle. Those are detents. By the way, do not get that grease on you. It’s hard to wash off.

This really is like pulling a tooth, but much easier. Use pliers, find a good grip and pull strait out. That’s what we like to see.

Reassembly of the Saitek X52 Throttle

Now let’s put it back together. The two halves of the base must be aligned perfectly.

These two white plastic tabs must fit in these two slots.

Snap it shut and start reinstalling the screws.

Again, here is a reminder of what they look like.

Start with these two corners.

Next attach the two tiny screws for the tension knob.

And then the two middle screws. So you’ll notice we’re attaching the screws in the reverse order that we removed them.

Finally install the screws in these last two corners. Try to stick the rubber pad back in place the best you can. It should stick pretty well.

And try it out. Try it with different tension settings. It’s so much smoother now. I really think you will enjoy using this throttle after this modification.

Saitek X52 Throttle Fix

Fly to the Secret Base in FSX

The FSX Secret Base and the surrounding islands are featured in the second half of the Tokyo Executive Transport mission. The islands only appear during that mission so if you try to fly there during free flight, you will find only empty ocean. Try flying the mission. Sure, you get to see the islands and the Secret Base in FSX, but you have to fly the assigned Lear jet.

So how do you fly to the Secret Islands in free flight? How do you fly your choice of aircraft? You noticed in the video I was flying the Robinson R22. If you want to do something similar, you should add the Secret Islands as a scenery object. Fortunately, this is very easy.

Add the Secret Base in FSX

Add the Secret Islands (including the Base) as a scenery object in FSX. Check out this link: this is a freeware FSX scenery download that installs the Secret Base as a regular scenery object. Don’t forget to read the Read Me file.

The file installs the Secret Islands, the Secret Base, death ray guns on the mountain peaks, and some sort of suspicious weather station on the top of the highest mountain. The only object that is not included is the retractable water runway that leads to the hangar. The runway is present during the Tokyo mission, but not when you fly to the Secret Islands in free flight.

Air Manager

I use Air Manager software from Sim Innovations in the embedded video. This is a clever piece of software that makes it easy to display instruments on a separate monitor. I’m using it for the Robinson R22, but it works for a variety of default and add-on aircraft. Use it in FSX, FSX Steam, Prepar3D and X-Plane. Air Manager features over 300 flight instruments to choose from and more on the way.

approaching Secret Base in FSX
Secret Base in FSX


Cats in Space

I unexpectedly adopted a cat when my mom moved to a new apartment and discovered she couldn’t have pets. Then I realized something amazing: I’ve been making YouTube videos for 10 years and I’ve never uploaded a video with a cat. I can now do cat videos! I had dreams of my cat earning enough money in ad revenue to pay for her own food, litter, and vet bills. Look at this video, she even hops onto the back of my chair and flies through space with me…. how cute is that?


I guess it’s not that interesting to people. Literally zero people care.

So I guess I’ll have to eat her.