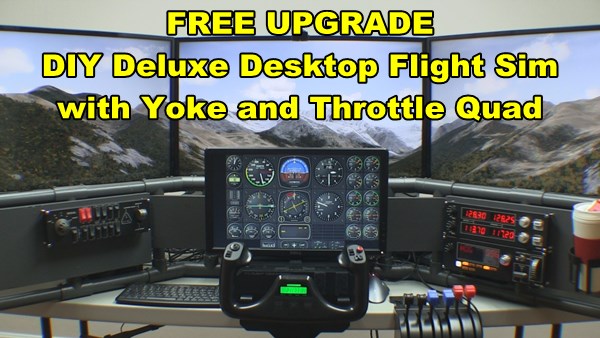
Home Flight Simulator Plans – How to Install Larger Displays
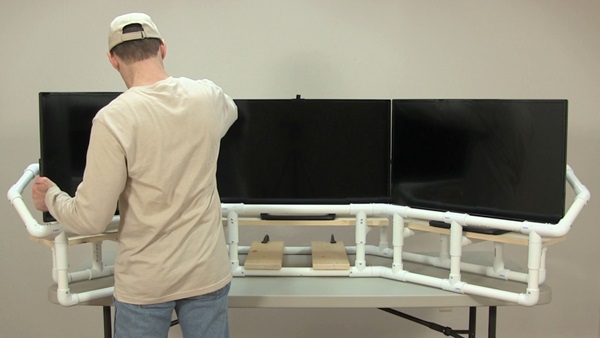
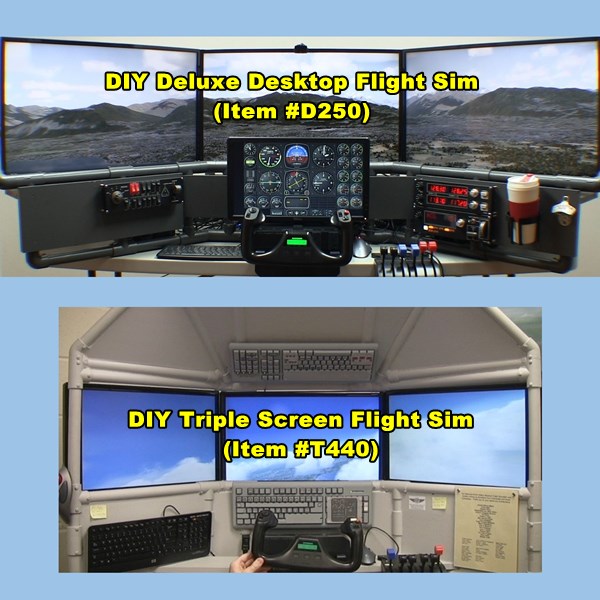
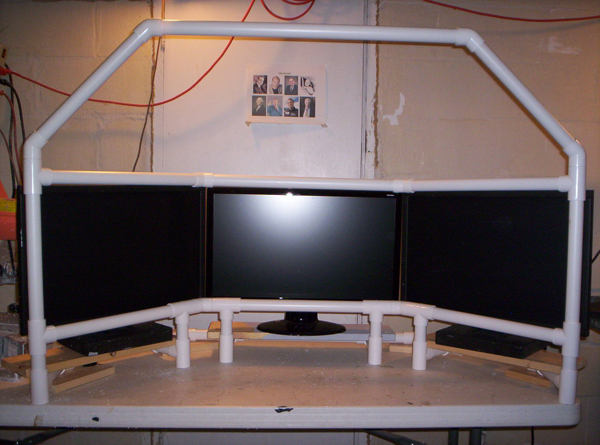
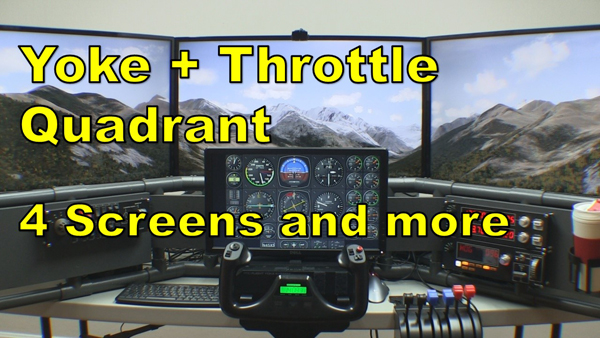
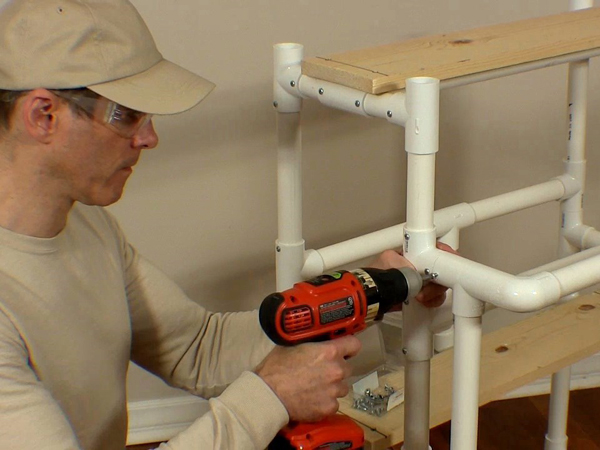
The DIY Deluxe Desktop home flight simulator plans are designed around three 32” HDTVs used as the main displays. But what if you want to use displays that are larger (or smaller)? Many DIY Flight Sim builders modify the plans to match their unique requirements. Furthermore, PVC pipe is a great material for experimental trial-and-error. It’s no wonder so many builders modify their projects.
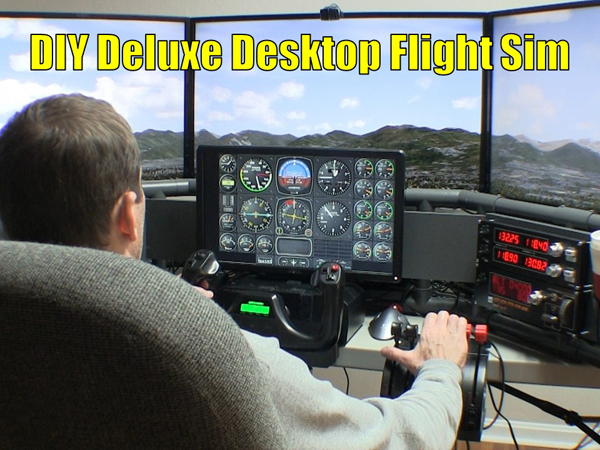
DIY Deluxe Desktop Flight Sim
Home Flight Simulator Plans
Gary is a DIY Flight Sim builder. He developed a useful spreadsheet to use when using larger (or smaller) displays with the DIY Deluxe Desktop home flight simulator plans. He was kind enough to share it with me, so I’m providing it to you in the course content. First of all, Gary’s spreadsheet is really clever. You simply enter in the dimension of the displays you want to use and then spreadsheet calculates how much to change the affected PVC pipes. Also the relevant pipes are identified in a new Pipe Frame Map.
You still may require a little trial-and-error because different PVC manufacturers make the fittings differently. Fortunately, PVC pipe is inexpensive and easy to work with.
You’re looking for a home flight simulator for sale and you come across two similar DIY projects. How do you tell the two apart? The DIY Deluxe Desktop Flight Sim and the DIY Triple Screen Flight Sim are similar, but there are some significant differences too. Here are 7 ways to choose the best multi-screen DIY Flight Sim for you.
The D250 Deluxe is much more adaptable than the T440 Triple Screen.
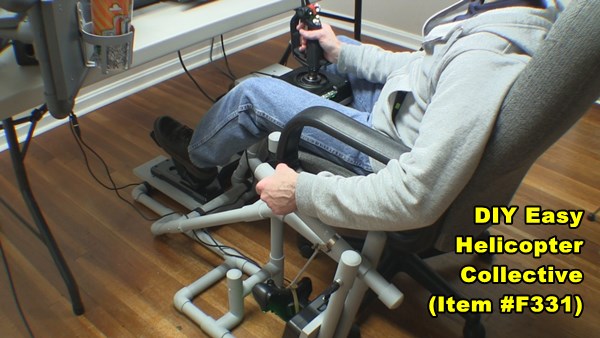
D250: You can build the D250 with a yoke and throttle quadrant, or pair it with one of the DIY floor frames so you can use HOTAS style controls or even a helicopter collective. Match the D250 with the #F311 Side Joystick Frame, the #F321 Center Joystick Frame, or the #F331 Easy Helicopter Collective.
T440: On the other hand, the T440 is great with a yoke and throttle quadrant as originally designed. But if you want a joystick and side throttle, you would need to invent some modifications.
2. Recent Work
The D250 instructional video is much newer than the T440.
T440: I produced the T440 video in 2011 as a part of a successful Kickstarter campaign. I had a very short amount of time to design and build the project and a short time to film, edit, and publish the video. It’s still a great project though.
D250: I produced the D250 video in 2016 so it has better lighting, better sound, I used a better camera, and I had more experience editing than I did in 2011.
Deluxe Desktop Flight Sim with Side Joystick Frame
3. Displays
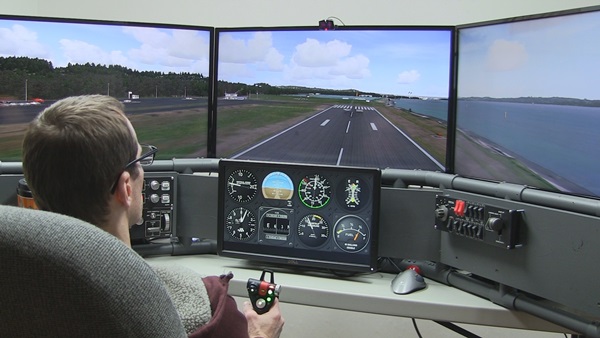
The D250 has larger screens.
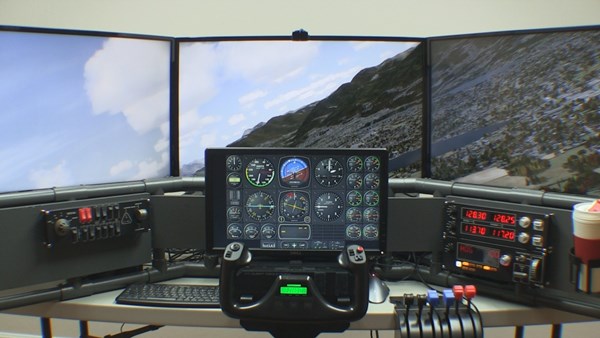
D250: I used 32” HDTVs for the three main displays. The combined screen width is over 6 feet wide.
T440: I used 24” monitors for the three main displays. The combined screen width is less than the D250, but still impressive.
4. Keyboard Modification
The T440 was designed to have an overhead panel like an airliner. For this reason, the T440 Triple Screen bundle includes the DIY Airliner Keyboard Modification. The D250 doesn’t have a place for an overhead panel.
Home flight simulator for sale
5. Styrofoam
The T440 has Styrofoam, the D250 does not.
Builders use ½” styrofoam sheets when constructing the T440 Triple Screen project. Styrofoam may be cheap or expensive depending on where you live in the world.
6. Instrument Panel on a 4th Monitor
T440: You will see several builders in the Customer Gallery added a 4th monitor to display the flight instruments. I didn’t include anything about that in the instructions, those clever builders modified their projects on their own.
D250: I included instructions to add an optional 4th monitor for the flight instruments.
DIY Easy Helicopter Collective paired with the Deluxe Desktop Flight sim
7. Ease of construction
I think the D250 is easier to build than the T440.
D250: The project doesn’t require gluing any Styrofoam panels in place. But the D250 does include 1×8 boards. If your saw won’t cut 1×8 boards, you’ll need to get that done at the store when you buy them.
T440: The project doesn’t require you to cut any lumber wider than a 1×6. You do cut Styrofoam with a utility knife, but it is not difficult just a little time-consuming.
Home Flight Simulator for Sale
You have a lot of choices when it comes to your home flight sim project. I hope this comparison helps you.
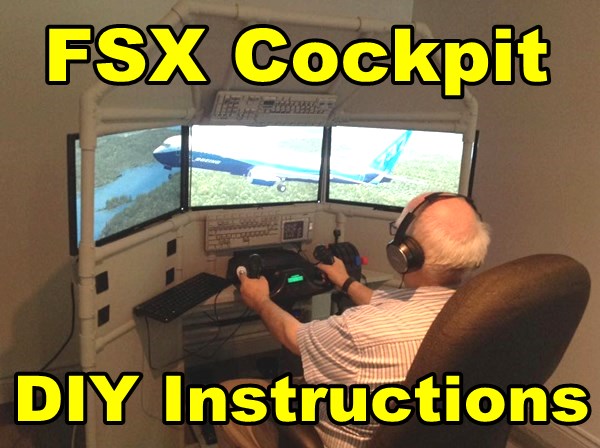
This is the greatest difference between Roger Dodger Aviation and the other guys: my customers actually complete their projects! My online courses include instructions for each step of the project including video clips, diagrams, pictures, and printouts. You can build a FSX cockpit DIY project like these guys!
DIY Deluxe Desktop Flight Sim
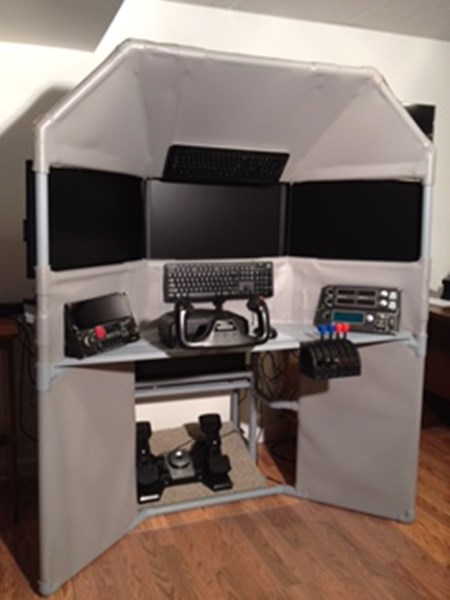
First of all, look at this beautiful DIY Deluxe Desktop Flight Sim item #D250. It was built by Greg in Savannah Georgia, USA. This is one of my favorite designs because it is so versatile. Builders can create exactly the type of home cockpit they need to match their flying interests. You can install a yoke and throttle quadrant in the #D250. On the other hand, you can also use a HOTAS joystick and throttle or even a helicopter collective.
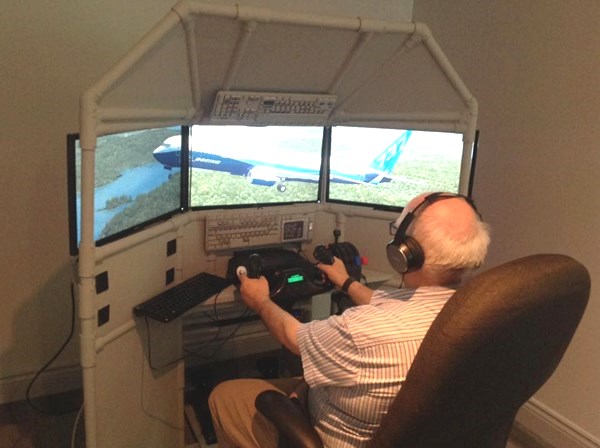
The DIY Triple Screen Flight Sim, item #T440 is still my most popular DIY course. As a result, I get more T440 pictures than any other project. Two customers recently sent me pictures of their completed projects (see below). Wayne and Richard both build the same project but built it to suit their particular simulation requirements.
DIY Triple Screen Flight Sim built by Wayne
DIY Triple Screen Flight Sim built by Richard
Help Spread the Word: FSX Cockpit DIY Projects
Don’t let Facebook bury these success stories! These men worked hard on their FSX cockpit DIY projects and deserve to be congratulated. When I post on Facebook, the message only goes out to 10% of my fans. Please LIKE, COMMENT, and SHARE to spread the word. If you are reading this as a blog post, please link to it or share it with friends. Let’s show these guys our community appreciates a job well done.
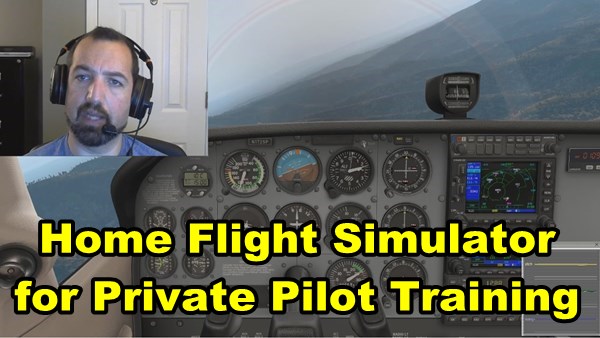
How to Use a Flight Simulator for Private Pilot License
Can you learn to fly a real airplane with a home flight simulator? Two aviation schools say yes, and they provide training to help armchair pilots become real pilots. Interestingly, both schools use X-plane as their chosen flight simulator for private pilot license. I’ll discuss both schools below.
First, an initial caveat: don’t record home flight sim training in your FAA logbook. The FAA will not recognize it. On the other hand, you can certainly learn material at home that will make your training time in the real airplane more efficient.
PilotWorkshops is a distance learning company that provides ongoing proficiency training with videos and manuals. Some online courses are one time fees, others like the IFR Mastery Course, is a subscription. They use X-plane 11 as the flight simulator for Private Pilot license training. The material provides impressive details about installing and setting up the X-plane software, controls, views, monitors, weather, replays, debrief tools. PilotWorkshops also introduces online, live human ATC with PilotEdge.
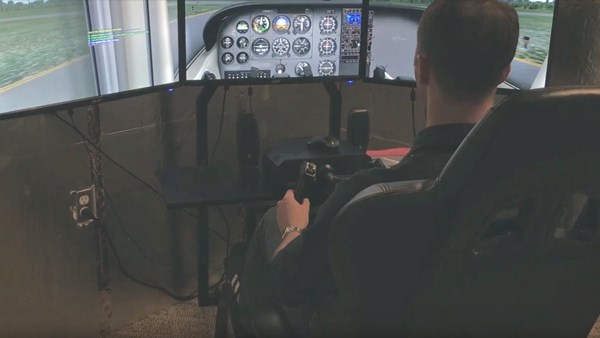
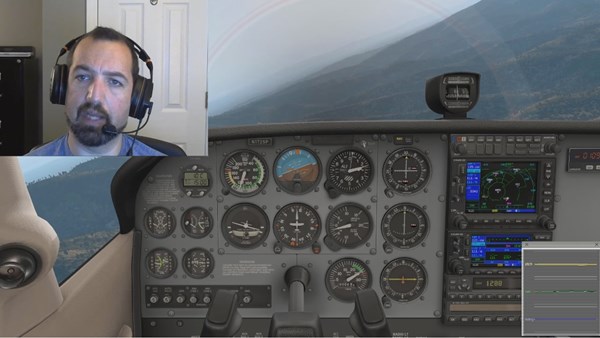
Interestingly, they try to do all this with a simple Phase 1 home flight sim setup (what is a Phase 1 flight sim? Read more). They use a single monitor, a joystick (not a yoke), and a TrackIR for the most part. You could have a much better training experience with a setup like the DIY Deluxe Desktop Flight Sim which features, multiple monitors, yoke, rudder pedals, throttle quadrant and more.
Best option for training: DIY Deluxe Desktop Flight Sim
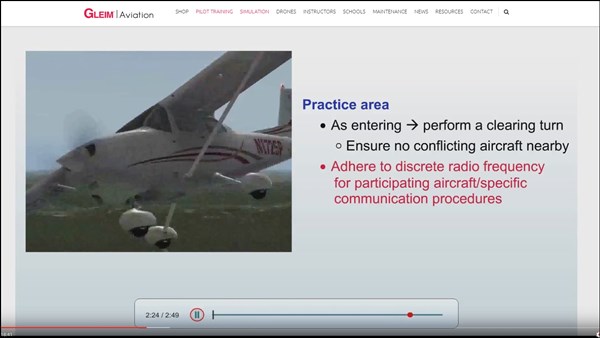
Gliem is a decades old legacy company that sells study guides, text books, videos and other materials for pilot ground schools. Anyone who has trained in North America has seen a Gliem book at one time or another.
The videos and content uses a traditional Private Pilot syllabus with a flight sim focus. However, note that Gliem is still using X-plane 10 (not 11) as their flight simulator for private pilot license training. The promo video shows a real Direct Fly Alto light sport airplane, instead of the Cessna 172 used in X-plane, which is a bit odd.
Gliem also sells a triple-screen cockpit frame for $549.95. That’s the price for the frame only! You will spend a lot less and get much more when you build your own DIY Deluxe Desktop Flight Sim.
Flight Simulator for Private Pilot License
In conclusion, home flight simulator software keeps getting better and is an excellent addition to your Private Pilot training if used correctly.
All DIY Flight Sim products are produced by me, Matt Thomas, here at Roger Dodger Aviation. These flight simulator build plans were originally sold as downloaded products. The customer would buy the instructional videos, manuals, and templates, and then download all contents in a big zip file. The customer would then open the files on a PC to view all the content.
That was a great idea in 2007, but not such a good idea 10 years later. Customers wanted better access to the content, and modern e-learning was the answer. With online tutorial courses, a student doesn’t have to sit through a giant video or sift through a 100+ pages of flight simulator build plans. I re-formatted all the content so each step in the building process has a short video clip, and the illustrated instructions for that step only. The plan drawings and printouts are presented with that step, instead of buried in an appendix.
You can now access the DIY Flight Sims courses with any device, even tablets and smart phones. This means you can bring all the instructions with you to the garage or workshop when you work on the project.
DIY Flight Sims made a huge leap forward in 2017.
How to Get the Updated Flight Simulator Build Plans
If you purchased an old Download version of a DIY Flight Sims product, you can get a free update to the new online course. The flight simulator build plans are in a better, learner-centered format, and many courses have additional material now.
Want the update? Simply email me at DIYflightsims@rogerdoger.net and tell me what product you bought and what email address you used. This will help me track down your order. Also tell me where you bought it if you purchased from a 3rd party vendor. I’ll send you a coupon code that will give you free access to the course.
New online courses are available for the following products:
You will have access to the original content for that product, but in the new format as an online e-learning course. I’ve updated and improved some of the projects, so you also get any new material that I’ve added. In addition, you also get a monthly notification of any future updates I make to the products in the Roger Dodger Insider. Finally, you also get free access to Builder Academy, which is where you learn all the basic skills for building DIY Flight Sims.
The D250 DIY Deluxe Desktop Flight Sim project shows you how to build a multiple monitor flight simulator for your home. Until now the project was only used with a joystick and side throttle. However, this update makes it possible to use the D250 frame with an airplane yoke and throttle quadrant. The instructions show you how to raise the center instrument panel to make room for the yoke. Also, the Saitek switch panels are mounted in a different configuration which are detailed in the new plan drawings. The new switch panel placement is better for a pilot that is flying with a yoke. Use the D250 home cockpit with your FSX multiple monitors setup… or P3D, or X-plane, or Flight Sim World. The project is platform independent so you can use it with any flight sim program.
Flight Sim FSX multiple monitors
online DIY flight sim training
FSX multiple monitors
View the Builder Academy on your phone or tablet or anything
How To Get Your Upgrade
This is a FREE upgrade if you already purchased the D250 Deluxe Desktop Flight Sim. Email me at DIYflightsims@rogerdodger.net to get your update. Tell me what email address you used when you ordered the project so I can verify your order. I’ll send you a coupon that will allow you free access to the project.
You can get the updated D250 project here and then access the plans on any device. The D250 instructions are now 100% online, so there are no downloads to worry about. The instructions, videos, pictures, and printouts are all categorized for easy access. You will receive ALL of the instructions, so scroll down to “Instrument Panels: Yoke and Throttle Quadrant” to see the updated material.
FSX Multiple Monitors
The new upgrade means that the DIY Deluxe Desktop can be combined with the F311 Side Joystick HOTAS Frame, the F321 Center Joystick Frame, or utilize the yoke + throttle quadrant option. It’s a multiple monitors flight simulator project that works with three screens. In addition, you can add a fourth smaller screen for the flight instruments. This project is one of the most versatile DIY Flight Sim projects I’ve ever created. I’m very excited to present it to you in this new mobile format.
One of the common questions I get is about altering the DIY Flight Sim designs. Most builders modify the designs in some way to match their specific needs or equipment. For examples, take a look at Customer Gallery 1 and Customer Gallery 2 and notice how no two Simpits are alike. Once a builder deviates from the plans, the project becomes a prototype DIY simpit. There is no way I can predict how people will modify my DIY Flight Sim projects, so that is why I use building materials that are inexpensive and easy to use. Don’t be scared! Prototyping is a wonderfully creative process that can give you real satisfaction with your project.
What Does “Prototype” Mean?
You don’t really know if a flight sim design is going to work until you build it in real life. Really! If some anonymous person on a forum says an idea will work or not work, they don’t really know, because anyone can type words on a screen. You only gain true knowledge by building a DIY simpit in real life. That is prototyping.
So when someone asks me if a design modification will work, I’m very cautious about my answer for several reasons…
I don’t know if my understanding of their message matches what they’re imagining.
I don’t know if a proposed modification will require an additional structural reinforcement.
I don’t know someone’s skill level. Have they built things before, or is this the first time?
I don’t know if they have adequate tools. Are they building in a workshop or a dorm room, etc?
Prototyping means you try your idea, then adjust it and try it again, then adjust it and try it again, and keep at it until you are happy with your work. Fortunately, PVC pipe is a wonderful material for prototyping a DIY simpit (more about that below).
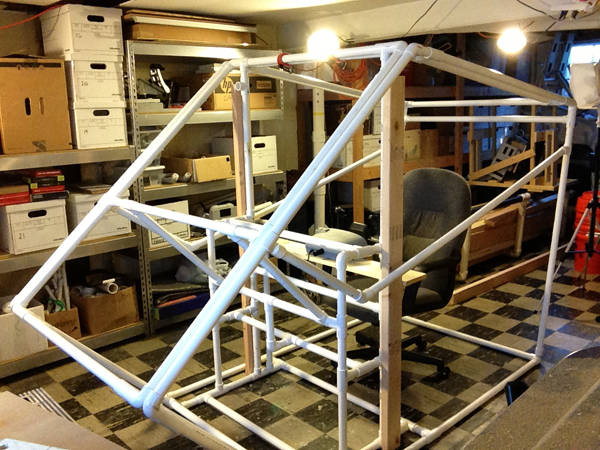
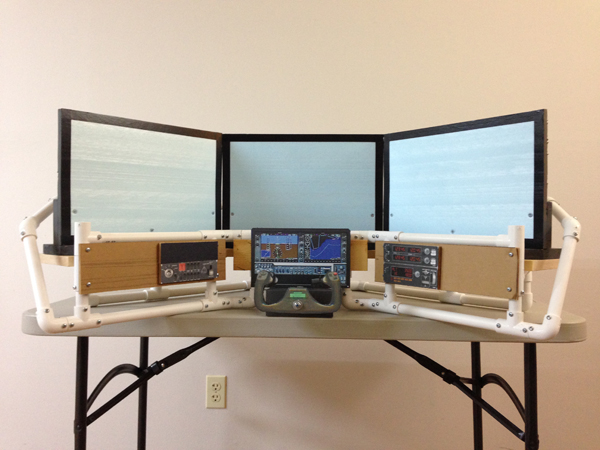
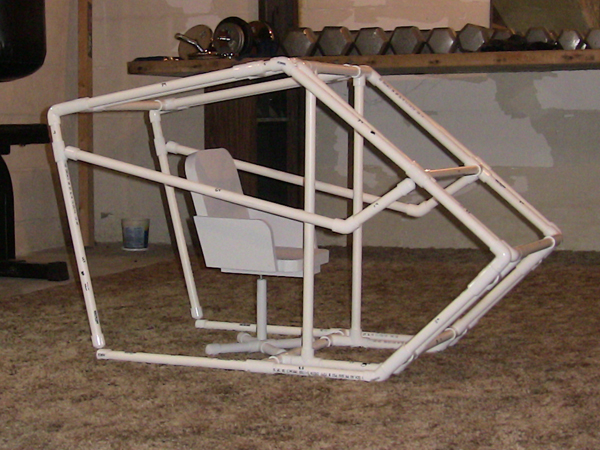
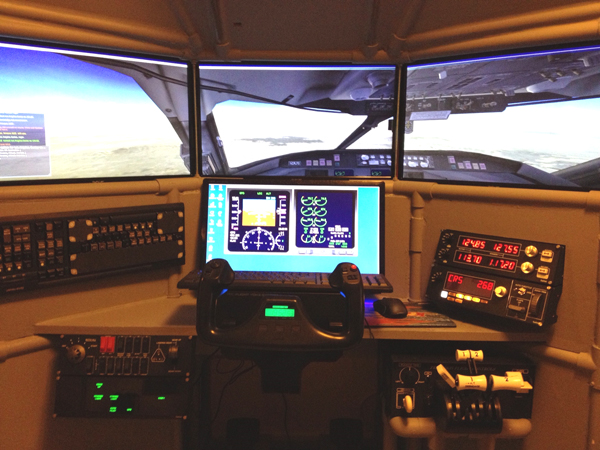
Fully operational prototype of the Deluxe Desktop Flight Sim
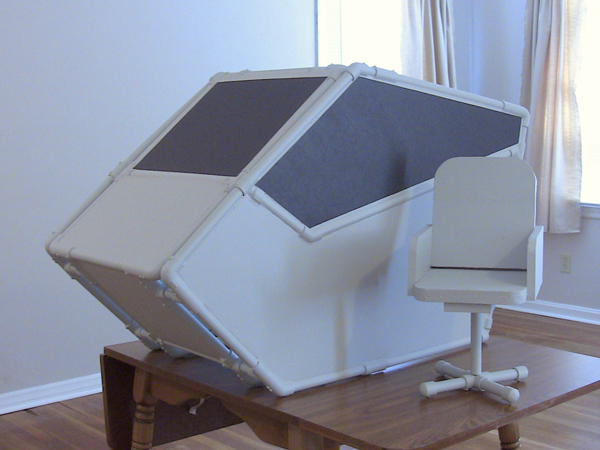
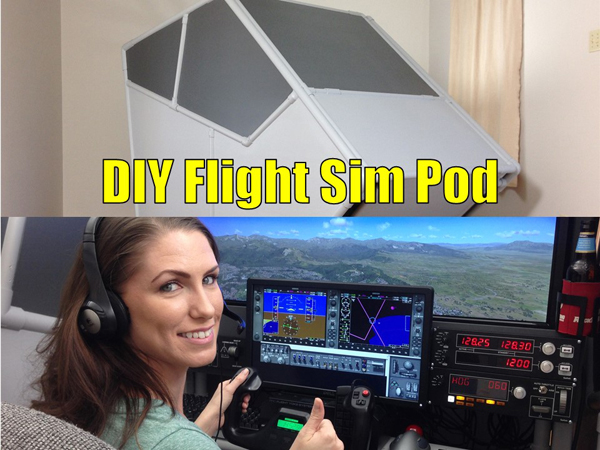
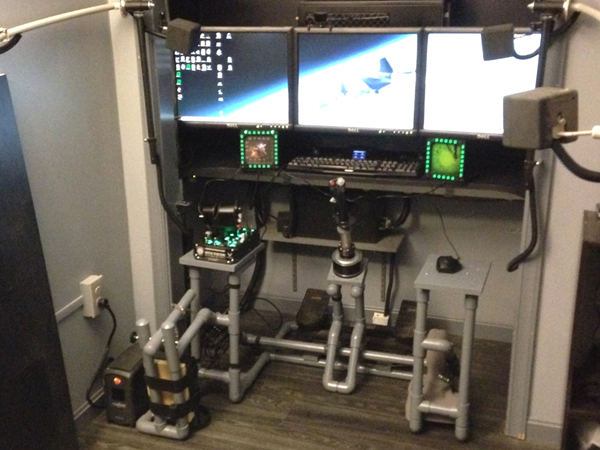
Prototype E430 Flight Sim Pod in my workshop
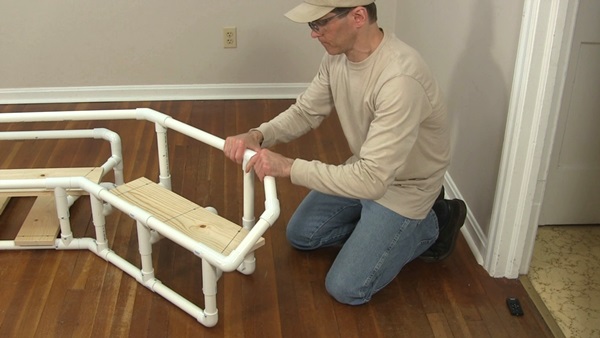
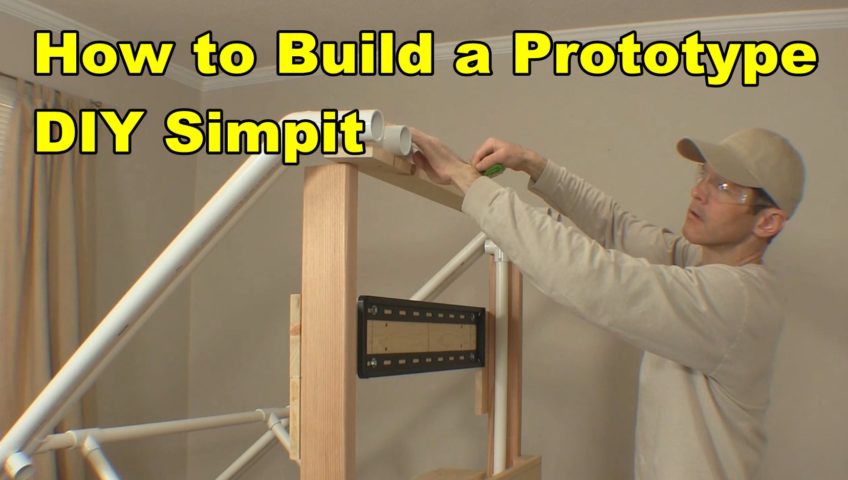
Prototyping starts with the frame around the monitors
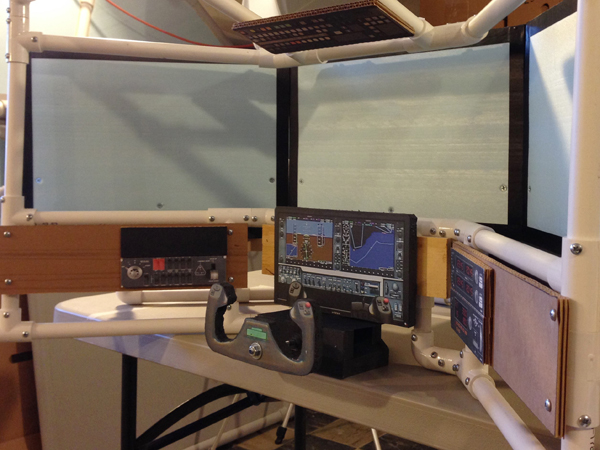
Mocked up flight controls in the prototype Triple Screen Flight Sim
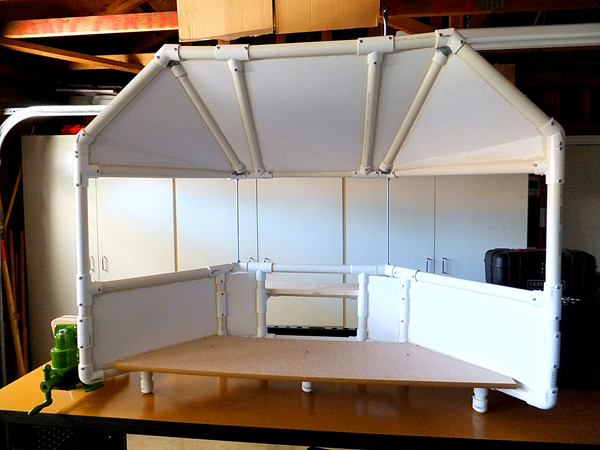
Scale models
When I am designing large DIY simpit projects I make a scale model of my idea. As a result, this helps me find any major flaws and get a feeling for what it will look like before I build it full size. I use 1/2″ PVC pipe when I build a scale model. The smaller pipe saves me money because I use less 1″ pipe when I later build the full size prototype.
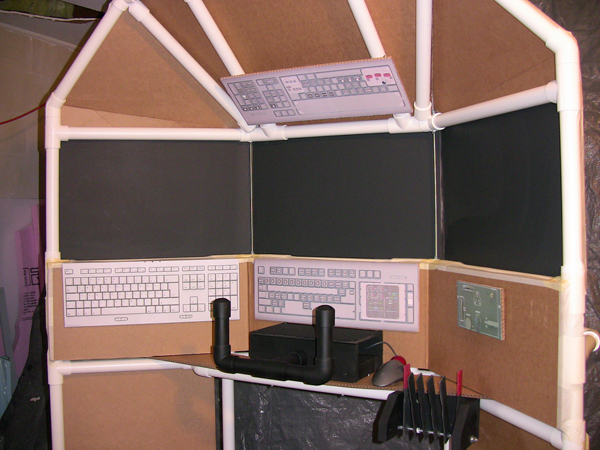
I also make scaled down controls, displays, and switch panels. This isn’t Computer Aided Design, but I still call it CAD: Cardboard Aided Design.
Half scale model of the Deluxe Desktop Flight Sim
Half scale flight controls, displays and switch panels
Scale model of the Flight Sim Pod
Scale model of the Flight Sim Pod frame
Scale model of the Triple Screen Flight Sim
Scale models helps me decide how it will all fit together
7 Steps for Prototyping a DIY Simpit
So how do you modify a DIY Flight Sim project if you need to scale it up or scale it down? Here’s an example. Let’s say you want to build the D250 Deluxe Desktop Flight Sim. However, the project is built around 32″ HDTVs but you want to use 27″ monitors. How do you scale this down?
First of all, buy an extra length of pipe in case you need it (PVC pipe is cheap)
Scale with a percentage. 27″ is about 16% smaller than 32″ Here’s the math: 32 – 27 = 5 and then 5 / 32 = .156, which is about 16%
Decrease the measurements of pipes by that same percentage. Only scale the pipes adjacent to the displays, for now.
Cut the pipes and assemble them with the PVC fittings. Start with just the pipes adjacent to the displays. Observe if the frame fits well compared to the displays or if you need to make changes.
If some pipes are a little too long, remove them and cut them shorter. If some pipes are too short, that’s why you bought extra pipe. It’s easy to assemble/disassemble the PVC pipe frame to test different frame dimensions.
Once you have pipe lengths that you are happy with, secure the PVC fittings with self-drilling screws.
Scale the rest of the pipes to fit with the part of the frame you changed. This is much easier now that you have a starting point.
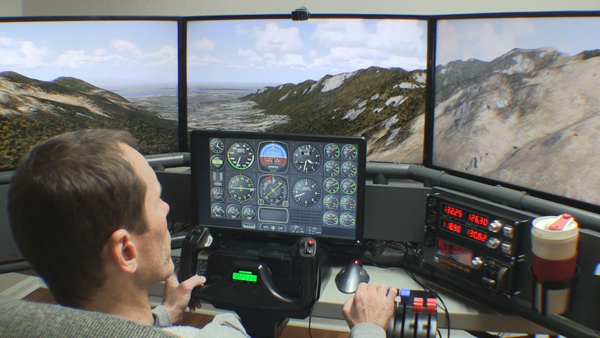
I made four simple, yet significant changes to the D250 Deluxe Desktop home built flight simulators. Consequently, these changes bring me back into the beloved world of general aviation. See me in the video flying a Beechcraft Baron once agian.
1. Added a Yoke and Throttle Quadrant
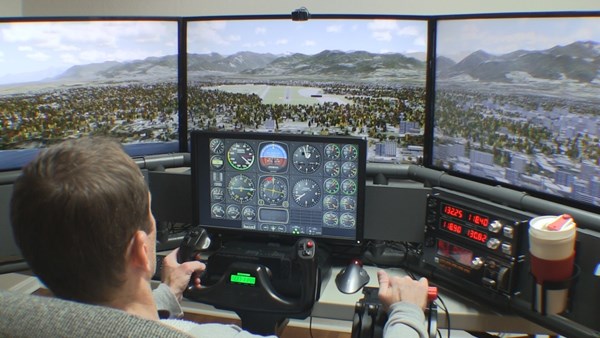
I removed the side-mounted HOTAS joystick and throttle and added a Saitek flight yoke and throttle quadrant. I attached the trim wheel underneath the throttle quadrants, and that is the perfect location. Once again, I can fly multi-engine airplanes like the Beech Baron, or light general aviation airplanes like the Cessna 172.
Home built flight simulators with new mods
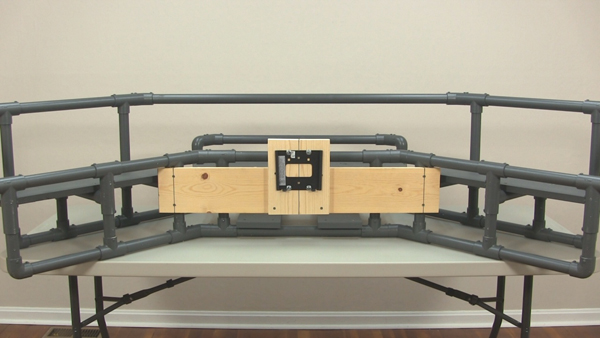
2. Raised the Instrument Panel Display
I use an inexpensive 19″ monitor to display the flight instruments on the D250. The yoke housing did not fit under the 19″ monitor, so I raised the monitor mount a few inches. I simply replaced the board for the Center Instrument Panel and attached an adapter board for the monitor mount.
Raised monitor mount for instrument display
3. Moved all Saitek Switch Panels
When you fly an airplane with a yoke, your left hand is typically on the yoke and your right hand is free to adjust the radio frequencies, dial in nav headings, and more. The D250 wasn’t set up like this because I used it to fly helicopters. As a result, the radios were on the left side of the cockpit, because a helicopter pilot typically keeps his right hand on the cyclic (joystick) and the left hand is free. I cut new 1×8 boards for the Left and Right Side Instrument Panels and re-arranged, and re-mounted the Saitek switch panels.
Yoke and throttle quadrant mod for the DIY flight sim
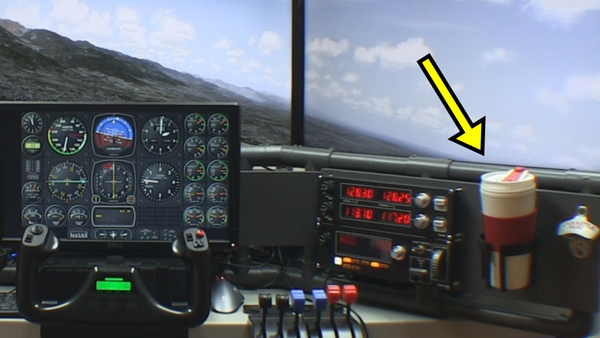
4. I Moved the Drink Holder
Don’t fly thirsty! I moved the drink holder to the right side of the cockpit so I could easily reach it with my right hand. The drink holder is the right size for a travel mug or a bottle with a drink coozie.
Important drink holder in the home flight sim
Plans for Home Built Flight Simulators
Do you want to build this same flight simulator for your home? If I get enough interest from my DIY community then I will create an additional Instruction Manual and include it with the original plans. In addition, customers who have already purchased this project will get the new plans for free.
System Specs and Peripherals
Notice these computers are not especially strong or new. You don’t have to spend $2000 on a computer to have great home built flight simulators.
DIY Deluxe Desktop Flight Sim, item #D250 Primary computer: Powerspec B634 with Intel i5-3450 Nvidia GeForce GTX 950 SSC Windows 7, 64 bit Flight yoke: Saitek Pro Flight Saitek throttle quadrant Saitek Pro Flight trim wheel Pro Flight Cessna rudder pedals from Saitek
Switch panels: Saitek PZ55, PZ69, PZ70
Marcin Strzyzewski invited me to do an interview for Onet online in Poland. Onet posts articles on a wide range of topics so I was happy to provide info about building flight simulator cockpit. Below are Marcin’s questions and my answers. Please let me know what you think of my responses.
1. What is the biggest fun in flight simulation?
Flight simulators can do many different things so that depends on what interests you. Think of the flight sim pilot population as three parts: Part 1 are the people that enjoy flying airliners with their flight simulator. Many of these users join Virtual Airlines and fly the same routes in the simulator as they would in real life. They fly online with other users that serve as air traffic control. Part 2 are all the pilots that used to fly in real life, or plan to fly later in real life, or they are active pilots now. You see these people using their simulator for civil airplanes and helicopters like the ones you would find at a flight school. Active pilots can fly a lesson in real life, then practice the same lesson at home with their simulator. Part 3 are the gamers and casual users. They fly space simulators or air combat simulators or maybe they just play around and fly for fun. This also a large and important population.
For me personally, I enjoy all the above. But most of all, I enjoy designing and building cockpit enclosures for home flight sims. I call these Do-It-Yourself (DIY) Flight Sims.
2. If some of our readers want to start making their own simulator, what is your advice?
First of all, know what type of aircraft you simulate the most. For example, a helicopter simulator project will look a lot different than an airliner simulator project.
Second, know your budget. If you live in a country where PVC pipe or lumber is really expensive, you should know that before you start. If you will buy new displays or new controls, start looking for sales. Retailers usually run a sale every month or two.
Third, and perhaps most important: negotiate with your spouse. A flight simulator will take up space in your home that can’t be used for other things. I designed both large and small DIY Flight Sims, but they all take up some measure of space. I recommend you talk this over with your spouse prior to construction. Note: if you can make the case that your children or grandchildren will somehow benefit from your flight simulator, this can help.
DIY Deluxe Desktop Flight Sim with 4 screens, yoke and throttle quad
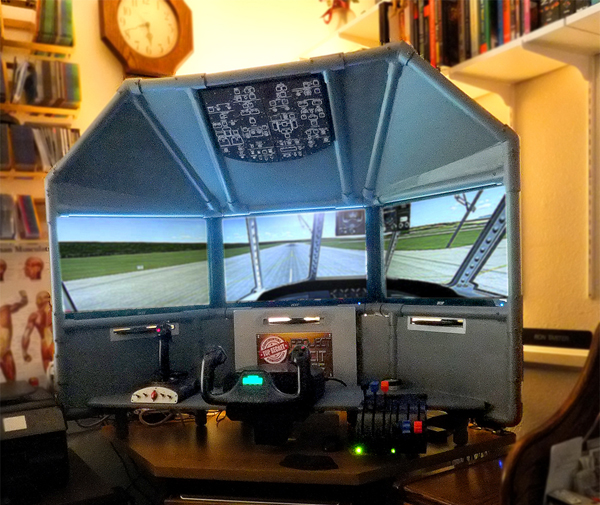
DIY Flight Sim Pod is a enclosed flight sim for maximum immersion
DIY Roll-Away Flight Sim is a compact full-featured sim that can fit anywhere
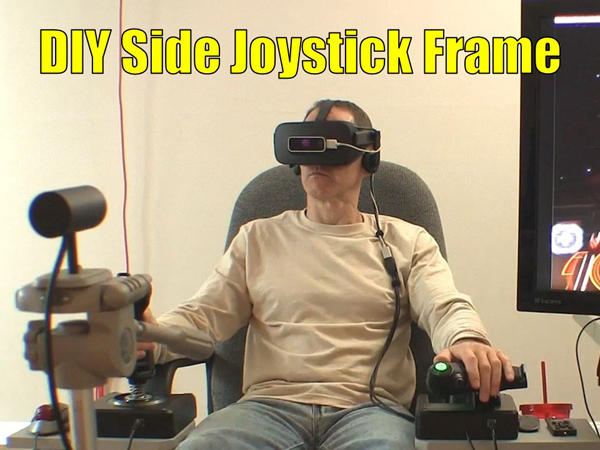
DIY Side Joystick Frame is a HOTAS chair that works well for VR
3. What is a most common mistake of the beginners?
The most common mistake is never starting the project. Actually, just getting started can be the most difficult part. No matter how large or small the project, you finish them all the same way: one step at a time, over and over, until you are done. I think my DIY videos help because you can see the building process before you personally start construction on your project. Just. Get. Started.
4. Building flight simulator cockpit sounds pricey is it in fact?
The most expensive components are the ones that keep going down in price: computers, graphics cards, touch-screens, and large HD displays. Therefore, these items get better and cheaper every year for building flight simulator cockpit. Other components are the flight controls and switch panels which can be good retail models, or more expensive premium models to fit your budget. My videos show how to build cockpit enclosures with materials from a home improvement store. Those materials are inexpensive in the USA, UK and Canada, but maybe not in other countries. For example, PVC pipe is expensive in New Zealand. I produce videos because they are the best way to teach building flight simulator cockpit.
5. What software is the best for simulators?
The flight simulator community (including third party developers) is unique because it mainly built up around Microsoft Flight Simulator X (FSX) for over a decade. Dovetail Games gave FSX new life by developing a version for Steam, however it’s still old software. As a result, we have wondered for years what will replace FSX, and today we have some newer options. Prepar3D Lockheed Martin’s Prepar3D (P3D) was developed by fixing and modernizing the old FSX code. P3D is an excellent flight sim platform, but some activities are prohibited because of Lockheed’s odd licensing agreement with Microsoft. X-Plane Laminar Research’s X-Plane 10 is also a solid flight sim platform with all the options of FSX, but with a smaller user base and somewhat fewer options from third party developers. X-Plane 11 was just released this month so it will be interesting to see how it performs in the market. Will X-Plane 11 be the ultimate replacement for FSX? We shall see.
Building flight simulator cockpit
6. Since now the best option was multiple monitors setting. Is this better now to use VR headset?
That is an excellent question, and the answer really depends on what type of flying you want to do. If you want to fly combat missions or spaceships, VR is a great option if you can afford it and if you don’t wear glasses. For example, Elite Dangerous and War Thunder are awesome in VR. The depth of field and the immersion are astonishing. Keep in mind, when you wear a VR headset, you can no longer see your actual controls, or a keyboard, or mouse. So your best option is HOTAS (Hands On Throttle And Stick) flying. Basically, if you can do everything you need to do in the sim without removing your hands from the joystick and throttle, and if you can memorize all the button assignments, then that sim could be a good option for VR.
If you fly airliners, civil training airplanes, or helicopters you will be performing a lot of tasks where you need to reach out with your hand and touch the control panel. You will tune radios, adjust the GPS, set the navigation headings, set the autopilot, and more. As of right now, it’s really difficult to do these tasks in VR so traditional flight simulators are best for this type of flying. In traditional flight simulators we use actual retail switch panels, modified keyboards, a touch screen, a real checklist, a real aviation map, or all of these things. I think it will stay that way for a long time and more people will be building flight simulator cockpit.
7. How looks your simulator, can you share some pictures with us?
Sure, here are pictures from four very different DIY flight simulators (see the slideshow gallery on this page).
I’m always impressed by the many ways my customers modify the DIY Flight Sim projects to meet their needs. It’s one of the best things about this gig. Customers change the home cockpit plans a little or a lot depending on their needs and resources. Check out these innovative DIY cockpit solutions from the Customer Gallery.
Rich’s Quad Screen Flight Sim
My customer Rich built a T440 DIY Triple Screen Flight Sim and installed an additional screen for the flight instruments. This creates a stunning degree of realism because your instruments are positioned close and you focus your vision outside to see the surrounding environment. Similarly, I demonstrated a quad display setup with the DIY Deluxe Desktop Flight Sim and Air Managerpowering the instruments.
You can see Rich added four Saitek switch panels and the K140 DIY Airliner Keyboard Mod. Do you think that is a Go Flight TQ6-ADV throttle quadrant? It’s not. It might be two Saitek throttle quadrants with after-market replacement handles attached. You can find such handles from FlightSimPM and others for your own innovative DIY cockpit.
Quad screen flight sim with switch panels, throttle quad by Rich
Thrustmaster Warthog HOTAS for Flight Sims
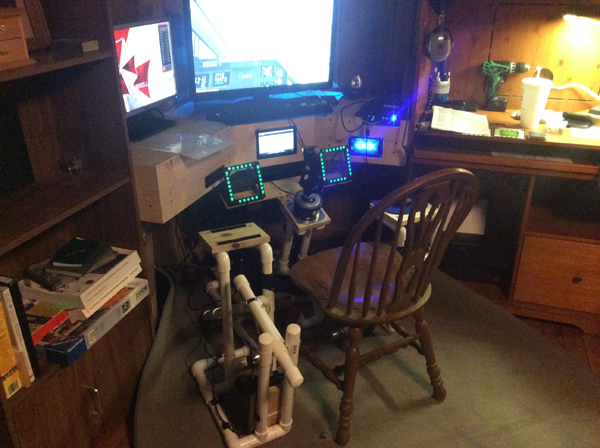
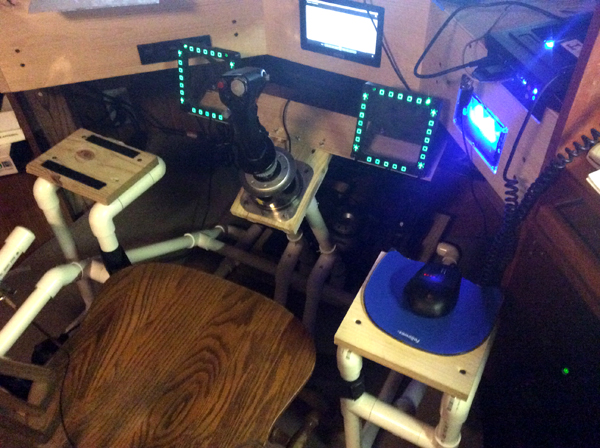
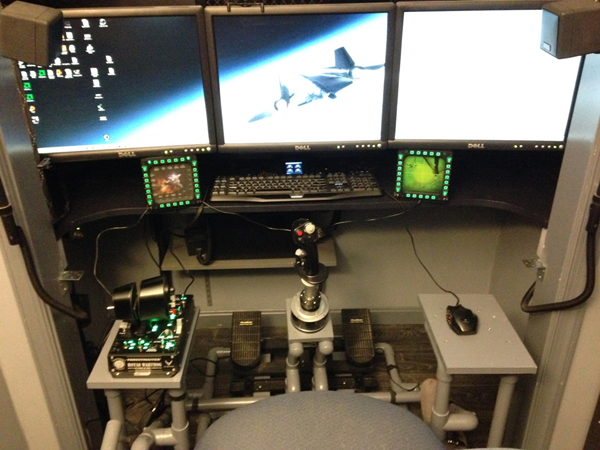
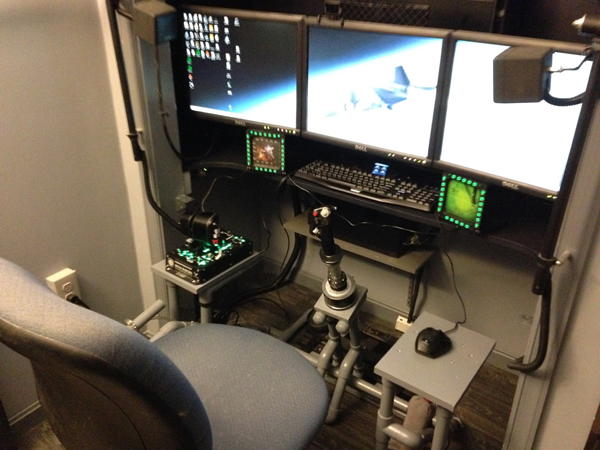
You can also see more usage of the Thrustmaster Warthog joystick and throttle with these projects. Here George modified the F331 DIY Easy Helicopter Collective to also include the Thrustmaster throttle. He can use it to simulate airplanes or spaceships in its shown configuration. He can also relocate the throttle to a platform below the collective handle and effectively simulate helicopters. Here is another example of flight sim builders buying quality hardware to equip their creations. Most of all, he built the whole simulator in a closet and included triple screens and Thrustmaster Cougar Multi-Function Panels (MFPs) for this innovative DIY cockpit.
Home flight sim helicopter collective, triple screens by George
A Very Special Triple Screen Flight Sim
Customer Ron built his T440 Triple Screen Flight Sim so it would fit on his desk. Keep in mind, the original plans are for a self-standing frame. Ron was able to modify the frame extensively so it fit neatly on his corner desk. He also added the Saitek yoke and throttle quadrant that we see so often in home flight simulators. Finally, the virtual cockpit you see there is from a Lockheed Constellation which is exactly what we use in the flight sim I built for the National Airline History Museum.
Desktop triple screen flight sim by Ron
More Innovative DIY Cockpit Solutions
Enjoy these other customer projects that I recently added to the Customer Galleries. More multi-screen projects and more modified frames for HOTAS and helicopter collectives. In addition, I have many more pictures to add to the gallery and I hope to do that in the coming weeks. Happy Landings!
If you like this post, please leave a comment. That will enable the mystical internet algorithms to spread it to more people.
Home helicopter collective by Joshua
Home helicopter collective by Joshua
WW2 flight sim keyboard mod by Michael
Home helicopter collective with mods by Robert
DIY Triple Screen Flight Sim by Chris
Home flight sim helicopter collective, triple screens by George
Home flight sim helicopter collective, triple screens by George
DIY flight sim helicopter collective and triple screens by George
Quad screen flight sim with switch panels, throttle quad by Rich
Desktop triple screen flight sim construction by Ron


Recent Comments