Add a Second Monitor – Part 1
Dual monitors
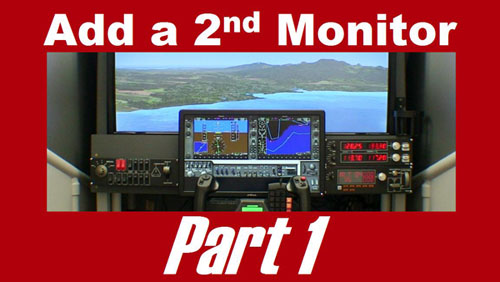
Dual Monitors for Flight Simulator
This was a great project and really enhanced the Flight Sim Pod. Dual monitors allow you to display the flight instruments on a smaller screen and show the outside view on a large monitor, or even an HDTV as shown here. Most noteworthy: quality flat panel monitors are wonderfully inexpensive now!
Video Transcript
You can display your flight instruments on an auxiliary monitor and use your main monitor for the outside view. This increases your outside visibility and makes it easier to read the instruments.
This is nothing new. People have been running flight simulator on multiple monitors for years, but I wanted to show you some specific issues for mounting a second monitor.
I’ll literally show you the nuts and bolts of this process.
Part 2 of this video will show you what to expect when you run Microsoft Flight Simulator X on two monitors.
To start off, I removed the 1×6 board from the flight simulator and used a 1×8 board instead. I needed this taller board to mount these two Saitek switch panels vertically.
If you don’t have a miter saw that can cut a 1×8 board you can usually get that done at the store. Many home improvement stores will cut lumber for you.
Now lets look at the monitor mounting bracket. This small bracket is appropriate for this size monitor. One half of the bracket attaches to the monitor, the other half will attach to the board.
This is the Dell 19 inch monitor that I’m using for this project. It was very inexpensive.
This is how the bracket will fit on the monitor….
but look here: the bottom edge of the monitor can not hang below the bottom edge of the board….
Because, I have to allow room for the Saitek yoke below it.
Unfortunately, that puts the top attachment holes on the bracket too close to the top edge of the board, so we can’t use those holes.
No problem. We will simply drill new holes into the steel bracket!
It’s not difficult. First, I measure where the new holes will be: three quarters of an inch on center, below the existing holes.
Next I tap the center points with a punch and hammer.
I drilled pilot holes first with a 1/8” drill bit. Use cutting fluid if you have it, or a lubricant like WD-40.
Next, use a ¼” drill bit to make the holes larger. Notice that I clamped the bracket in place.
The drill bit generates a lot of heat, so take your time. Drill a little, then back off for a moment to allow the bit to cool. Then repeat.
The drill press I’m using is not expensive or fancy. You could probably even do this with a hand drill if you clamped the bracket to a work bench. Either way, remember to take your time and be safe.
Use a 5/16” drill bit to make the holes larger one last time. So yes, I used three different drill bits for these holes. Yes, there is an easier way, a step bit will allow you drill holes in steel without changing drill bits.
Wear safety glasses. Wear safety glasses. Look, you can actually see bits of hot metal shooting in different directions.
Are dual monitors worth going through all this trouble? Yes! You will love having your flight instruments on a separate monitor.
Be sure to clean up the bracket after you’re done drilling.
Attach the mounting bracket to the back of the monitor according to the manufacturer’s instructions. This model already has mounting screws for this purpose.
The bracket slides on easily.
Measure the distance from the bottom edge of the monitor to the top edge of the bracket. In this case, it’s 7 ½”
I want the monitor in the center of the board, so I’m measuring the halfway point here.
Again, I want the top of the mounting bracket to be 7 ½” above the bottom of the board.
Hold the bracket in place and trace where your four mounting holes will be.
Drill pilot holes with a 1/8” drill bit, then final holes with a 5/16” drill bit
Now we can use ¼-20 screws to attach the bracket…. However, there’s another issue to address.
The ends of these screws will be too close to my 40” HDTV. I’m not comfortable with that.
So I used these ¼” tee nuts for the top two holes.
Flip the board over, and bang in the tee nuts with a hammer and a block of wood.
You can use shorter screws now. 1 inch long ¼-20 screws with washers.
Make sure the bracket is straight and attach ¼-20 screws to the bottom two holes. These screws are an inch and a half long, attach with nuts, washers and lock washers.
Slide on the monitor and see how it fits.
This is how it will sit in relation to the switch panels.
In part 2 of this video, we will paint the board and attach it to the flight simulator. I’ll also show you how to relocate the aircraft instruments to your new monitor in Microsoft Flight Simulator X.

Write a Comment