I was so excited to receive my new X52 Pro HOTAS joystick and throttle, but then I discovered they just don’t make them like they used to. So I bought the Logitech Saitek X52 Joystick Spring Modification kit from Ebay.
Why Use the Logitech Saitek X52 Joystick Spring Modification?
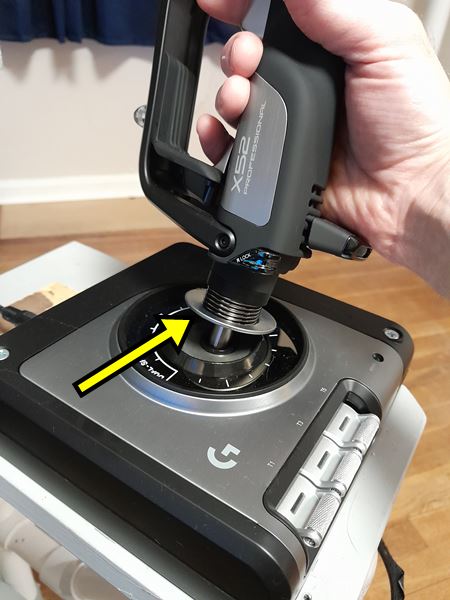
I bought a brand new X52 Pro joystick and discovered it is way too loose in the center of the joystick travel where the spring tension is the weakest. The weak spring tension causes the pilot to overshoot control inputs right where they need to make precise adjustments. Fortunately, TerraVestra’s Spring Plate kit was the remedy I needed. The kit is inexpensive, 3D printed, easy to install, and made in the USA.
How to Install the Logitech Saitek X52 Joystick Spring Mod
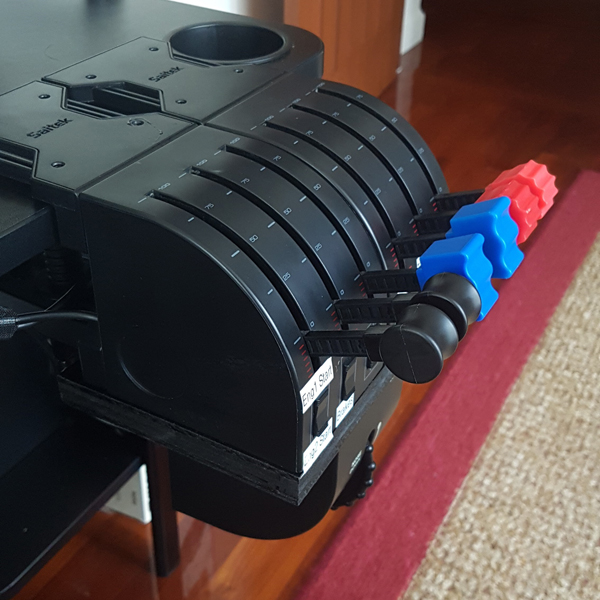
The kit includes four spacers of different widths that correspond to four different spring tensions. I used the 5mm wide spacer, which is the widest. If you need more spring tension than that, you can also stack the spacers on top of each other. The spacers fit on both the Logitech X52 and the X52 Pro. The manufacturer includes a handy installation tool. Bonus: this does not void the warranty and you don’t have to disassemble anything.
Here is the installation video, which is also available on their Ebay listing.
Let’s Go Flying!
The increased spring tension helps a lot! The spacer pushes down on the spring which increases tension between the spring plate and the joystick housing. But the increased tension also brings increased friction. I easily remedied this by applying a thin coat of bearing grease to the bottom of the spring plate (see picture). If you don’t have bearing grease, try lithium grease. Lithium grease is probably better for plastic anyway.
Roger Dodger Aviation produced and uploaded over 100 flight simulator videos to YouTube. These 5 videos are the ones that are currently trending.
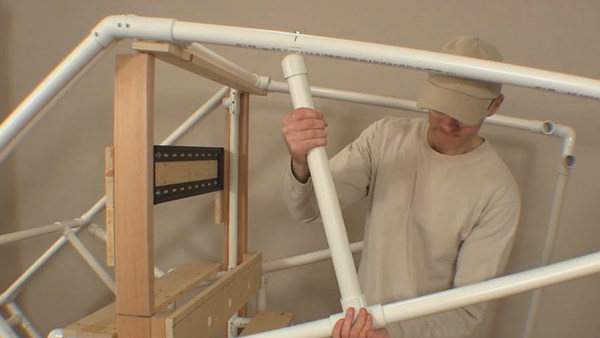
#1 Flight Sim Pod Final Assembly: 6 minutes
This is an actual excerpt from the DIY Flight Sim Pod instructional video. It’s one of my favorite DIY projects.
#2 A Source for PVC Fittings: DIY Flight Simulator Videos
I found a great place to order PVC Fittings in bulk, so I decided to share the info with everyone. I’m a little surprised because it’s not directly related to flight simulator videos, but it is still watched by many people.
#3 Saitek Yoke Modification: Springs and Zip Ties
This is just one way to modify the Saitek Yoke. It’s one of my favorite flight simulator videos and also one of the most useful…
#4 Saitek X52 Throttle Fix
This is an easy way to fix the annoying detent in the Saitek X52 Throttle. I’m happy to say this video has help a great many people.
#5 Saitek Yoke Disassembly
Before you can modify a Saitek yoke, you must first open the case without damaging the interior mechanisms or losing anything.
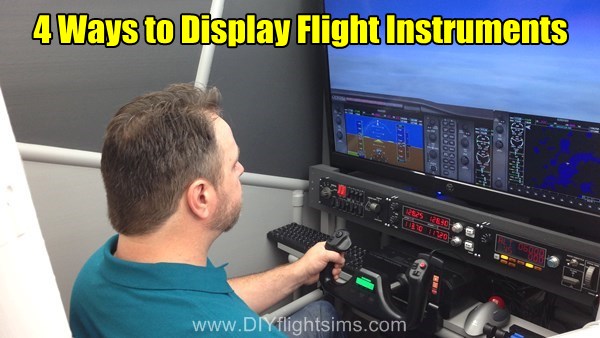
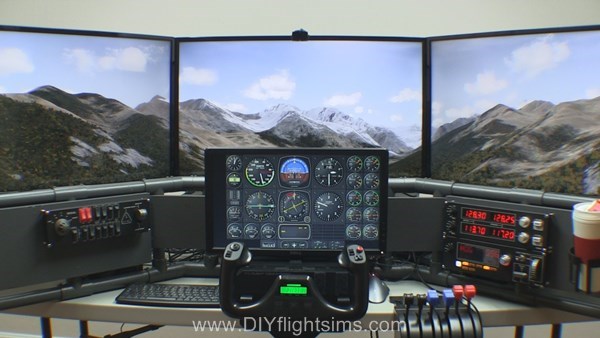
Developers struggle to create software that displays a legible flight simulator instrument panel, and also present a realistic outside world with scenery that stretches to the horizon. Today I’ll focus on viewing the flight instruments. You have a few options to choose from and each has its own benefit trade offs. It’s up to you to decide which flight simulator instrument panel works best with your particular needs.
TrackIR with DTG Flight School and the DIY Deluxe Desktop Flight Sim
TrackIR $140.00
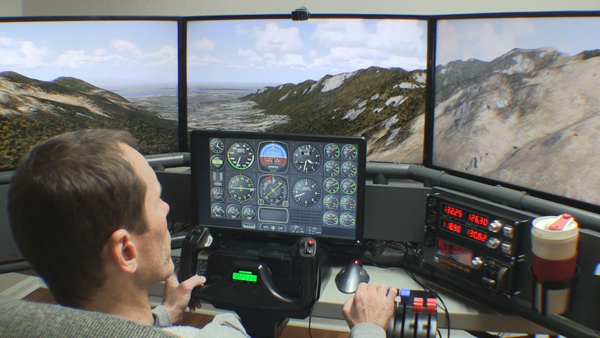
I’ve used TrackIR from Naturalpoint for a long time. It is a view tracking device that allows you to look around the virtual cockpit by moving your head. TrackIR “sees” your head move in 6 axes, also called 6 degrees of freedom. Instead of explaining all 6, I’ll just say your real life head also moves in 6 degrees of freedom, and leave it at that. As a result, you can lean into the flight simulator instrument panel if you want to see something closer. You can also look out the windows, look over your shoulder, look around struts and other parts of the airplane. The picture above shows TrackIR with the DIY Deluxe Desktop Flight Sim.
TrackIR works with a single screen, or multiple screens. It works with a very wide variety of titles: Prepar3D, X-Plane, FSX, Flight Sim World, DTG Flight School, DCS World, even Elite Dangerous, War Thunder, IL2, and many others. In conclusion, TrackIR is very useful but it’s still difficult to use with a GPS or other instruments that require fine tuning.
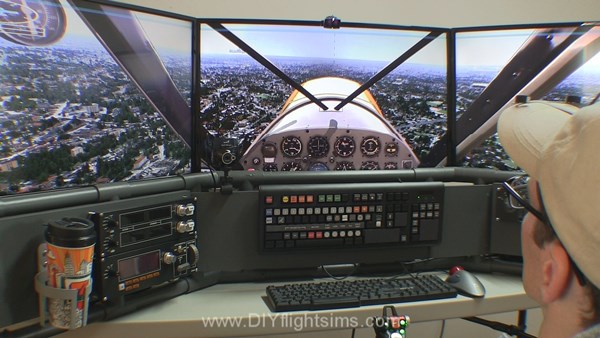
Native FSX instruments in the DIY Flight Sim Pod
Moving/resizing windows (free)
You can move and resize the 2D windows in old FSX and FSX Steam. When you type Shift+1, or Shift +2, Shift+3, etc. then FSX will display different windows that you can move around your screen. You see how this appears in the picture above with the DIY Flight Sim Pod. This trick also works with multiple screens. For example, you could show the outside view on all three monitors, and then in the bottom of your middle screen, show smaller windows with the flight instruments. You can also re-size the windows. That’s all great, except FSX does not save these settings on exit, and you have to set up all your views again the next time you turn on your computer.
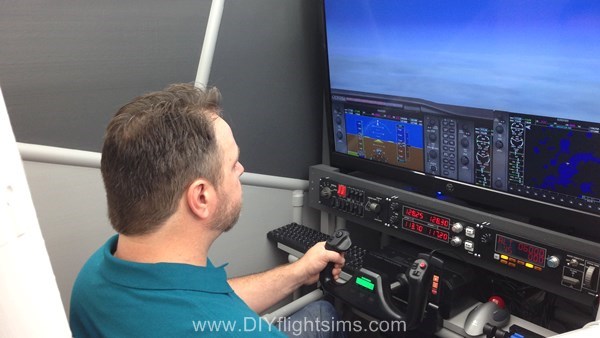
Air Manager with the DIY Deluxe Desktop Flight Sim
Air Manager $77.00 + separate monitor or computer
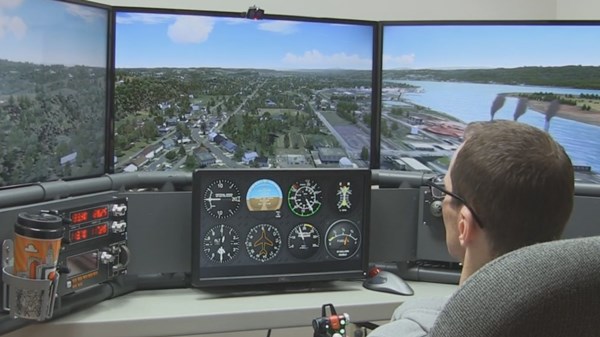
Air Manger works with Prepar3D, X-Plane 9, 10, and 11, FSX and FSX Steam. I’ve personally used Air Manager for displaying the flight simulator instrument panel on a separate screen. What I mean is, a totally separate monitor that is set aside for just the flight instruments. Flat panel computer monitors are so cheap that I literally have 3 in my house just waiting for a project. Air Manager can also work on an iPad or other tablet computer.
Air Manager is very versatile, see it above with the DIY Deluxe Desktop Flight Sim. I run the software on an old, obsolete computer (running Windows Vista) which is connected via network to my flight sim computer. A separate computer means there is zero impact on my frame rates. Download full flight simulator instrument panels, mix and match gauges (free), even create your own (also free).
Saitek Pro Flight Instruments $169.99 each
The most expensive option is the Saitek Pro Flight Instrument gauges. I listed the price, but that is only for one single, physical USB gauge. Consequently, if you want a panel consisting of 6 flight instruments and an RPM gauge, that is 6 x $169.99 = $1019.94. I haven’t personally tried these gauges because they are so incredibly expensive. In addition, you are limited primarily to round-gauge type displays.
Flight Simulator Instrument Panel
In conclusion, there are several ways to display a flight simulator instrument panel and the method you choose will depend on your needs and your budget. Have you tried anything I haven’t listed here? If so, let me know in the comments (you don’t have to log in to comment).
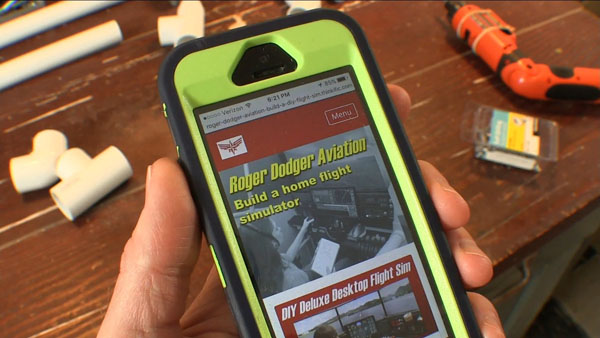
The Builder Academy is a comprehensive resource for learning all the basic flight sim building skills. What is it like to build a DIY Flight Sim project? The Builder Academy will show you. In addition, you can also learn about modifying the existing DIY Flight Sims projects. If you’re wondering how to build a flight simulator, this is your first, best resource. By the way, it’s free!
Building a flight simulator from PVC pipe
View the Builder Academy on your phone or tablet or anything
How to display flight instruments in your simulator
How to modify the Saitek yoke
Introducing the Builder Academy
How to install Saitek Switch Panels
Builder Academy Content
What is in the Builder Academy? Some of the videos in the Builder Academy were formerly a part of the “Free Videos” folder included with some purchases. Other videos were first published on YouTube, but are now only available in the Builder Academy. Some of the content is new and available only at the Builder Academy. Finally, all of the content assists you in different ways when you’re learning how to build a flight simulator. This is an overview of the course curriculum:
Recommended Tools
Building with PVC Pipe (new)
Self-Drilling Screws
Add a Monitor for the Flight Instruments
Display Flight Instruments with Air Manager
Install Saitek Switch Panels
Styrofoam Body Panels
Prototyping – How to Modify DIY Flight Sim Projects
Saitek Trim Wheel Adapter
X52 Saitek Throttle Fix
Saitek Yoke Modifications
CH Yoke Modifications
Paint for Home Flight Simulators
USB Cable Management
Change Log
Training Available Wherever You Are
The Builder Academy is available on nearly any device. As a result, you can view the training on a tablet or phone while you’re in your workshop or view it on a laptop or desktop. Also, there are some printouts and templates for certain projects, so you might need a printer at some point. I periodically add new content, so be sure to check the Change Log if you haven’t been there in a while. The Builder Academy is my platform to show everyone how easy it can be to build a home flight simulator. Even the most complex projects are really just a series of relatively easy steps. Visit the Builder Academy today and let me know what you think of it.
View the Builder Academy on your phone or tablet or anything
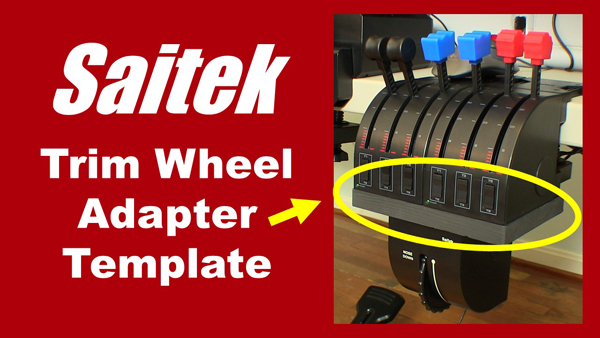
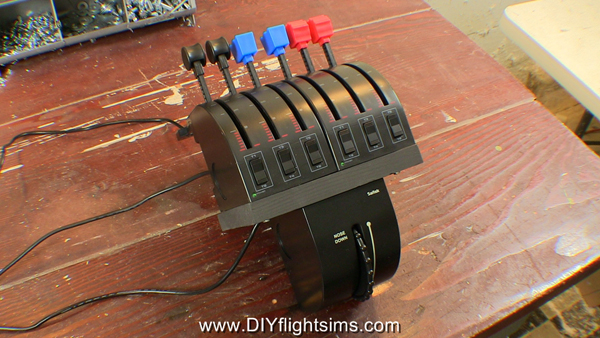
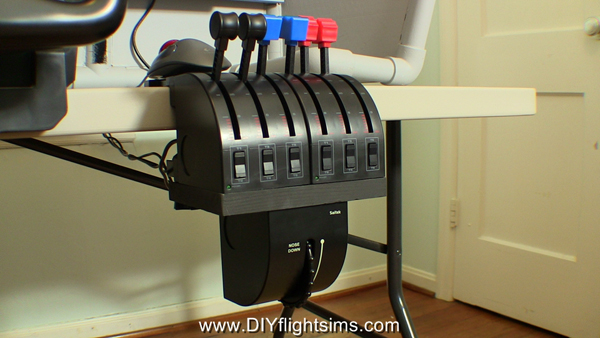
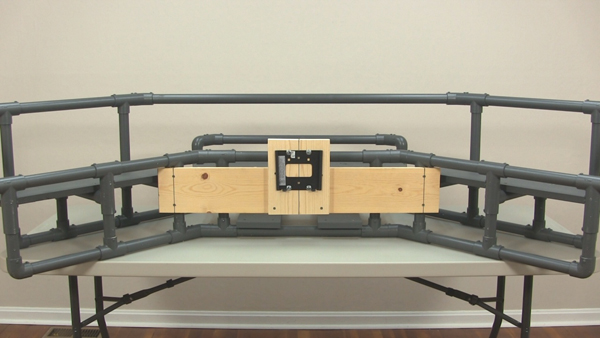
You can install the Saitek Trim Wheel underneath dual Saitek Throttle Quadrants… but only if you use an adapter plate. I made instructions, a DIY video, and a template to help you build a Saitek Trim Wheel Adapter just like the one you see in the pictures.
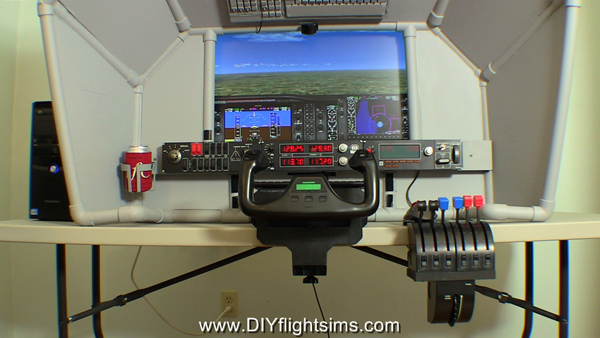
I’m very happy with the Saitek Trim Wheel mainly because proper elevator trim is such a vital and basic skill in real flying. We are lucky that an inexpensive and robust trim wheel is readily available for our home flight simulators. Unfortunately, there is no way to clamp the stock Saitek Trim Wheel to a reasonable location. Believe me, I tried. A pilot should be able to adjust the elevator trim without looking for it the trim wheel. As a result, most trim wheels in real airplanes are located under the throttle or next to the pilot seat. Therefore, I made this Saitek Trim Wheel Adapter plate so you can install your trim wheel in a very natural location for your home flight simulator.
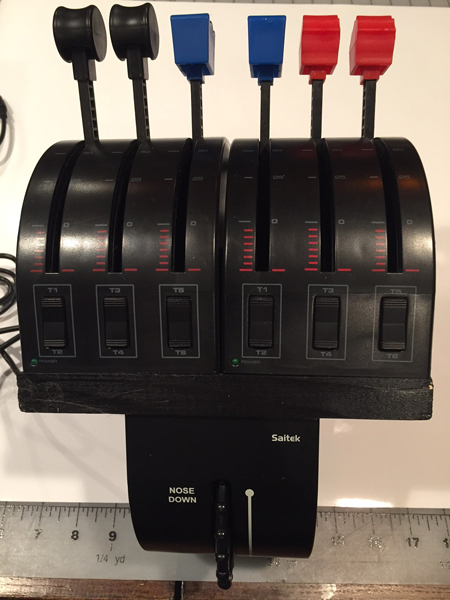
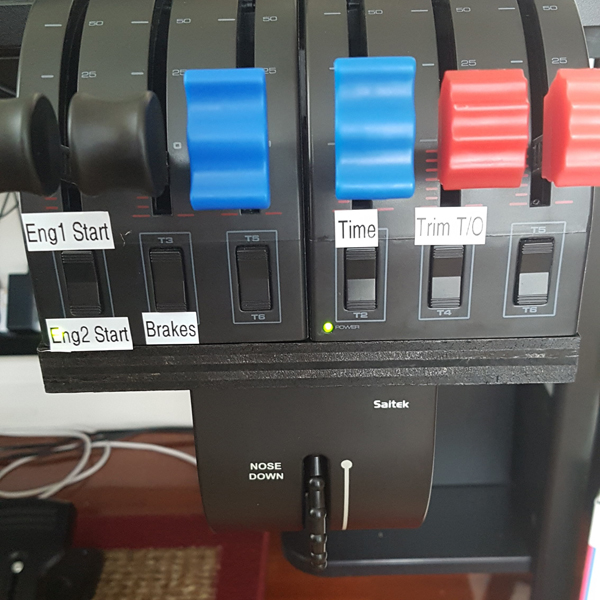
Saitek Throttle Quadrant with Trim Wheel
Install the Saitek Trim Wheel under the Throttle Quadrant
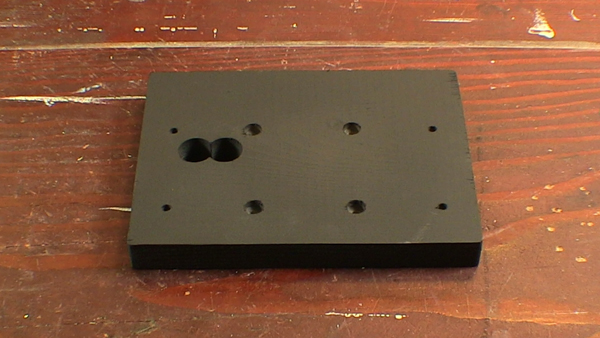
Saitek Trim Wheel Adapter painted black
Saitek Trim Wheel Adapter Template
Saitek Trim Wheel Adapter for your home simulator cockpit
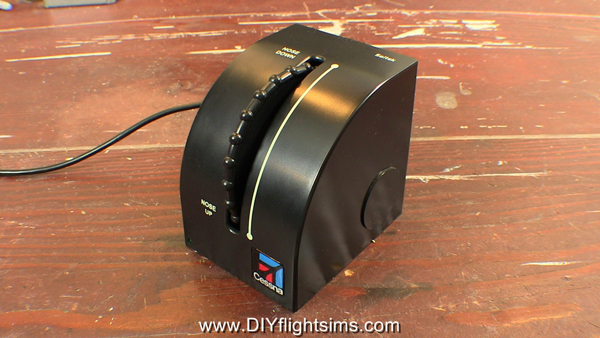
Saitek Trim Wheel
You Can Build a Saitek Trim Wheel Adapter
Take a look at these two examples of Saitek Trim Wheel Adapters built by Flight Sim enthusiasts just like You! Most noteworthy, you will see their Adapters look exactly like the one I built. They used the exact same build template that I offer free on my website. Many thanks to builders Dennis and Ben for sending me their pictures. I would love to see your finished Adapter too. If you build one, please send me pictures of your project to diyflightsims@rogerdodger.net.
Saitek Trim adapter by Dennis
Saitek Trim adapter by Ben (1)
Saitek Trim adapter by Ben (2)
Download the Free Template
Build your own Saitek Trim Wheel Adapter. Start by downloading and printing out the template. Get the template free by signing up for my monthly newsletter, the Roger Dodger Insider. You will be the first to know about product updates, sales, building tips, and more. It’s a monthly email so you won’t be bombarded with a bunch of stuff in your inbox and you can unsubscribe at any time. Become a Roger Dodger Insider here.
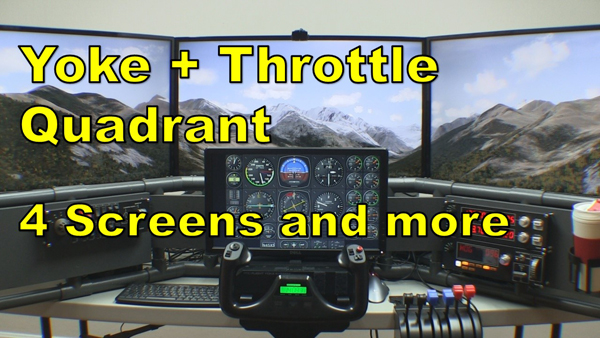
I made four simple, yet significant changes to the D250 Deluxe Desktop home built flight simulators. Consequently, these changes bring me back into the beloved world of general aviation. See me in the video flying a Beechcraft Baron once agian.
1. Added a Yoke and Throttle Quadrant
I removed the side-mounted HOTAS joystick and throttle and added a Saitek flight yoke and throttle quadrant. I attached the trim wheel underneath the throttle quadrants, and that is the perfect location. Once again, I can fly multi-engine airplanes like the Beech Baron, or light general aviation airplanes like the Cessna 172.
Home built flight simulators with new mods
2. Raised the Instrument Panel Display
I use an inexpensive 19″ monitor to display the flight instruments on the D250. The yoke housing did not fit under the 19″ monitor, so I raised the monitor mount a few inches. I simply replaced the board for the Center Instrument Panel and attached an adapter board for the monitor mount.
Raised monitor mount for instrument display
3. Moved all Saitek Switch Panels
When you fly an airplane with a yoke, your left hand is typically on the yoke and your right hand is free to adjust the radio frequencies, dial in nav headings, and more. The D250 wasn’t set up like this because I used it to fly helicopters. As a result, the radios were on the left side of the cockpit, because a helicopter pilot typically keeps his right hand on the cyclic (joystick) and the left hand is free. I cut new 1×8 boards for the Left and Right Side Instrument Panels and re-arranged, and re-mounted the Saitek switch panels.
Yoke and throttle quadrant mod for the DIY flight sim
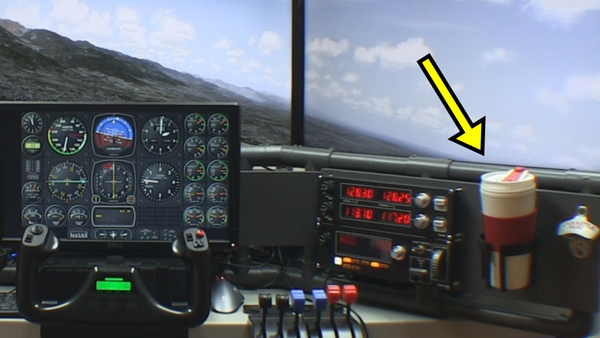
4. I Moved the Drink Holder
Don’t fly thirsty! I moved the drink holder to the right side of the cockpit so I could easily reach it with my right hand. The drink holder is the right size for a travel mug or a bottle with a drink coozie.
Important drink holder in the home flight sim
Plans for Home Built Flight Simulators
Do you want to build this same flight simulator for your home? If I get enough interest from my DIY community then I will create an additional Instruction Manual and include it with the original plans. In addition, customers who have already purchased this project will get the new plans for free.
System Specs and Peripherals
Notice these computers are not especially strong or new. You don’t have to spend $2000 on a computer to have great home built flight simulators.
DIY Deluxe Desktop Flight Sim, item #D250 Primary computer: Powerspec B634 with Intel i5-3450 Nvidia GeForce GTX 950 SSC Windows 7, 64 bit Flight yoke: Saitek Pro Flight Saitek throttle quadrant Saitek Pro Flight trim wheel Pro Flight Cessna rudder pedals from Saitek
Switch panels: Saitek PZ55, PZ69, PZ70
I added more pictures of DIY Flight Sim completions to the new expanded Customer Gallery. Note there are now three distinct examples of customers adding the popular Thrustmaster Warthog HOTAS joystick to the #F321 DIY Center Joystick Frame.
Thrustmaster Warthog and other Additions
Several customers modified the #F321 Center Joystick project slightly to accommodate the Thrustmaster Warthog joystick. They did this by shortening the center joystick stand by several inches and then bolting on the joystick. The Thrustmaster Warthog originally comes with a flat, square base which can be easily removed. Notice that the DIY Center Joystick Frame works well with Saitek rudder pedals because of their wide stance. You can comfortably straddle the center joystick to reach the pedals. Note the Saitek Combat Rudder Pedals installed on the #F321, but you can also use the Saitek Cessna Rudder Pedals. I originally designed the #F321 project around the early model Saitek Pro Flight Rudder Pedals, witch still work well. You can use the CH Rudder Pedals but they are difficult to use because they are narrow and makes it harder to straddle the center joystick stand.
Center Joystick or Side Joystick?
Check out Craig’s pictures in the new Customer Gallery 2. Craig created one of the most attractive DIY Flight Sim completions. He built the #F321 with a removable center stand and with side stands on both sides. He can now switch between a traditional center joystick and a HOTAS side joystick. Notice the D-ring fasteners he uses to attach the center stand.
Rob modified the #E420 DIY Roll-Away Flight Sim to match his needs and style of flying. He added an expanded mid-shelf for the Saitek yoke and throttle quadrant and a swing-out platform for the compact mini-keyboard. Also note the additional platform for the mouse and mouse pad. The Roll-Away Flight Sim frame is wonderfully mobile because Rob installed four castering wheels to it. Two of the castering wheels can be locked in place so he can comfortably use the rudder pedals without worrying about the frame rolling away. You should always use rudder pedals, they are an important part of DIY Flight Sim completions.
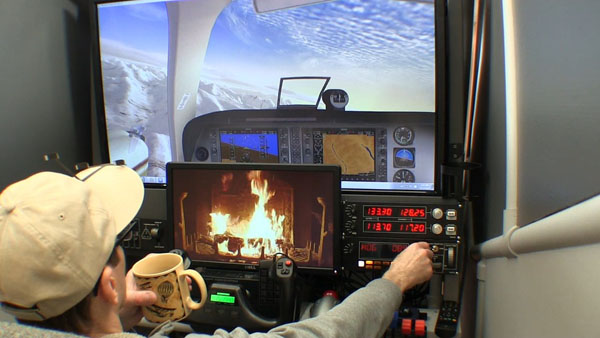
This project combines two of my favorite things: a cozy fireplace and my flight simulator. Why not simulate a nice cozy fireplace inside a flight simulator?!
This DIY flight sim is ready for winter! I combined the warm atmosphere of a crackling fireplace with the fun of flying my simulator. It’s just the thing for those freezing winter months. You can do this too, it’s easy to set up.
Create a Fireplace Inside a Flight Simulator
My flight simulator has two displays connected to the graphics card. The large display is a 40″ HDTV and the smaller display is a 19″ VGA computer monitor. Typically, I display the flight simulator outside view on the large screen and the flight instruments on the smaller screen. For today’s project, I’m only running FSX on the large screen. Start FSX and start a flight. Select Windowed Mode from the View Menu and resize the window so it fits on one screen (the large screen in my example).
Next start a web browser on the second monitor and find a fireplace video on YouTube. Play the video and select full screen. This is how I my smaller display shows a cozy, crackling fireplace.
All we need now is a nice hot apple cider. I recently discovered sugar free apple cider from Alpine. It doesn’t need any sugar because of what we add next: cinnamon flavored bourbon. Apple and cinnamon… oh it’s so, so good! Leave the ice and snow outside, you’re flying in comfort. Happy Landings!
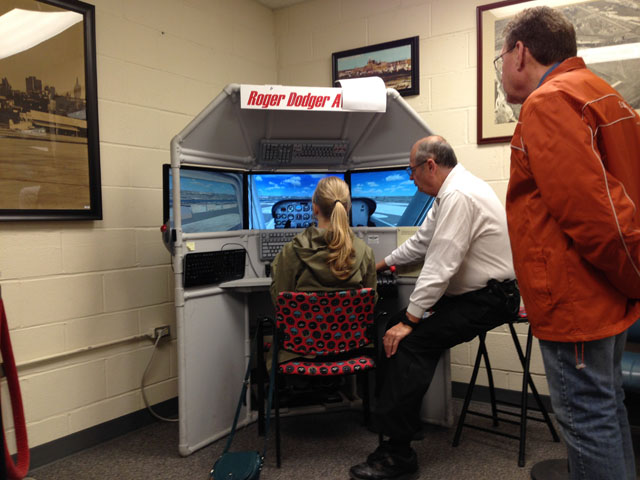
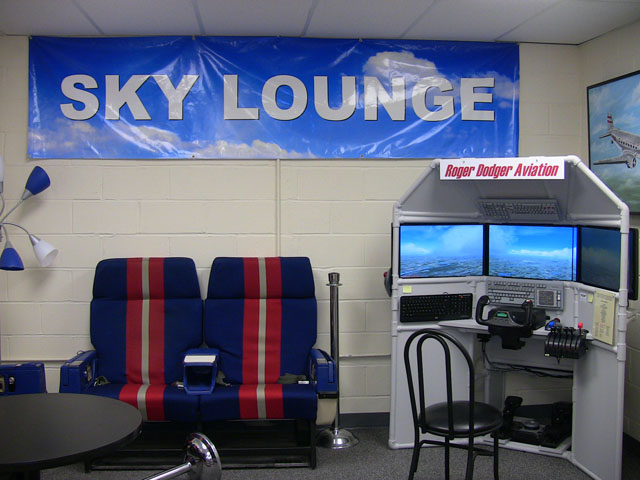
I built a flight simulator and donated it to a local aviation museum. The museum guests enjoy a hands-on experience because they get to fly the simulator. Some people say the Triple Screen Flight Sim at the National Airline History Museum is their favorite part of the museum.
National Airline History Museum
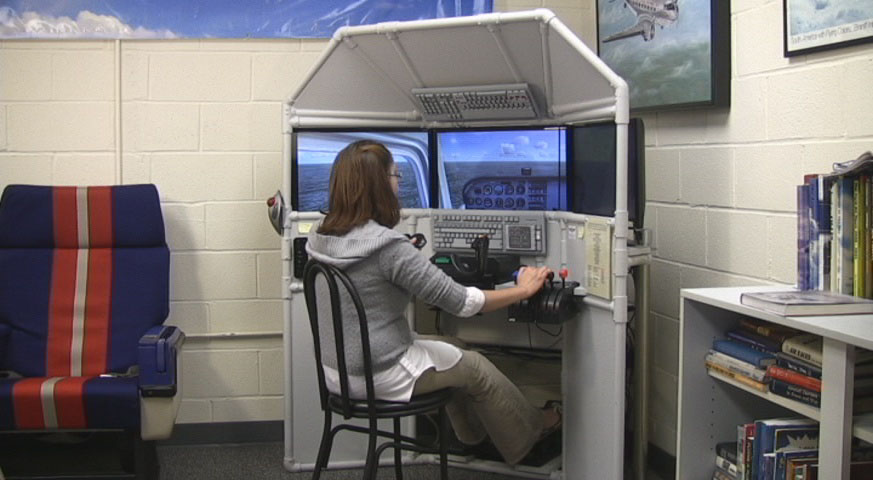
The NAHM is the only airline-specific museum in the United States. The museum has several airliners but the Lockheed Constellation is the crown jewel of the collection. The Triple Screen Flight Sim allows visitors to fly a simulated Constellation just like the one in the museum.
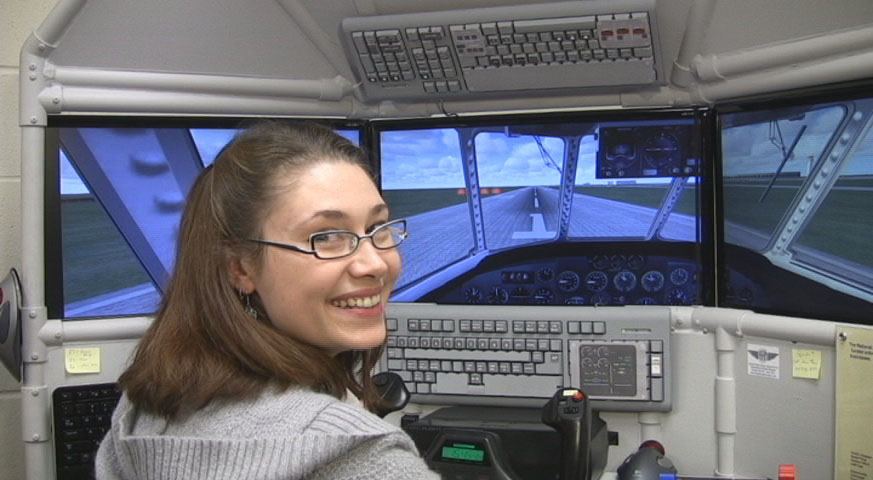
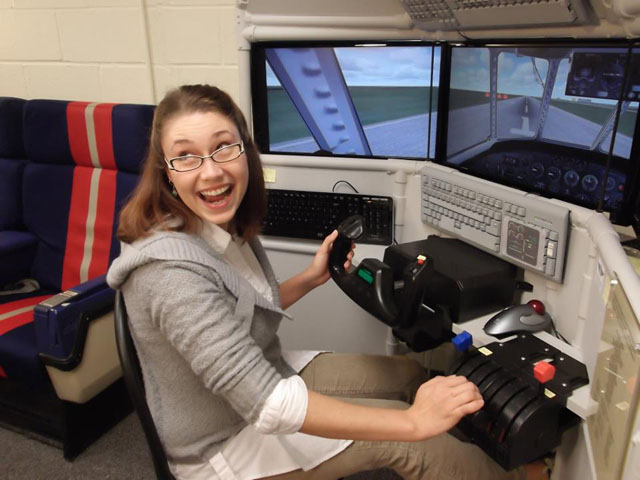
The Triple Screen Flight Sim at the National Airline History Museum is also used as a introduction to general aviation. Visitors receive a flight “lesson” as they fly a simulated Cessna 172. A museum volunteer personally teaches some basic flight maneuvers while the guest tries them in the sim. The simulator is such an excellent teaching tool because you can pause the flight to answer questions or explain something in more detail.
Triple Screen Flight Sim for guests at NAHM
Flying the Constellation in the Triple Screen Flight Sim
Triple Screen Flight Sim in National Airline History Museum
Shannon flying the Triple Screen Flight Sim at the NAHM
The Triple Screen Flight Sim intro to aviation
Triple Screen Flight Sim looks great in the Sky Lounge
Triple Screen Flight Sim at the National Airline History Museum
Lockheed Constellation at the National Airline History Museum
Triple Screen Flight Sim
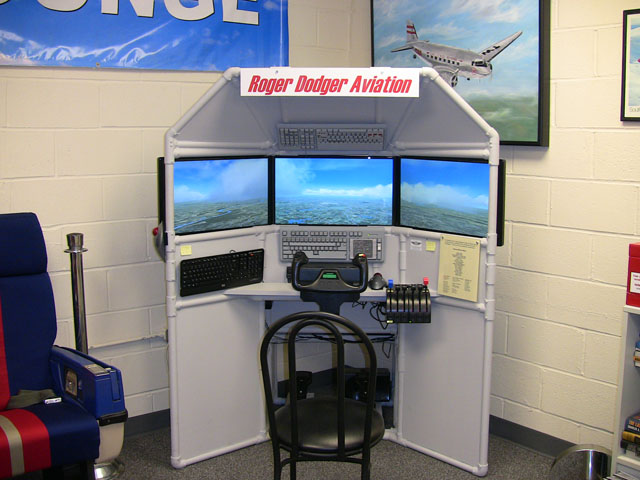
The pictures here show a stock version of the DIY Triple Screen Flight Sim at the National Airline History Museum. My DIY video and instruction manual show you how to build this same project from PVC pipes, lumber, and foam insulation. I installed a Saitek Pro Flight yoke, throttle and rudder pedals in this particular project. The painted keyboards are stock versions of the DIY Keyboard Mod: Airliner project.
The DIY Triple Screen Flight Sim is the perfect addition to the Sky Lounge at the NAHM, and it would be a perfect addition to your home.
Kickstarter Fund-Raiser
This project was the first successful flight simulator project ever funded through Kickstarter. It is truly historical. The fund raising campaign paid for the supplies and materials I needed to build the project from scratch. After I built it, I brought it to the Kansas City Maker Faire and then to the NAHM.
The Triple Screen Flight Sim at the National Airline History Museum
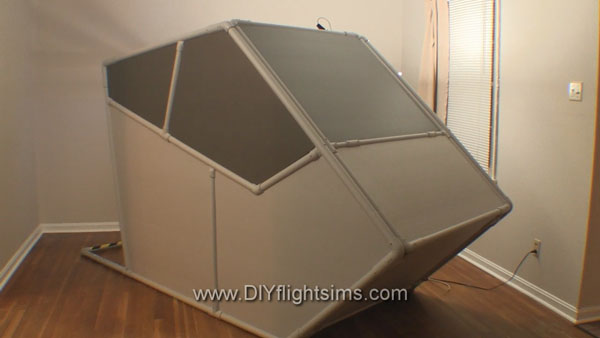
The DIY Side Joystick Frame is one of my most popular projects, and it’s very versatile. Even though I published this project 6 years ago, the design has stood the test of time. Yet, as great as it is, I have recently made a few modifications to the design that you might find helpful for your project. Read on for 5 Modifications for a DIY HOTAS Chair for Virtual Reality and More.
A True HOTAS for your Flight Sim
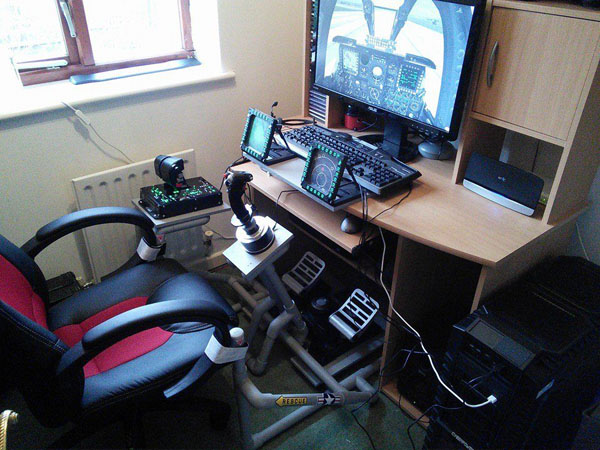
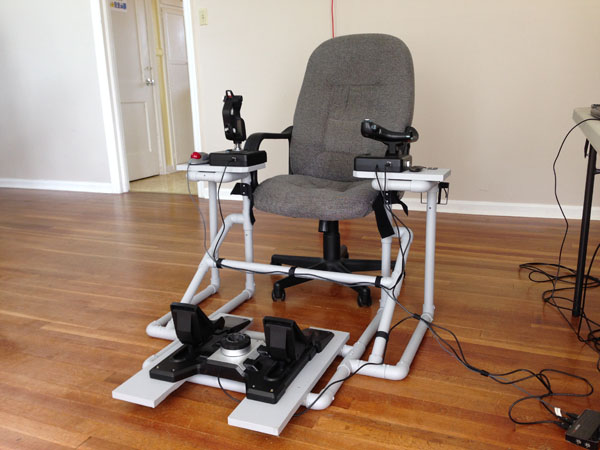
The DIY Side Joystick Frame, Item #F311, makes a true HOTAS (Hands On Throttle And Stick) possible for your flight simulator because the project also includes rudder pedals. True pilots use rudder pedals, not joystick twisty grips so always remember that. I originally envisioned the F311 as useful primarily for jet fighter simulators, but now, many customers are using it for space sims like Elite Dangerous and Star Citizen.
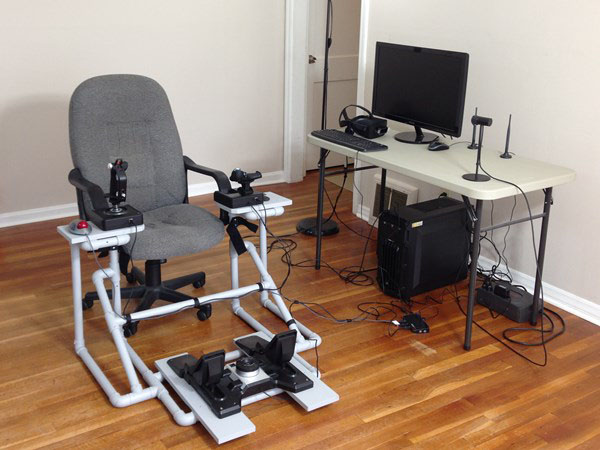
Use the F311 in combination with a Virtual Reality headset. Remember, when you wear a VR headset, you can’t see your keyboard any more and any functions you have assigned to your keyboard keys are literally out of sight. You can also use the F311 with a traditional multi-monitor setup like the DIY Deluxe Desktop Flight Sim (Item D250). The F311 is delightfully versatile and useful. Use these 5 Modifications for a DIY HOTAS Chair to update the F311.
5 Modifications for a DIY HOTAS Chair
F311 HOTAS with a multiple screen flight simulator
F311 HOTAS in combination with VR
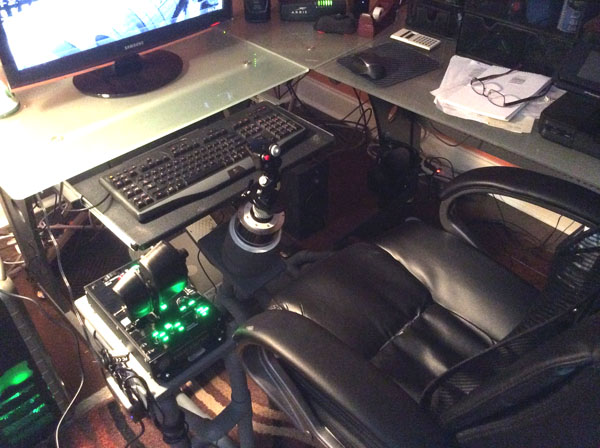
DIY Side Joystick frame with a quad screen flight sim
F311 HOTAS chair for flight sims, Saitek X52 and trackball mouse
F311 Side Joystick Frame with D250 Deluxe Desktop Flight Sim
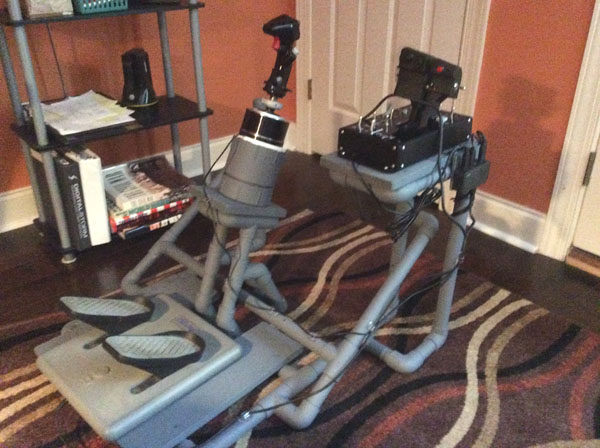
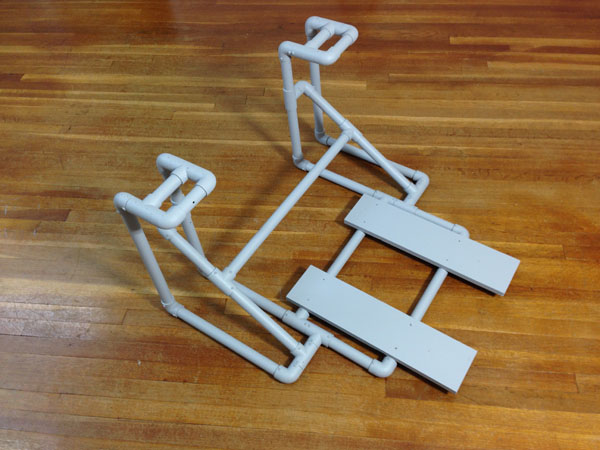
F311 Side Joystick frame without the Side Stand platforms
5 Modifications for a DIY HOTAS Chair
I made five main modifications to adapt the F311 Side Joystick Frame for my current requirements. None of these modifications are difficult. If you can build the F311 in the first place, you can certainly make these modifications or include these changes during the initial build.
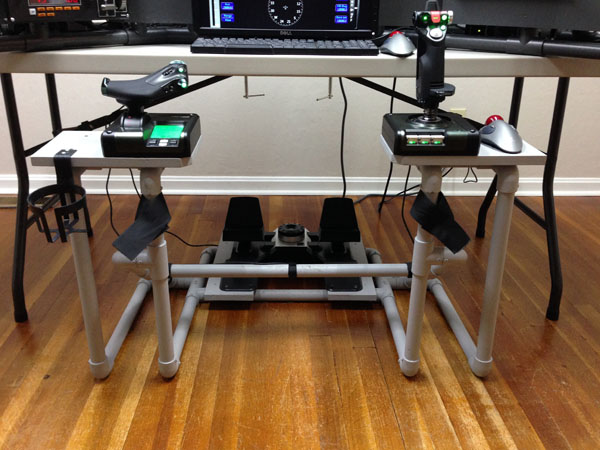
1. Wider Side Stand Platforms
First of all, I installed wider side stand platforms, cut from 1×8 boards. To be clear, the PVC pipe side stands did not change, just the the boards that attach to the top of the stands. I topped the side stands with 1×8 boards, 12″ long. The wider boards give you room for a trackball mouse next to the joystick and give you room next to the throttle to set down your phone or whatever. Most importantly, you can place the controls in a more ergonomic location. This means placing the joystick and throttle in line with the chair’s arm rests. This is so important! Place the joystick and throttle so that your arms sit straight on the chair’s arm rests. This will allow you to fly comfortably for hours.
In addition, I attached the joystick and throttle with wood screws instead of Velcro. I also trimmed the inside corners of the 1×8 boards by 1″ and sanded the edges so my legs wouldn’t get caught on the corners.
2. Longer floor boards
I use the Saitek Pro Flight Cessna Rudder Pedals, and I really like them, but they have to be positioned further away from the pilot. The rudder pedals attach to the Floor Boards with Velcro, but the original boards were too short. Therefore, I replaced them with two 1×6 boards, 22″ long. You might not need to make this change for your rudder pedals.
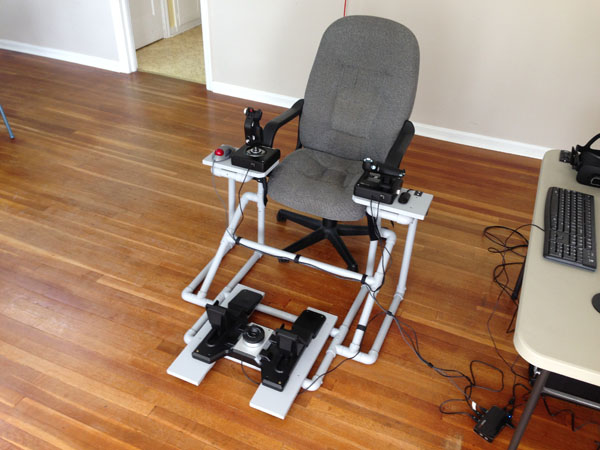
3. Raised center stabilizer
I also raised the center stabilizer bar to allow room for the Saitek Pro Flight Cessna Rudder Pedals. Specifically, the back of my ankles banged into the stabilizer bar, so I had to move it. It is now 6.5″ higher than it was before.
4. Self-drilling screws
I now use self-drilling screws in everything I build. Back in 2010 when I designed this project, I used Liquid Nails Project Glue to attach all the PVC pipes and fittings. This allowed for some cost-savings, but self-drilling screws are far superior. The screws allow for a simpler assembly with no overnight dry time. In addition, the screws create a much stronger frame. Lastly, you can remove the screws later if you decide to modify the frame. I absolutely recommend using 1/2″ self-drilling screws to build DIY Flight Sims from PVC pipe.
Don’t fly thirsty! I include a cup holder with almost every project I design. The cup holder is located next to the throttle and it’s easy to find it, even when wearing a VR headset. I use these inexpensive cup holders from Amazon.
If you’ve already built the DIY Side Joystick Frame, Item F311, or if you haven’t built one yet, these 5 Modifications for a DIY HOTAS Chair can enhance your home flight simulator experience for years to come.


Recent Comments