Saitek Pro Flight Yoke Fix: Rubber Bands
This rubber band modification is the simplest and cheapest way to improve the feel of this particular yoke. Welcome to the Saitek Pro Flight Yoke Fix: Rubber Bands.
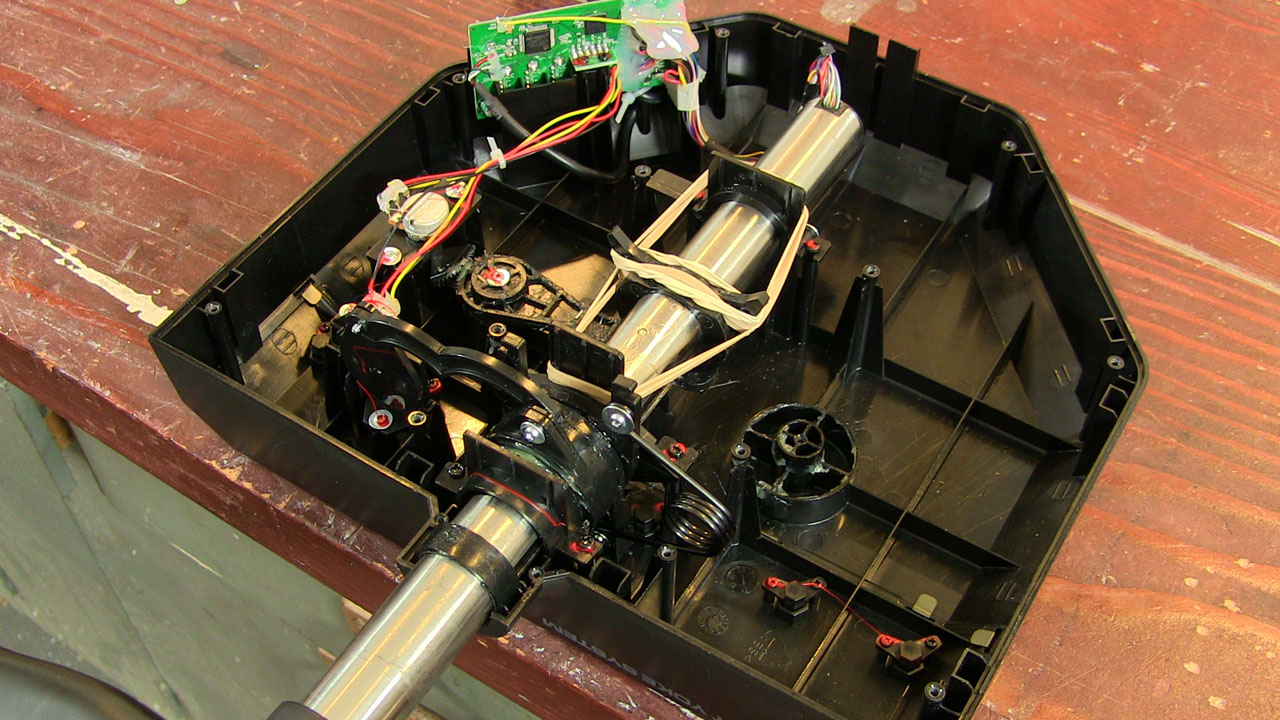
Before we start, we’re assuming you’ve already removed the pitch spring and swing arms as shown in the disassembly video. Also, I recommend leaving the roll return spring in place. This modification is specifically for the pitch axis.
NOTE: modifying the Saitek yoke will void the warranty. However, if you purchased the yoke over two years ago, the warranty has already expired.
The first issue we should address is the use of rubber bands. Some people won’t use them because they fear the rubber bands will break someday. Yes, there is that possibility, especially if you use old rubber bands. So buy new ones. This bag of rubber bands cost less than one US dollar and they should last a long time. They will definitely last longer than reusing old rubber bands you have sitting around your home or office.
Credit for this Saitek Pro Flight Yoke fix should go to Tom Gromko who published this method on the AVSIM forum.
Rubber Band Installation
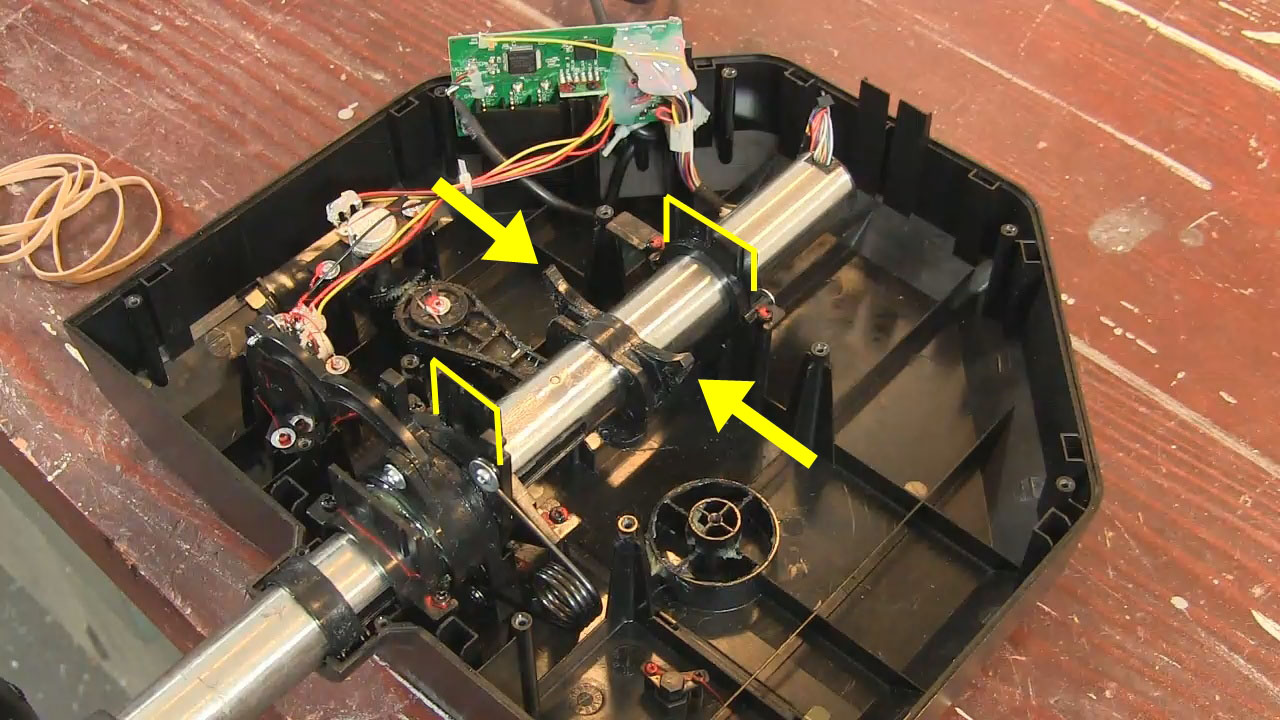
As we get started, note the Saitek yoke has these two tabs that bridge the center shaft. Also locate these horns on the center shaft. I used five rubber bands for this modification, and here’s the first one. Wrap it around the horns and the front tab.
The second one goes around the rear tab and the horns. Try not to twist it much. The third is same as the first, and here’s the fourth. Also push down the rubber bands around the horn. The last rubber band will hold the others in place. Wrap it tightly around the horns.
Test The Control Tension
Now try it out. There is no abrupt detent in the middle of the pitch travel. You can make subtle pitch changed easily. Try the full travel of the controls. Notice it looks like the rubber band may slip off the rear tab. No worries. Recall that these tabs will fit into these slots on the bottom lid. This will keep the rubber bands secure. These tabs may be a little bent out of alignment because of the tension from the rubber bands. This can make it challenging to get the lid back on the control housing. You may need to wiggle the tabs a little to better align them with the slots on the lid.
You can try out the feel of the yoke now. Hold it down with one hand. Note how easy it is to make small pitch changes when you don’t have to struggle against that center detent. If you’re happy with the results, reattach the control housing. There are 14 screws.
And then go flying to test out your new modification!

Saitek Pro Flight Yoke Modification Videos
6 Comments
Hi!
I have bought a electronically-damaged Saitek Yoke (same as described in this article). It should arrive next week.
I wanted to ask, do you know, what can cause, that there is no power (no display back-light, no throttle quadrant diode lit)?
Are there any common issues resulting in such behaviour?
Kind regards and thank you for any help
I’m sorry, I don’t know how to fix that.
Hi,
what pitch mod gives the best results?
– Rubber Bands?
– Rubber Bands & Zip Ties?
– Springs and Zip Ties ?
cheers,
Jan
Hi Jan. I like the Rubber Bands & Zip Tie mod, but you have to use brand new rubber bands.
Most people use the Springs and Zip Tie mod because they’re afraid the rubber bands will break (they don’t).
Even if they break, just buy new ones!
HI Matt,
I used your modification and it has made all the difference for me. One wee improvement I made to the mod was to use the decomissioned shoulder arm point. If you put the screw and top washer back in the screw hole you can use it as an anchor point. Using that you can then attach rubber bands laterally across the horn to the other shoulder arm that rocks the potentiometer. I found this helped my yoke to more accurately find it’s (now softer!) centre.
Write a Comment
Tag Cloud
Categories
Recent Posts
Recent Comments
Meta
Recent Posts
Recent Comments
Archives
Categories
Meta