Saitek Pro Flight Yoke Modification: Rubber Bands and Zip Ties
This modification to the Saitek Yoke Pro Flight Yoke uses rubber bands and zip ties. In some respects, it’s similar to the method I used for modifying the yoke from CH Products. This is the modification I personally use with my Saitek yokes. Notice that both yokes have this horn-shaped structure on the center shaft. That’s what we will be modifying. We will also be using these four screw posts. The Saitek Pro Flight Yoke Modification: Rubber Bands and Zip Ties only takes a few minutes to complete.
NOTE: modifying the Saitek yoke will void the warranty. However, if you purchased the yoke over two years ago, the warranty has already expired.
Before we start, we’re assuming you’ve already removed the pitch spring and swing arms as shown in the disassembly video. You can leave the roll return spring in place for this mod, or if you want less resistance, you can remove it.
Rubber Bands? Yes.
Should you really use rubber bands to modify the yoke? Some people won’t use them because they fear the rubber bands will break someday. Yes, there is that possibility, especially if you use old rubber bands. So buy new ones. This bag of rubber bands cost less than one US dollar and they should last a long time. They will definitely last longer than reusing the old rubber bands you have sitting around your home or office.
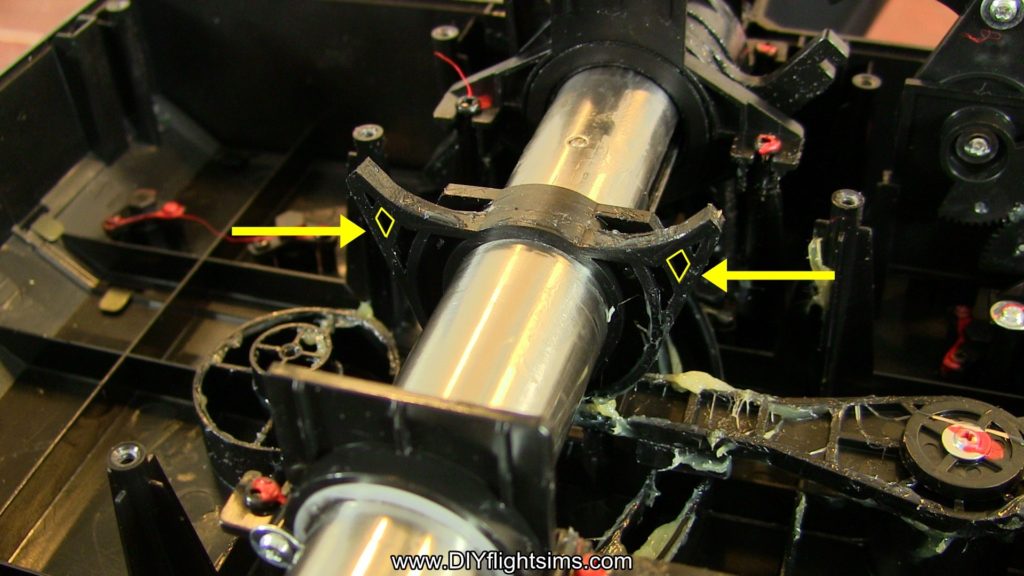
Let’s start by rotating the yoke so the back of the control housing is facing you. It’s best to prop up the yoke on some boards or something. Locate these horns on the center shaft. And specifically locate this small gap in the plastic structure. Use a drill and an 1/8” drill bit to make a hole right through that small gap. Repeat on the other side. A 1/8” hole should be large enough for these mini Zip Ties.
Next, select four rubber bands and four Zip Ties. Double over the rubber band like this and then loop through and attach a Zip Tie. Repeat for the remaining pairs of rubber bands and Zip Ties. I’ve sped up the video now, but feel free to take your time with this step. The only purpose for these four Zip Ties are to help you handle the rubber bands. They will be cut off later.
Install the Rubber Bands
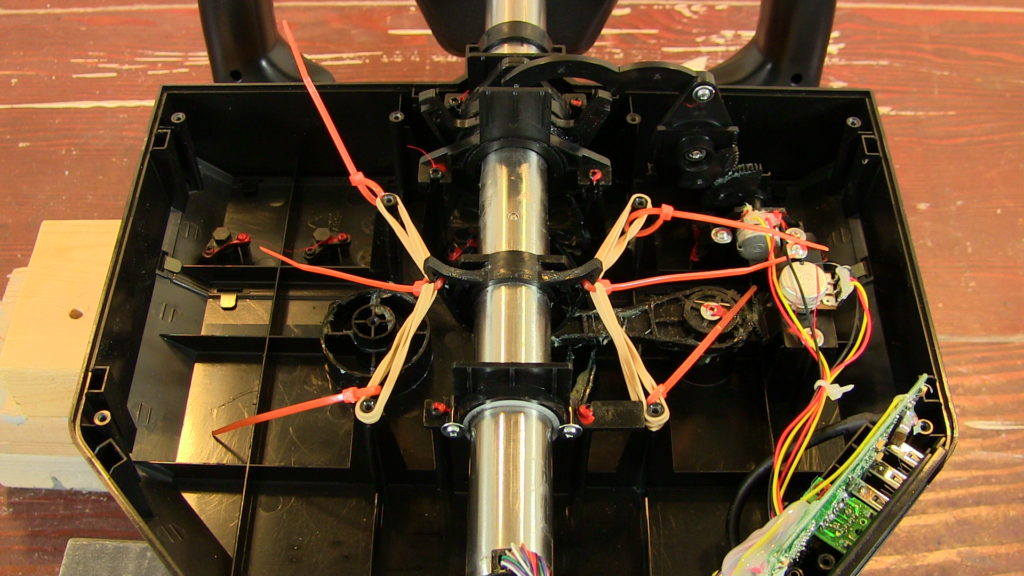
Here, we have attached the rubber bands and zip ties to one side of the center shaft. Here’s how we did it. Select an additional Zip Tie and thread it through the hole you drilled. Take one of the looped rubber bands and put it over one end of the Zip Tie. Select another looped rubber band and put it over the other end of the Zip Tie, and then attach the Zip Tie to itself, but do not tighten it all the way down yet. Now loop one rubber band over the rear screw post. Loop the other rubber band over the front screw post.
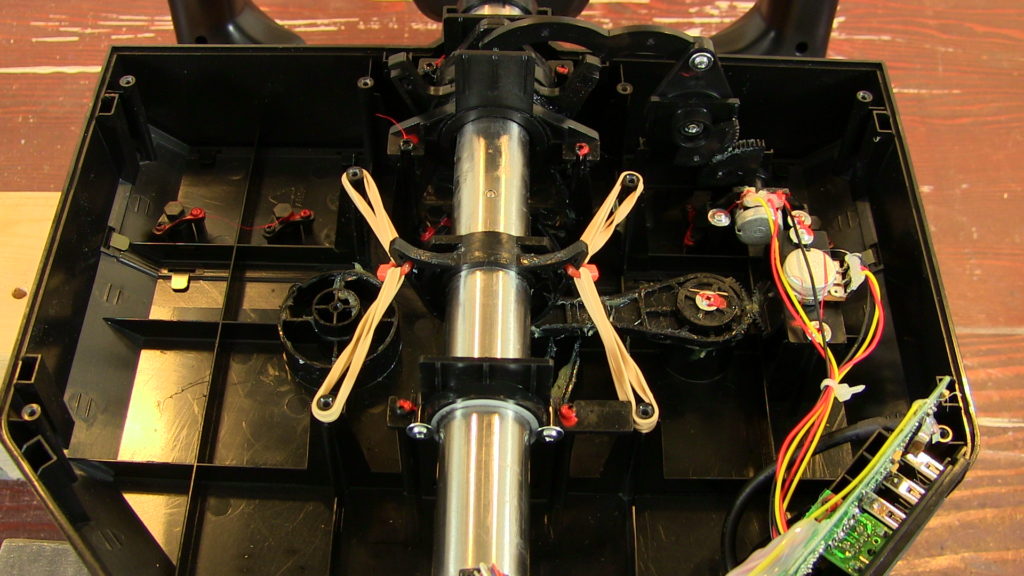
We’re almost finished with the Saitek Pro Flight Yoke Modification: Rubber Bands and Zip Ties. Tighten the middle Zip Tie all the way. Carefully clip off the four extra Zip Ties and also trim the extra length from the middle Zip Ties.
Replace the lid and try it out.
There is no abrupt detent in the middle of the pitch travel. You can make subtle pitch changed easily. If you’re happy with the results, reattach the control housing. There are 14 screws.
And give it a test flight! I hope the Saitek Pro Flight Yoke Modification: Rubber Bands and Zip Ties worked well for you. Happy landings!


Saitek Pro Flight Yoke Modification Videos

1 Comment
I recently did this mod and found a very good improvement in performance. However, i still have some minor “jerky” resistance in the pitch axis which can be troublesome. Is there an way to smooth out this axis? I have red about increasing grease; if this is helpful what type of grease?
Thanks for a great mod.
Write a Comment
Tag Cloud
Categories
Recent Posts
Recent Comments
Meta
Recent Posts
Recent Comments
Archives
Categories
Meta