motion flight sim theory, man in Kinetic flight sim

Motion Flight Sim Theory – 3 Things You Need To Know

How Our Bodies Detect Motion

First of all, as I introduce the subject of motion flight sim theory, it helps to start with a foundational understanding of how our bodies sense movement and orientation. Movement is our sense of acceleration/deceleration and the notion that we are traveling through a space. Orientation is our attitude in space, our sense of pitch, roll, and yaw. The quality of a motion flight sim is in its ability to fool the human sensation of movement and orientation. For many normal flight attitudes in an airplane, there is a corresponding flight sim action that can emulate how it should look and feel from the cockpit. Consequently, this is the basis of motion flight sim theory.


Motion Flight Sim Theory: How do we know we’re moving?

The human body has three systems that inform the brain about movement and orientation:

  1. Visual system – the eyes that sense position by what is seen
  2. Vestibular system – the inner ear organs that senses balance and orientation
  3. Somatosensory system – the nerves in your body that sense position and movement. For example, when you accelerate forward, you feel pressed back into your seat.

Valid motion flight sim theory states that a moving rig, like the Kinetic motion flight sim, does specific things to fool each of these systems.


Visual System

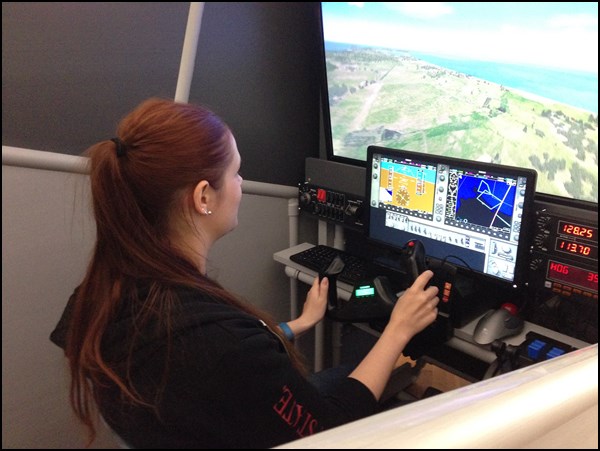
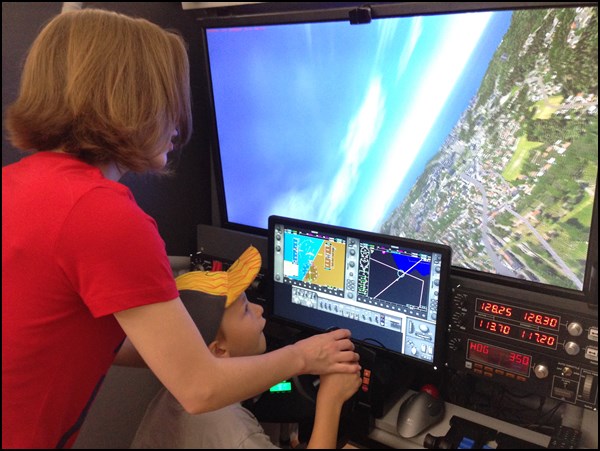
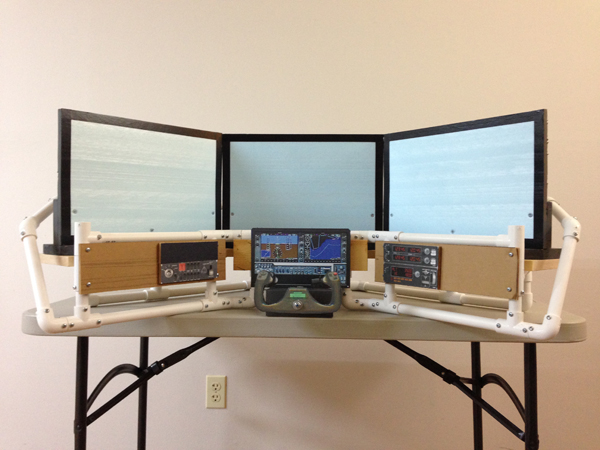
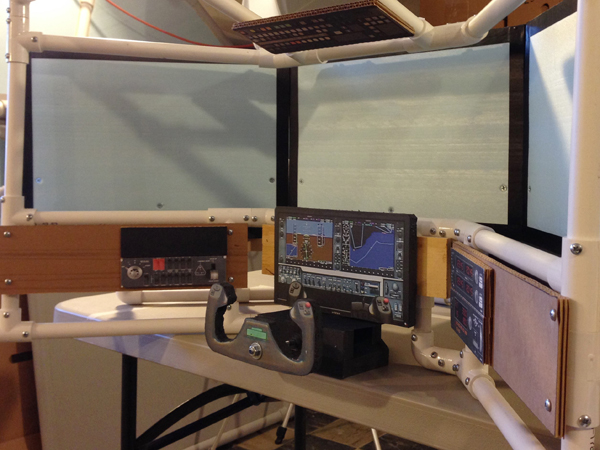
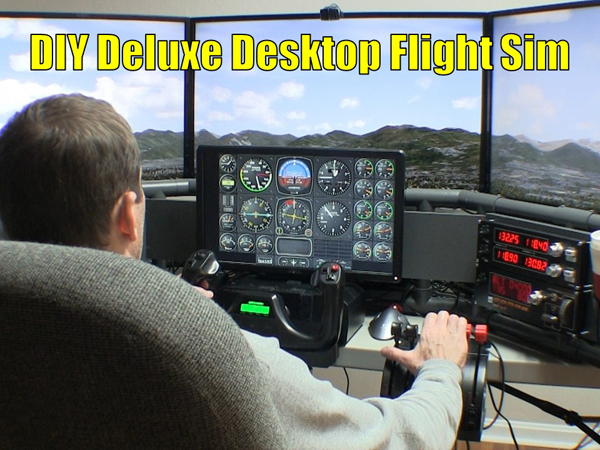
A pilot recognizes his position in space by seeing the simulated environment produced by the flight sim software. It is vital that the pilot only sees the simulated environment, and nothing else. For example, imagine you’re looking at the flight sim displays, but you can also see the walls of the room in your peripheral vision. As a result, your brain will not be fooled.

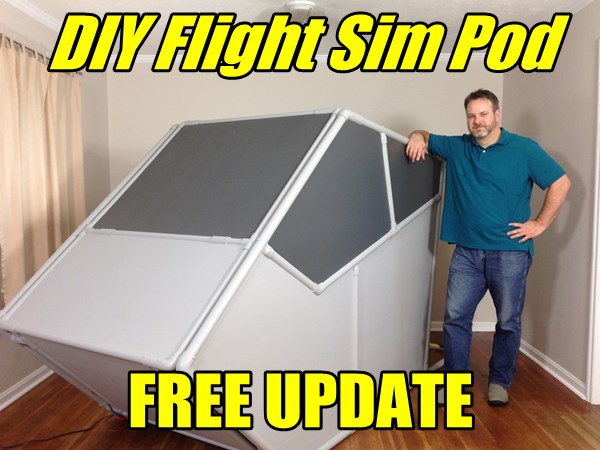
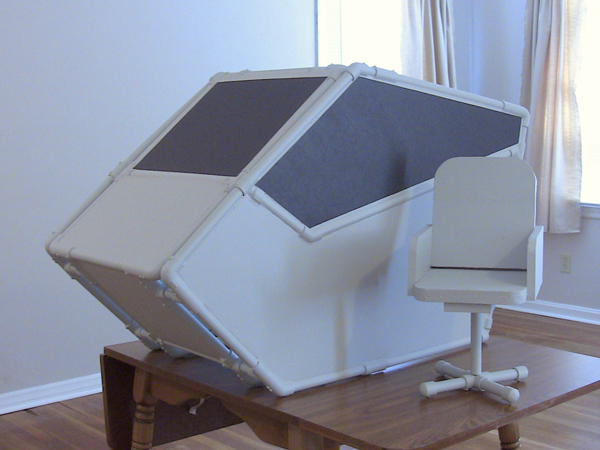
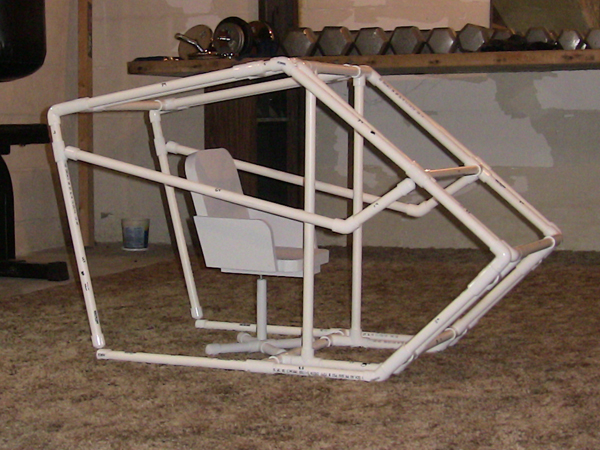
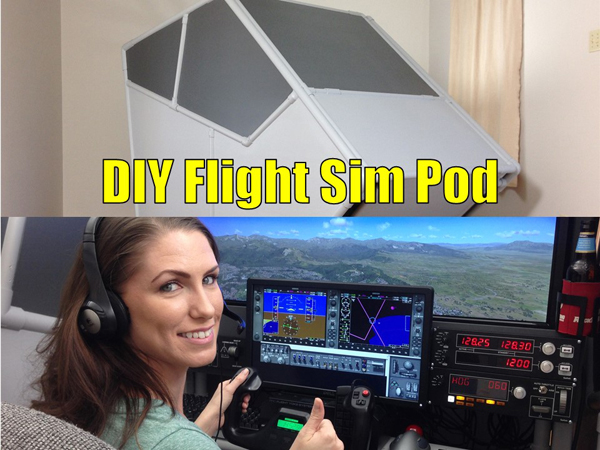
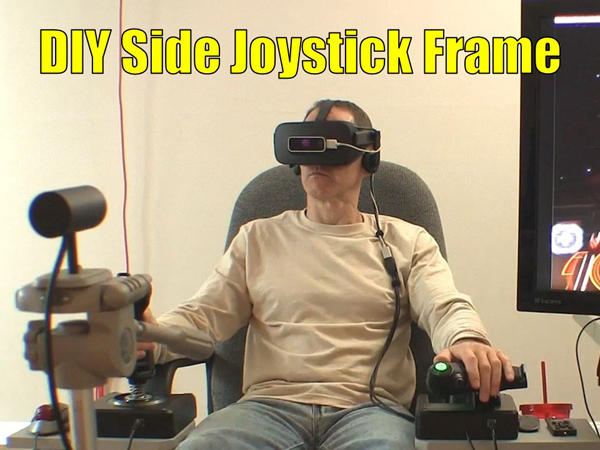
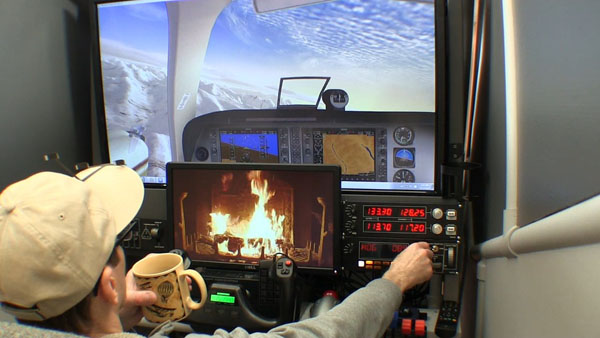
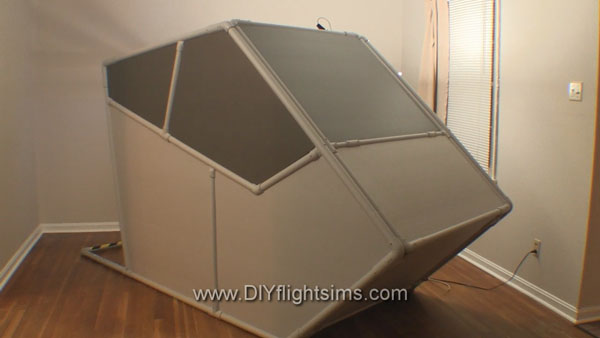
One way to create an immersive visual experience is to seat the pilot in an enclosed cabin like the expensive flight sims used by airlines. Even when a pilot uses an inexpensive DIY rig like the DIY Flight Sim Pod he can feel immersion because all he sees is the simulated flight environment. The other option is to use a high-quality virtual reality headset. In either case, the pilot must not see the room beyond the flight sim.

Even with a static flight sim, an effective visual system can give you a feeling of movement… or even motion sickness if you are prone to it.


Vestibular System (the Inner Ear)

In our airplane, we control movement around the pitch axis, the roll axis, and the yaw axis. Coincidentally, the inner ear contains three semicircular canals that are aligned roughly the same way – pitch, roll, and yaw. How do we fool the inner ear? You already know at least one way to do it. We discover as little kids that if we spin around and around, we get dizzy and lose our balance. The effect is so profound that even when we stop spinning, we still stagger around for a bit before fully regaining our balance.

The semicircular canals contain tiny hairs and a special fluid. When the fluid is displaced by movement, the hairs are pushed around by the moving fluid. The brain interprets this signal as motion.

In a motion flight sim that moves in pitch, roll, and yaw, the inner ear will also detect that same movement. In real airplanes, there are certain scenarios that can confuse a pilot’s inner ear and cause spatial disorientation. Furthermore, some of these scenarios can be emulated in a simulator.


Motion Flight Sim Theory - Semicircular Canals
Motion Flight Sim Theory – Semicircular Canals


Somatosensory System

Imagine accelerating down a runway. You can feel yourself being pressed back into your seat. Now imagine you’re in a regular chair and you simply lean back in it. You can feel yourself being pressed into the back of that seat too. Your somatosensory system will give you a similar feeling for the two situations, to a certain extent. A motion flight sim can fool your somatosensory system for mild maneuvers and mile acceleration/deceleration.

When you’re in a real airplane, and you’re making a steep bank, your somatosensory system will tell you when you’re starting to pull G forces. In a 60 degree bank, you will feel two G’s as you are pressed down in your seat. If you fly inverted, you will feel one negative G as you hang upside-down from your seatbelt. Unfortunately, we can’t simulate G forces like that in a simulator. But certain motion flight sims can simulate heave, like turbulence, or like a hard landing.


Putting it All Together: Motion Flight Sim Theory

For example, imagine a pilot is in the Kinetic motion flight sim and he starts a climbing turn. He can see the simulated horizon and as he banks the wings, he can see the corresponding bank angle. Also, shadows inside the cockpit move as the airplane turns. This is a climbing turn, so the pilot also pulls back on the joystick. His inner ear detects that he is pitching nose up. The pilot also feels that he is being pressed back in his seat slightly, that’s his somatosensory system.

The pilot should feel like he’s flying. If the pilot is in a quality motion flight sim, then the machine is able to fool the pilot’s sense of motion and orientation.

disassemble enclosed flight sim

How to Disassemble the DIY Flight Simulator Pod – Enclosed Flight Sim

The DIY Flight Sim Pod is a fully enclosed flight sim cockpit and your view is completely filled with the simulated environment. Therefore, you don’t see the other things in the room like furniture, book shelf, plants, etc. You fly in a totally immersive environment. In addition, when you strap into the Pod to start a flight, it really feels like you’re preparing to go somewhere. It’s relatively easy to disassemble the Flight Sim Pod because it’s a modular structure. This is how to disassemble this enclosed flight sim.

Enclosed Flight Sim Components

The entire project includes three major assemblies, three subassemblies, flight simulator hardware (including computer), and displays.

Major assemblies

  • Inner Frame
  • Left fuselage side
  • Right fuselage side

Subassemblies

  • Nose cone (top and bottom)
  • Top Canopy with Bumper
  • Tail


Enclosed flight sim Pod, partial disassembly


Disassemble the Enclosed Flight Sim

Start by removing the Tail, Top Canopy with Bumper and Tail. The Bumper is simply the single padded PVC pipe that attaches the Left and Right Fuselage Sides just below the Top Canopy. Unscrew the self-drilling screws as needed to free the PVC fittings.

Next, remove the Left and Right Fuselage Sides. This leaves the Inner Frame still packed with computer hardware and displays. Again, unscrew all self-drilling screws necessary to free the applicable fittings.
Carefully remove the 40” HDTV main display, cushion it, and place in moving box. Do the same with the instrument panel display. Finally, remove and box all computer hardware and flight controls.


Disassemble the Inner Frame

The Inner Frame consists of lumber and PVC pipe and is consequently the strong center structure of the enclosed flight sim. The Nose Cone is the pipe and foam structure that attaches to the front of the Inner Frame.
The top and bottom of the Nose Cone is glued together. However, you can separate the bottom Nose Cone panel by cutting just under the point of the Nose Cone. Cut from across the top edge of the bottom Nose Cone panel and also the top corners around the fittings. This will separate the top and bottom of the Nose Cone leaving only the fittings to hold them together. Remove self-drilling screws as required.


Enclosed flight sim, ready to move


The Pod on the Move

If you load the Pod into a moving van, note how many of the parts can lay flat. Even the Inner Frame doesn’t take up much room because it’s like a shelf – you can load boxes onto it. Your flight sim controls will all fit into boxes as shown in the picture.

Top 5 Flight Simulator Videos

Top 5 Flight Simulator Videos You May Have Missed

Roger Dodger Aviation produced and uploaded over 100 flight simulator videos to YouTube. These 5 videos are the ones that are currently trending.

#1 Flight Sim Pod Final Assembly: 6 minutes

This is an actual excerpt from the DIY Flight Sim Pod instructional video. It’s one of my favorite DIY projects.


#2 A Source for PVC Fittings: DIY Flight Simulator Videos

I found a great place to order PVC Fittings in bulk, so I decided to share the info with everyone. I’m a little surprised because it’s not directly related to flight simulator videos, but it is still watched by many people.


#3 Saitek Yoke Modification: Springs and Zip Ties

This is just one way to modify the Saitek Yoke. It’s one of my favorite flight simulator videos and also one of the most useful…


#4 Saitek X52 Throttle Fix

This is an easy way to fix the annoying detent in the Saitek X52 Throttle. I’m happy to say this video has help a great many people.


#5 Saitek Yoke Disassembly

Before you can modify a Saitek yoke, you must first open the case without damaging the interior mechanisms or losing anything.


If you bought DIY flight simulator build plans from a 3rd party vendor

If you bought DIY Flight Sims products from a 3rd party vendor

What Happened to the DIY Flight Sim downloads?

All DIY Flight Sim products are produced by me, Matt Thomas, here at Roger Dodger Aviation. These flight simulator build plans were originally sold as downloaded products. The customer would buy the instructional videos, manuals, and templates, and then download all contents in a big zip file. The customer would then open the files on a PC to view all the content.

That was a great idea in 2007, but not such a good idea 10 years later. Customers wanted better access to the content, and modern e-learning was the answer. With online tutorial courses, a student doesn’t have to sit through a giant video or sift through a 100+ pages of flight simulator build plans. I re-formatted all the content so each step in the building process has a short video clip, and the illustrated instructions for that step only. The plan drawings and printouts are presented with that step, instead of buried in an appendix.

You can now access the DIY Flight Sims courses with any device, even tablets and smart phones. This means you can bring all the instructions with you to the garage or workshop when you work on the project.

DIY Flight Sims made a huge leap forward in 2017.


How to Get the Updated Flight Simulator Build Plans

If you purchased an old Download version of a DIY Flight Sims product, you can get a free update to the new online course. The flight simulator build plans are in a better, learner-centered format, and many courses have additional material now.

Want the update? Simply email me at DIYflightsims@rogerdoger.net and tell me what product you bought and what email address you used. This will help me track down your order. Also tell me where you bought it if you purchased from a 3rd party vendor. I’ll send you a coupon code that will give you free access to the course.

New online courses are available for the following products:


What Happens When You Enroll

You will have access to the original content for that product, but in the new format as an online e-learning course. I’ve updated and improved some of the projects, so you also get any new material that I’ve added. In addition, you also get a monthly notification of any future updates I make to the products in the Roger Dodger Insider. Finally, you also get free access to Builder Academy, which is where you learn all the basic skills for building DIY Flight Sims.

Happy building! Happy flying!

DIY enclosed flight simulator update

DIY Flight Sim Pod enclosed flight simulator | Free Update

The DIY Flight Sim Pod Enclosed Flight Simulator

If I had to choose my favorite DIY Flight Sim project, I think it would be the Pod. It’s my only enclosed flight simulator project so you actually enter it like a vehicle. When you take a flight in the Pod, it’s more like leaving on a trip. Plus… it’s big. This enclosed flight simulator is more than just a shell packed full of hardware, it also has an attractive exterior. I dreamed about having a flight sim like this for a long time before I had the opportunity to build one. Plus, I worked on the DIY videos, instructions, pictures, and drawings for over a year. Now I can present the entire project to you, step-by-step, so you can build one too.

DIY enclosed flight simulator cockpit


What is the Update?

The updated version of these plans are in a new, online tutorial format. This means that for each step of the project you see a video clip and the associated instructions, pictures, or printouts. Recall the original Pod video is over 2 hours long and the manual is 130 pages. The new course is a better, learner-centered presentation. In addition, you can access the course on nearly any device like tablets and smart phones in addition to desktops and laptop computers. This means it’s easy to take the tutorials with you into your garage or workshop while you build. There are a few printout templates, and yes, you can still print them out. You can see a free trial here.

Krystal flying the enclosed flight simulator Pod


How do you get the Update?

This new online version is FREE if you’ve already bought the E430 DIY Flight Sim Pod enclosed flight simulator course. Email me at DIYflightsims@rogerdodger.net to get your updated version. Be sure to tell me what email address you used when you ordered so I can look you up. Then, I’ll send you a coupon code that will allow you access to the online lessons for free. Start the epic journey of building and flying the DIY Flight Sim Pod!

Wine Flights in the Simulator

Wine Flights

Wine Flights is the nick name we gave to a couple of flight simulator parties we had a while back. The events were a way to launch the new DIY Flight Sim Pod. But do you really need a reason to drink wine and fly a big airplane simulator? The concept was simple: everybody bring some wine, and then fly the sim over Italian wine country. Brilliant!


Pod Mods

If you have a sharp eye you noticed that I built the Pod with a removable window. This makes it far easier to take pictures over the pilot’s shoulder. In addition it allows more people to watch and provide helpful commentary. I originally designed the Pod with a closed top canopy. In these pictures, the top is open. The top canopy frame is still there, but I just didn’t install a foam body panel. This allows much more light in the cockpit for videos and pictures.

The most noteworthy change was the addition of a second monitor for the flight instruments. This is obvious in the pictures from the second Wine Flights party. The additional monitor freed up the entire 40 inch HDTV to display the outside view and it was glorious.


Flight Sim Add-Ons

We flew over simulated wine country in Italy. I used upgraded scenery packages from Orbx. Namely FTX Global and FTX Vector. I also installed FSPS Xtreme FSX PC which is a utility that helps FSX fly smoothly with higher frame rates. We used the default FSX Beechcraft Baron. That was pretty much all we needed for a great event. Well, all that plus wine, I mean.

The DIY Flight Sim Pod is one of my more popular DIY projects, but I don’t get a lot of finished pictures from customers. I understand, it’s a big project and it takes a while to build. If you’re building a Pod and would like to send me some pics of your project so far, I would be happy to see them… DIYflightsims@rogerdodger.net

How to Build a Prototype DIY Simpit

How to Build a Prototype DIY Simpit

One of the common questions I get is about altering the DIY Flight Sim designs. Most builders modify the designs in some way to match their specific needs or equipment. For examples, take a look at Customer Gallery 1 and Customer Gallery 2 and notice how no two Simpits are alike. Once a builder deviates from the plans, the project becomes a prototype DIY simpit. There is no way I can predict how people will modify my DIY Flight Sim projects, so that is why I use building materials that are inexpensive and easy to use. Don’t be scared! Prototyping is a wonderfully creative process that can give you real satisfaction with your project.

What Does “Prototype” Mean?

You don’t really know if a flight sim design is going to work until you build it in real life. Really! If some anonymous person on a forum says an idea will work or not work, they don’t really know, because anyone can type words on a screen. You only gain true knowledge by building a DIY simpit in real life. That is prototyping.

So when someone asks me if a design modification will work, I’m very cautious about my answer for several reasons…

  • I don’t know if my understanding of their message matches what they’re imagining.
  • I don’t know if a proposed modification will require an additional structural reinforcement.
  • I don’t know someone’s skill level. Have they built things before, or is this the first time?
  • I don’t know if they have adequate tools. Are they building in a workshop or a dorm room, etc?

Prototyping means you try your idea, then adjust it and try it again, then adjust it and try it again, and keep at it until you are happy with your work. Fortunately, PVC pipe is a wonderful material for prototyping a DIY simpit (more about that below).


Scale models

When I am designing large DIY simpit projects I make a scale model of my idea. As a result, this helps me find any major flaws and get a feeling for what it will look like before I build it full size. I use 1/2″ PVC pipe when I build a scale model. The smaller pipe saves me money because I use less 1″ pipe when I later build the full size prototype.

I also make scaled down controls, displays, and switch panels. This isn’t Computer Aided Design, but I still call it CAD: Cardboard Aided Design.


7 Steps for Prototyping a DIY Simpit

So how do you modify a DIY Flight Sim project if you need to scale it up or scale it down? Here’s an example. Let’s say you want to build the D250 Deluxe Desktop Flight Sim. However, the project is built around 32″ HDTVs but you want to use 27″ monitors. How do you scale this down?

  1. First of all, buy an extra length of pipe in case you need it (PVC pipe is cheap)
  2. Scale with a percentage.  27″ is about 16% smaller than 32″ Here’s the math: 32 – 27 = 5 and then 5 / 32 = .156, which is about 16%
  3. Decrease the measurements of pipes by that same percentage. Only scale the pipes adjacent to the displays, for now.
  4. Cut the pipes and assemble them with the PVC fittings. Start with just the pipes adjacent to the displays. Observe if the frame fits well compared to the displays or if you need to make changes.
  5. If some pipes are a little too long, remove them and cut them shorter. If some pipes are too short, that’s why you bought extra pipe. It’s easy to assemble/disassemble the PVC pipe frame to test different frame dimensions.
  6. Once you have pipe lengths that you are happy with, secure the PVC fittings with self-drilling screws.
  7. Scale the rest of the pipes to fit with the part of the frame you changed. This is much easier now that you have a starting point.

Interview with Onet – Building Flight Simulator Cockpit

Marcin Strzyzewski invited me to do an interview for Onet online in Poland. Onet posts articles on a wide range of topics so I was happy to provide info about building flight simulator cockpit. Below are Marcin’s questions and my answers. Please let me know what you think of my responses.

1. What is the biggest fun in flight simulation?

Flight simulators can do many different things so that depends on what interests you. Think of the flight sim pilot population as three parts:
Part 1 are the people that enjoy flying airliners with their flight simulator. Many of these users join Virtual Airlines and fly the same routes in the simulator as they would in real life. They fly online with other users that serve as air traffic control.
Part 2 are all the pilots that used to fly in real life, or plan to fly later in real life, or they are active pilots now. You see these people using their simulator for civil airplanes and helicopters like the ones you would find at a flight school. Active pilots can fly a lesson in real life, then practice the same lesson at home with their simulator.
Part 3 are the gamers and casual users. They fly space simulators or air combat simulators or maybe they just play around and fly for fun. This also a large and important population.

For me personally, I enjoy all the above. But most of all, I enjoy designing and building cockpit enclosures for home flight sims. I call these Do-It-Yourself (DIY) Flight Sims.

2. If some of our readers want to start making their own simulator, what is your advice?

First of all, know what type of aircraft you simulate the most. For example, a helicopter simulator project will look a lot different than an airliner simulator project.

Second, know your budget. If you live in a country where PVC pipe or lumber is really expensive, you should know that before you start. If you will buy new displays or new controls, start looking for sales. Retailers usually run a sale every month or two.

Third, and perhaps most important: negotiate with your spouse. A flight simulator will take up space in your home that can’t be used for other things. I designed both large and small DIY Flight Sims, but they all take up some measure of space. I recommend you talk this over with your spouse prior to construction.
Note: if you can make the case that your children or grandchildren will somehow benefit from your flight simulator, this can help.


3. What is a most common mistake of the beginners?

The most common mistake is never starting the project. Actually, just getting started can be the most difficult part. No matter how large or small the project, you finish them all the same way: one step at a time, over and over, until you are done.
I think my DIY videos help because you can see the building process before you personally start construction on your project.
Just. Get. Started.

4. Building flight simulator cockpit sounds pricey is it in fact?

The most expensive components are the ones that keep going down in price: computers, graphics cards, touch-screens, and large HD displays. Therefore, these items get better and cheaper every year for building flight simulator cockpit. Other components are the flight controls and switch panels which can be good retail models, or more expensive premium models to fit your budget.
My videos show how to build cockpit enclosures with materials from a home improvement store. Those materials are inexpensive in the USA, UK and Canada, but maybe not in other countries. For example, PVC pipe is expensive in New Zealand. I produce videos because they are the best way to teach building flight simulator cockpit.

5. What software is the best for simulators?

The flight simulator community (including third party developers) is unique because it mainly built up around Microsoft Flight Simulator X (FSX) for over a decade. Dovetail Games gave FSX new life by developing a version for Steam, however it’s still old software. As a result, we have wondered for years what will replace FSX, and today we have some newer options.
Prepar3D
Lockheed Martin’s Prepar3D (P3D) was developed by fixing and modernizing the old FSX code. P3D is an excellent flight sim platform, but some activities are prohibited because of Lockheed’s odd licensing agreement with Microsoft.
X-Plane
Laminar Research’s X-Plane 10 is also a solid flight sim platform with all the options of FSX, but with a smaller user base and somewhat fewer options from third party developers. X-Plane 11 was just released this month so it will be interesting to see how it performs in the market. Will X-Plane 11 be the ultimate replacement for FSX? We shall see.


Building flight simulator cockpit

6. Since now the best option was multiple monitors setting. Is this better now to use VR headset?

That is an excellent question, and the answer really depends on what type of flying you want to do.
If you want to fly combat missions or spaceships, VR is a great option if you can afford it and if you don’t wear glasses. For example, Elite Dangerous and War Thunder are awesome in VR. The depth of field and the immersion are astonishing.
Keep in mind, when you wear a VR headset, you can no longer see your actual controls, or a keyboard, or mouse. So your best option is HOTAS (Hands On Throttle And Stick) flying. Basically, if you can do everything you need to do in the sim without removing your hands from the joystick and throttle, and if you can memorize all the button assignments, then that sim could be a good option for VR.

If you fly airliners, civil training airplanes, or helicopters you will be performing a lot of tasks where you need to reach out with your hand and touch the control panel. You will tune radios, adjust the GPS, set the navigation headings, set the autopilot, and more. As of right now, it’s really difficult to do these tasks in VR so traditional flight simulators are best for this type of flying. In traditional flight simulators we use actual retail switch panels, modified keyboards, a touch screen, a real checklist, a real aviation map, or all of these things. I think it will stay that way for a long time and more people will be building flight simulator cockpit.

7. How looks your simulator, can you share some pictures with us?

Sure, here are pictures from four very different DIY flight simulators (see the slideshow gallery on this page).

Warm Fireplace Inside a Flight Simulator

This project combines two of my favorite things: a cozy fireplace and my flight simulator. Why not simulate a nice cozy fireplace inside a flight simulator?!

This DIY flight sim is ready for winter! I combined the warm atmosphere of a crackling fireplace with the fun of flying my simulator. It’s just the thing for those freezing winter months. You can do this too, it’s easy to set up.

Create a Fireplace Inside a Flight Simulator

My flight simulator has two displays connected to the graphics card. The large display is a 40″ HDTV and the smaller display is a 19″ VGA computer monitor. Typically, I display the flight simulator outside view on the large screen and the flight instruments on the smaller screen. For today’s project, I’m only running FSX on the large screen. Start FSX and start a flight. Select Windowed Mode from the View Menu and resize the window so it fits on one screen (the large screen in my example).

Next start a web browser on the second monitor and find a fireplace video on YouTube. Play the video and select full screen. This is how I my smaller display shows a cozy, crackling fireplace.

The flight simulator you see in the pictures and video is the DIY Flight Sim Pod. You can build this same thing in your own home. These instructional videos and manuals show you how to build a big, beautiful, flight simulator. The yoke, throttle quadrant, switch panels, etc. all came from Amazon.

Don’t Fly Thirsty

All we need now is a nice hot apple cider. I recently discovered sugar free apple cider from Alpine. It doesn’t need any sugar because of what we add next: cinnamon flavored bourbon. Apple and cinnamon… oh it’s so, so good!
Leave the ice and snow outside, you’re flying in comfort.
Happy Landings!

Warm fireplace in your Flight Sim!

Merry Christmas from Roger Dodger Aviation

Here’s wishing you and yours a very Merry Christmas from Roger Dodger Aviation. I’m lucky for my opportunities to share aviation (both real and simulated) with people.

Merry Christmas from Roger Dodger Aviation

Christmas Lights on a Flight Simulator!

Let’s deck the flight sims with boughs of holly, tinsel, and colored lights! I like to decorate my flight simulator for Christmas and it’s one of my favorite holiday traditions. I think I’m the only flight simulator entrepreneur that currently does this. All of my decorating efforts go into the simulator because more people see it than see my house. December is so busy I rarely have people over to visit, however many people see my pictures and videos online. 

I like to fly some of the old winter missions in FSX like the apple delivery missions or the Alaska missions. I drink hot chocolate and fly my simulator, it’s a wonderful time. Often I’m bundled up in a hoodie and scarf since I can’t afford to run the furnace at a reasonable temperature.


Matt Thomas, Plaza Flight pilot in Kansas City

Plaza Flights in Kansas City

Many of you don’t know this but I am a real pilot with 1200 hours. I used to provide scenic flight in an actual Cessna 172 over Kansas City. Each year, the Plaza decorates all of its buildings with brilliant lights throughout the entire holiday season. I provided night flights to the public from the KC Downtown Wheeler Airport over the Plaza Lights. For many people this was their first experience in a small airplane. I even awarded certificates and aviator wings after the flights since this was a special occasion. Season after season I provided these flights and it became an important part of Christmas to me and for this city. I did more Plaza Flights than anyone else in the city during the years I offered them. 

Merry Christmas from Roger Dodger Aviation

I wish you the best this holiday season. Get ready because January is Build Month! Many customers build DIY Flight Sims projects during January. It’s a great time to do it.